
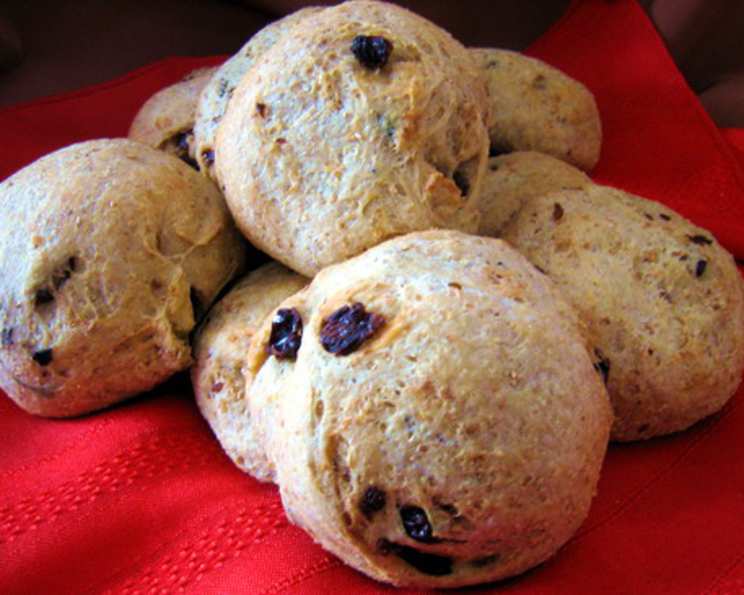
Walnut Raisin Whole Wheat Bread: A Taste of Nostalgia
The scent of warm bread, studded with plump raisins and crunchy walnuts, has always been a source of comfort for me. My grandmother, a woman whose kitchen was the heart of our family, used to bake loaves like this every Sunday. The nutty aroma would fill the house, beckoning us in for a slice slathered with butter. It was more than just bread; it was a symbol of family, love, and the simple joys of life – a memory I cherish with every bite.
Recipe Overview
- Prep Time: 3 hours
- Cook Time: 45 minutes
- Total Time: 3 hours 45 minutes
- Yields: 2 loaves
- Dietary Type: Vegetarian
Ingredients
- 1 (1/4 ounce) package active dry yeast
- 1 cup warm water
- 1 cup milk
- 2 tablespoons sugar
- 1/2 cup yellow cornmeal, plus 2 tablespoons yellow cornmeal
- 3 tablespoons unsalted butter, at room temperature
- 3 cups coarsely chopped walnuts
- 2 cups raisins
- 2 teaspoons salt
- 1 teaspoon fresh coarse ground black pepper
- 2 cups whole wheat flour
- 2 1/2 – 3 cups unbleached white flour
Equipment Needed
- Large bowl
- Measuring cups and spoons
- Lightly floured surface
- Towel
- Large oiled bowl
- Baking sheet
- Wire rack
Instructions
-
In a large bowl, combine the active dry yeast, warm water, and milk. Let the mixture stand until the yeast has dissolved, about 5 minutes. This step is crucial for activating the yeast and ensuring a good rise. If your yeast doesn’t foam or bubble, it might be old and needs to be replaced.
-
Add the sugar, 1/2 cup cornmeal, butter, walnuts, raisins, salt, pepper, whole wheat flour, and 2 cups of the white flour to the yeast mixture. Beat well to combine all ingredients. The dough will be shaggy at this point.
-
Move the dough to a lightly floured surface and knead for 2-3 minutes, adding the remaining white flour as necessary to make it workable. Don’t add too much flour at once, as this can result in a dry loaf. The dough should be slightly sticky, but manageable. Let the dough rest, covered loosely with a towel, for 10-15 minutes. This resting period allows the gluten to relax, making the dough easier to knead.
-
Knead the dough again, until it is smooth and elastic, 8-10 minutes. Sprinkle with extra flour if you need to keep it from sticking. Proper kneading is essential for developing the gluten, which gives the bread its structure and chewy texture.
-
Oil a large bowl and turn the dough in it to coat with the oil. This prevents the dough from drying out as it rises. Cover the bowl and let the dough rise in a warm place till doubled in bulk, about 1 1/2 hours. A warm environment encourages the yeast to ferment, resulting in a light and airy loaf.
-
Punch the dough down to release the air. Divide the dough in half. Shape the halves into round loaves. The shaping process helps to create a uniform loaf that will bake evenly.
-
Sprinkle a baking sheet with the remaining 2 tablespoons cornmeal, and put the loaves on it, seam side down. The cornmeal adds a delightful texture and prevents the loaves from sticking to the baking sheet. Cover with the towel, and let them rise until doubled in bulk, about 45 minutes. This second rise is critical for achieving a light and fluffy bread.
-
Preheat the oven to 350°F (175°C). Ensure your oven is properly preheated for even baking.
-
Place the baking sheet on the center rack of the oven, and bake until the bread is well browned and sounds hollow when the bottom is tapped with your finger, about 45 minutes. The internal temperature of the bread should reach around 200-210°F (93-99°C).
-
Cool bread on a wire rack. Cooling the bread completely before slicing prevents it from becoming gummy. Enjoy!
Expert Tips & Tricks
- For a richer flavor, toast the walnuts lightly before adding them to the dough.
- If you don’t have time for a long rise, you can use a faster-rising yeast. Just be sure to adjust the rising time accordingly.
- To get a crispier crust, brush the loaves with an egg wash before baking.
- You can add other spices to the dough, such as cinnamon or nutmeg, for a warmer flavor profile.
- If your kitchen is cold, you can create a warm environment for rising by placing the dough in a slightly warmed oven (turned off) or near a warm stovetop.
- For a softer crust, brush the baked loaves with melted butter immediately after removing them from the oven.
Serving & Storage Suggestions
This walnut raisin whole wheat bread is delicious served warm with butter, jam, or a slice of sharp cheese. It also makes excellent toast or sandwiches.
Store leftover bread in an airtight container at room temperature for up to 3 days, or in the refrigerator for up to a week. For longer storage, wrap the bread tightly in plastic wrap and freeze for up to 2 months. To reheat frozen bread, thaw it overnight in the refrigerator or at room temperature. You can then warm it in a preheated oven at 350°F (175°C) for a few minutes to refresh its texture.
Nutritional Information
| Nutrient | Amount per Serving | % Daily Value |
|---|---|---|
| Calories | 2987.6 kcal | N/A |
| Calories from Fat | 1279 g | 43% |
| Total Fat | 142.2 g | 218% |
| Saturated Fat | 25.4 g | 127% |
| Cholesterol | 62.9 mg | 20% |
| Sodium | 2434.1 mg | 101% |
| Total Carbohydrate | 394.8 g | 131% |
| Dietary Fiber | 39.8 g | 159% |
| Sugars | 104.2 g | 416% |
| Protein | 72.5 g | 145% |
Note: Nutritional information is an estimate and may vary based on specific ingredients and portion sizes.
Variations & Substitutions
- Gluten-Free: Substitute the wheat flours with a gluten-free blend, but be prepared to adjust the liquid as gluten-free flours absorb moisture differently. Consider adding a binding agent like xanthan gum.
- Dairy-Free: Replace the milk with almond milk, soy milk, or another plant-based milk alternative. Ensure your butter substitute is also dairy-free.
- Nut-Free: Swap the walnuts for sunflower seeds or pumpkin seeds.
- Spice It Up: Add a teaspoon of cinnamon or nutmeg to the dough for a warmer, more festive flavor.
- Sweetener: Instead of sugar, you could use honey or maple syrup for a natural sweetener.
- Fruit: Try substituting dried cranberries or chopped dried apricots for the raisins.
FAQs (Frequently Asked Questions)
Q: Why is my bread dense and not rising properly?
A: Several factors can cause dense bread. Ensure your yeast is fresh and properly activated, the dough is rising in a warm environment, and you’re not using too much flour. Over-kneading can also result in a tough, dense loaf.
Q: How do I know when the bread is fully baked?
A: The best way to check for doneness is to insert a thermometer into the center of the loaf; it should read around 200-210°F (93-99°C). You can also tap the bottom of the loaf; if it sounds hollow, it’s likely done.
Q: Can I make this dough in a bread machine?
A: Yes, you can use a bread machine to mix and knead the dough. Follow your bread machine’s instructions for adding the ingredients. Once the dough cycle is complete, remove the dough, shape it into loaves, and bake as directed in the recipe.
Q: Can I freeze the dough instead of baking it right away?
A: Yes, you can freeze the dough after the first rise. Punch it down, shape it into loaves, wrap tightly in plastic wrap, and freeze. Thaw the dough overnight in the refrigerator before letting it rise again and baking.
Q: What if I don’t have whole wheat flour?
A: While the recipe calls for whole wheat flour, you can substitute it with unbleached white flour, but the flavor and texture will be slightly different. The whole wheat flour contributes a nutty flavor and a denser texture.
Final Thoughts
Baking this Walnut Raisin Whole Wheat Bread is more than just following a recipe; it’s an invitation to create a warm, comforting experience in your own kitchen. The aroma alone will fill your home with a sense of nostalgia and anticipation. Don’t be afraid to experiment with variations and make it your own. And most importantly, share it with those you love. This bread is best enjoyed with good company and even better conversation. So, preheat that oven, gather your ingredients, and let the baking begin!