
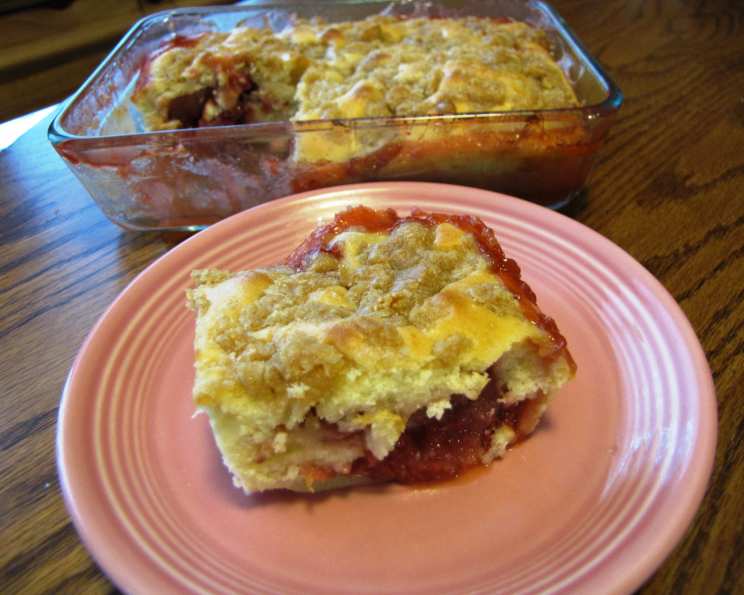
Warm Strawberry Crumb Cake: A Taste of Summer Sunshine
There’s something magical about the aroma of warm strawberries baking in the oven, a scent that instantly transports me back to my grandmother’s sun-drenched kitchen. I can almost feel the warmth of the summer air, see the checkered tablecloth, and hear the gentle hum of cicadas outside the window. This Strawberry Crumb Cake isn’t just a dessert; it’s a memory, a taste of pure, unadulterated joy that I’m thrilled to share with you.
Recipe Overview
- Prep Time: 45 minutes
- Cook Time: 1 hour 15 minutes
- Total Time: 2 hours 30 minutes
- Servings: 8
- Yield: 1 (9×13 inch) cake
- Dietary Type: Not specified (can be adapted to gluten-free or dairy-free; see variations below)
Ingredients
FILLING
- 3 lbs strawberries, hulled and halved (about 8 cups)
- 1/2 cup sugar
- 2 tablespoons fresh lemon juice
- 2 1/2 tablespoons cornstarch, dissolved in 2 1/2 tablespoons water
- 1 vanilla bean, split and seeds scraped
CRUMB TOPPING
- 1/2 cup lightly packed light brown sugar
- 1/2 cup all-purpose flour, plus 2 tablespoons all-purpose flour
- 1 pinch salt
- 4 tablespoons unsalted butter, cubed and chilled
CAKE
- 2 1/4 cups all-purpose flour
- 1 tablespoon baking powder
- 3/4 teaspoon salt
- 1/2 cup unsalted butter, softened
- 1 1/4 cups sugar
- 3 large eggs
- 1 1/2 teaspoons pure vanilla extract
- 3/4 cup buttermilk
Equipment Needed
- 9-by-13-inch glass or ceramic baking dish
- Sturdy baking sheet
- Medium bowls
- Large bowl
- Whisk
- Handheld electric mixer
Instructions
- Preheat the oven to 350°F (175°C). Position a rack in the center of the oven.
- Prepare the strawberry filling. In a large bowl, gently toss the hulled and halved strawberries with 1/2 cup sugar, 2 tablespoons fresh lemon juice, the cornstarch slurry (cornstarch dissolved in water), and the seeds scraped from the vanilla bean. Let this mixture stand for about 30 minutes, allowing the berries to release their juices. This step is crucial for developing that luscious, jam-like consistency. Don’t skip it!
- Pour the strawberry filling into the 9-by-13-inch baking dish. Place the dish on a sturdy baking sheet to catch any bubbling juices during baking.
- Make the crumb topping. In a medium bowl, combine 1/2 cup light brown sugar, 1/2 cup all-purpose flour, 2 tablespoons all-purpose flour (the extra flour helps create those lovely clumps), and 1 pinch of salt.
- Cut in the 4 tablespoons of cubed and chilled butter using your fingers or a pastry blender until the mixture resembles a coarse meal with small clumps. The butter needs to be cold to create a crumbly texture; avoid overworking the mixture.
- Prepare the cake batter. In a separate medium bowl, whisk together the 2 1/4 cups all-purpose flour, 1 tablespoon baking powder, and 3/4 teaspoon salt. This ensures the baking powder is evenly distributed, leading to a light and airy cake.
- In a large bowl, using a handheld electric mixer, beat the 1/2 cup softened butter and 1 1/4 cups sugar at medium-high speed until the mixture is light and fluffy, about 3 minutes. Creaming the butter and sugar properly is key to achieving a tender cake crumb.
- Add the 3 large eggs one at a time, beating well after each addition. This ensures each egg is fully incorporated into the batter.
- Beat in the 1 1/2 teaspoons of pure vanilla extract. Scrape down the sides of the bowl to ensure everything is evenly mixed.
- Gradually add the dry ingredients to the wet ingredients in 3 additions, alternating with the 3/4 cup buttermilk. Begin and end with the dry ingredients. Mix until just combined after each addition; avoid overmixing, which can lead to a tough cake. Overmixing develops the gluten in the flour, resulting in a less tender crumb.
- Spoon the cake batter over the strawberry filling, spreading it evenly to the edges of the baking dish.
- Sprinkle the prepared crumb topping evenly over the cake batter.
- Bake in the center of the preheated oven for 1 hour and 15 minutes. The cake is done when the fruit is bubbling, the crumb topping is golden brown, and a toothpick inserted into the center of the cake comes out with a few moist crumbs attached. If the topping is browning too quickly, you can tent the dish with foil during the last 15-20 minutes of baking.
- Transfer the warm strawberry crumb cake to a wire rack to cool slightly before serving.
Expert Tips & Tricks
- Strawberry Selection: Use ripe but firm strawberries for the best texture. Overripe berries will become too soft and mushy during baking.
- Chilling the Butter: Make sure your butter for the crumb topping is truly cold. Freezing it for 10 minutes before cubing can help!
- Preventing a Soggy Bottom: Ensure your baking dish is not too shallow. The fruit filling releases a lot of liquid, so a deeper dish helps prevent the cake from becoming soggy. Placing the baking dish on a baking sheet in the oven is crucial!
- Vanilla Bean vs. Extract: Using a vanilla bean adds a depth of flavor that extract can’t quite match, but vanilla extract is a perfectly acceptable substitute. If using extract, add it directly to the strawberry mixture.
- Make-Ahead Tip: The crumb topping can be made a day or two in advance and stored in the refrigerator.
Serving & Storage Suggestions
Serve the Strawberry Crumb Cake warm or at room temperature. A scoop of vanilla ice cream or a dollop of whipped cream elevates this dessert to a whole new level.
- Storage: Leftover crumb cake can be stored in an airtight container at room temperature for up to 2 days or in the refrigerator for up to 4 days.
- Reheating: To reheat, warm individual slices in the microwave for 20-30 seconds or bake in a preheated oven at 350°F (175°C) for 5-10 minutes.
Nutritional Information
| Nutrient | Amount per Serving | % Daily Value |
|---|---|---|
| Calories | 642 kcal | N/A |
| Total Fat | 20.3 g | 31% |
| Saturated Fat | 11.7 g | 58% |
| Cholesterol | 126 mg | 42% |
| Sodium | 434.6 mg | 18% |
| Total Carbohydrate | 108.8 g | 36% |
| Dietary Fiber | 4.7 g | 18% |
| Sugars | 66.5 g | N/A |
| Protein | 9.1 g | 18% |
Note: Nutritional information is an estimate and may vary based on specific ingredients and portion sizes.
Variations & Substitutions
- Gluten-Free: Substitute the all-purpose flour in the crumb topping and cake batter with a gluten-free all-purpose blend. Ensure the blend contains xanthan gum or add a teaspoon of xanthan gum for best results.
- Dairy-Free: Use a plant-based butter alternative and non-dairy buttermilk (almond, soy, or oat milk mixed with a tablespoon of lemon juice or vinegar) for a dairy-free version.
- Mixed Berry Filling: Use a combination of strawberries, raspberries, and blackberries for a more complex flavor profile.
- Spice It Up: Add a pinch of cinnamon or nutmeg to the crumb topping for a warm, cozy twist.
- Almond Extract: Substitute 1/2 teaspoon of the vanilla extract with almond extract for a subtle almond flavor that complements the strawberries beautifully.
FAQs (Frequently Asked Questions)
Q: Can I use frozen strawberries?
A: While fresh strawberries are preferred, you can use frozen. Thaw them completely and drain off any excess liquid before using them in the recipe. Be aware that frozen berries may release more liquid during baking.
Q: My crumb topping is too dry. What can I do?
A: Add a tablespoon or two of melted butter to the crumb mixture and mix until it forms clumps.
Q: Can I make this cake ahead of time?
A: Yes, you can assemble the cake and store it in the refrigerator, unbaked, for up to 24 hours. Add about 10-15 minutes to the baking time.
Q: The top of my cake is browning too quickly. What should I do?
A: Tent the baking dish loosely with aluminum foil during the last 15-20 minutes of baking to prevent the topping from burning.
Q: Can I freeze the baked crumb cake?
A: Yes, you can freeze the baked and cooled crumb cake. Wrap it tightly in plastic wrap and then in aluminum foil. It can be stored in the freezer for up to 2 months. Thaw overnight in the refrigerator before reheating.
Final Thoughts
I truly hope this Warm Strawberry Crumb Cake brings as much joy to your table as it does to mine. Don’t be afraid to experiment with the variations and make it your own. The most important ingredient is love, so pour some into every step, and I promise you’ll be rewarded with a dessert that’s both delicious and unforgettable. I’d love to hear about your experience making this cake, so please share your feedback and photos! And if you’re looking for a perfect pairing, try it with a glass of chilled rosé or a cup of freshly brewed coffee. Happy baking!