
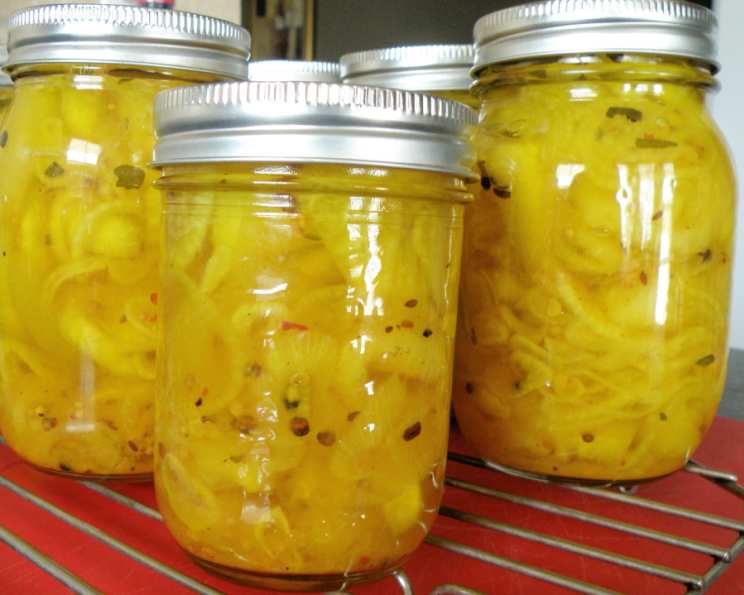
Watermelon Rind Bread and Butter Pickles: A Summertime Delight
I can still picture my grandmother’s sun-drenched kitchen, the air thick with the sweet and tangy aroma of simmering vinegar and spices. Every summer, after we’d devoured juicy slices of watermelon on the porch, she’d transform the discarded rinds into these magical bread and butter pickles. The satisfying crunch and unexpected flavor were a revelation – a testament to her resourcefulness and a taste of summer preserved in a jar. These pickles weren’t just a condiment; they were a symbol of family, tradition, and making the most of every season.
Recipe Overview
- Prep Time: 2 hours
- Cook Time: 30 minutes
- Total Time: 2 hours 30 minutes
- Yields: 8-10 pints
- Dietary Type: Vegetarian, Gluten-Free
Ingredients
- 8 cups cubed watermelon rind (about 1-inch cubes)
- 2 lbs onions, thinly sliced
- 1/2 cup pickling salt
- 2 cups sugar
- 2 tablespoons mustard seeds (brown or yellow)
- 2 teaspoons turmeric
- 2 teaspoons celery seeds
- 1 teaspoon ground ginger
- 1 teaspoon peppercorns
- 3-4 cups white vinegar
Equipment Needed
- Large bowl
- Large pan
- Canning jars (pints or quarts)
- Lids and bands for canning jars
- Canning tools (jar lifter, funnel)
- Boiling water canner
Instructions
- Begin by preparing the watermelon rind. Use a spoon to scrape away all the pink flesh, leaving only the white rind. This is important to achieve the desired texture and prevent the pickles from being too sweet.
- Using a sharp knife, cut away the outer green skin from the rind. This is easiest if you first cut the melon into 3-inch squares.
- Cut the prepared rind into your desired shape – strips, cubes, or chunks. For that classic bread and butter pickle look, aim for roughly 1-inch cubes.
- In a large bowl, layer the watermelon rind and sliced onions with the pickling salt.
- Cover the mixture with ice cubes and let it stand for 1 1/2 hours. This step is crucial for drawing out excess moisture from the rind and onions, resulting in a crisper pickle.
- After soaking, drain and rinse the rind and onion mixture thoroughly. This removes the salt and any lingering bitterness.
- In a large pan, combine the sugar, mustard seeds, turmeric, celery seeds, ground ginger, peppercorns, and white vinegar.
- Bring the mixture to a boil over medium-high heat, stirring occasionally to ensure the sugar dissolves completely.
- Add the drained watermelon rind and onions to the boiling vinegar mixture.
- Return the mixture to a boil, then reduce the heat and simmer for about 10-15 minutes, or until the rind becomes slightly translucent and tender-crisp.
- While the pickles are simmering, prepare your canning jars. Wash the jars, lids, and bands in hot, soapy water. Rinse well. Sterilize the jars by placing them in a boiling water canner for 10 minutes, or by running them through a hot cycle in your dishwasher.
- Using a jar lifter, carefully remove the hot, sterilized jars from the canner. Place them on a clean towel-lined surface.
- Using a ladle and canning funnel, pack the hot pickles and liquid into the hot, sterile jars, leaving 1/4-inch headspace. Headspace is the distance between the top of the pickles and the lid of the jar.
- Remove any air bubbles by gently tapping the jar on the counter or using a non-metallic spatula.
- Wipe the jar rims clean with a damp cloth.
- Place the lids on the jars, then screw on the bands until they are fingertip tight. This means tightening the bands until you feel resistance, then backing off slightly.
- Using a jar lifter, carefully lower the filled jars into the boiling water canner. Ensure the water covers the jars by at least 1 inch.
- Bring the water back to a boil and process the jars for 10 minutes.
- After processing, turn off the heat and carefully remove the jars from the canner using the jar lifter. Place them on a towel-lined surface, leaving space between the jars.
- Let the jars cool completely, undisturbed, for 12-24 hours. As the jars cool, you should hear a “pop” sound as the lids seal.
- Check the seals by pressing down on the center of each lid. If the lid doesn’t flex, it’s sealed properly. If the lid flexes, the jar is not sealed and should be refrigerated and used within a few weeks.
- Remove the bands from the sealed jars. This prevents moisture from accumulating under the bands and causing rust.
- Store the sealed jars in a cool, dark place for at least 2-3 weeks before opening to allow the flavors to meld.
Expert Tips & Tricks
- Don’t skip the soaking step! It’s essential for achieving that signature crisp texture.
- For a spicier kick, add a pinch of red pepper flakes or a sliced jalapeño to the vinegar mixture.
- If you don’t have pickling salt, you can use kosher salt, but you may need to adjust the amount slightly to avoid overly salty pickles.
- Ensure the jars are properly sterilized to prevent spoilage.
- If you’re new to canning, consult a reputable canning guide for detailed instructions and safety information.
Serving & Storage Suggestions
These Watermelon Rind Bread and Butter Pickles are incredibly versatile. They’re fantastic on sandwiches (especially turkey or ham), burgers, or served alongside grilled meats. Add them to relish trays for a unique and unexpected twist. They also make a great addition to potato salad or coleslaw.
Once opened, store the pickles in the refrigerator. They should last for several weeks. Properly sealed, unopended jars can be stored in a cool, dark place for at least one year.
Nutritional Information
(Estimated, per serving)
| Nutrient | Amount per Serving | % Daily Value |
|---|---|---|
| Calories | 271 kcal | 14% |
| Total Fat | 1g | 1% |
| Saturated Fat | 0g | 0% |
| Cholesterol | 0mg | 0% |
| Sodium | 7084mg | 295% |
| Total Carbohydrate | 63g | 21% |
| Dietary Fiber | 2g | 8% |
| Sugars | 55g | – |
| Protein | 2g | 4% |
Note: Nutritional information is an estimate and may vary depending on specific ingredients and portion sizes. The sodium content is very high; this recipe is intended as a small condiment, not a large portion of a meal.
Variations & Substitutions
- Spicy Watermelon Rind Pickles: Add a pinch of red pepper flakes or a sliced jalapeño to the vinegar mixture.
- Sweet Watermelon Rind Pickles: Increase the amount of sugar slightly to suit your taste.
- Cucumber Bread and Butter Pickles: If you don’t have watermelon rind, you can substitute cucumbers, but be aware that the texture will be softer.
- Use different vinegars: Apple cider vinegar could be used for a different flavor profile.
FAQs (Frequently Asked Questions)
Q: Why is it important to scrape away all the pink flesh from the watermelon rind?
A: Removing the pink flesh ensures that the pickles have the desired firm texture and prevents them from being overly sweet.
Q: Can I skip the soaking step?
A: It’s not recommended. Soaking the rind in salt water helps draw out excess moisture and results in a crisper pickle.
Q: How do I know if my jars are sealed properly?
A: After processing and cooling, the lids should be concave and not flex when pressed down in the center.
Q: How long do I need to wait before eating the pickles?
A: It’s best to wait at least 2-3 weeks before opening a jar to allow the flavors to meld and develop fully.
Q: Can I use a different type of vinegar?
A: Yes, you can experiment with different vinegars, such as apple cider vinegar, but white vinegar is traditionally used in bread and butter pickles.
Final Thoughts
These Watermelon Rind Bread and Butter Pickles are more than just a recipe; they’re a way to connect with the past, celebrate the bounty of summer, and reduce food waste. Don’t be intimidated by the canning process; it’s easier than you think! Give this recipe a try, and I guarantee you’ll be amazed at the deliciousness that can be created from something often discarded. Share your creations and feedback, and perhaps pair them with a homemade sourdough loaf and a grilled cheese sandwich for the ultimate comfort food experience.