
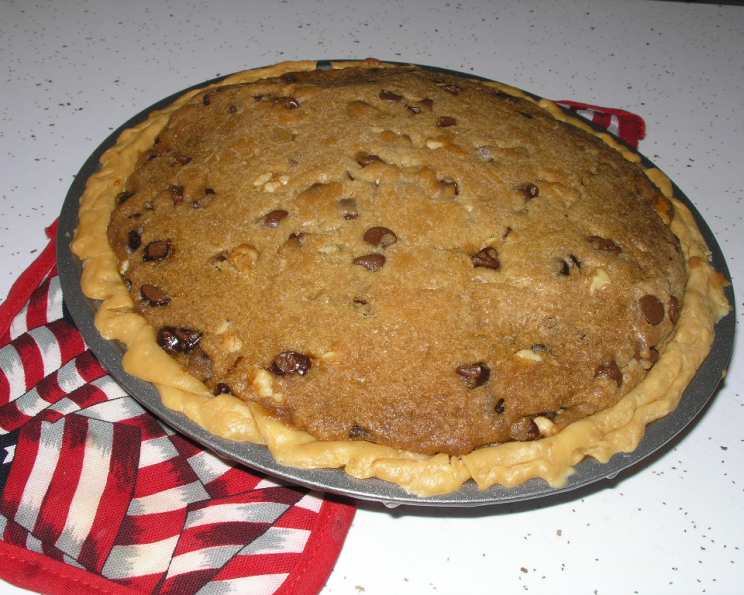
Whiffletree Chocolate Chip Pie: A Taste of Nostalgia
There’s a specific scent that can transport me back to my childhood kitchen faster than any time machine: the warm, intoxicating aroma of chocolate chip cookies baking. But it wasn’t just any chocolate chip cookie; it was a pie, a decadent, gooey masterpiece my momma called Whiffletree Chocolate Chip Pie. I remember the anticipation, hovering near the oven, watching for that perfect golden-brown hue, and the pure bliss of that first warm bite, the slightly crisp top giving way to a chewy, chocolate-studded center. This pie wasn’t just dessert; it was love baked into a 9-inch shell.
Recipe Overview
- Prep Time: 20 minutes
- Cook Time: 1 hour 10 minutes
- Total Time: 1 hour 30 minutes
- Servings: 10-12
- Yield: 1 pie
- Dietary Type: Vegetarian
Ingredients
- 1 cup vegetable shortening
- 1/2 cup firmly packed brown sugar
- 1/2 cup sugar
- 1 teaspoon vanilla extract
- 2 large eggs
- 2 cups all-purpose flour
- 1 teaspoon baking soda
- 1 teaspoon salt
- 2 cups semi-sweet chocolate chips
- 1 cup chopped walnuts
- 1 9-inch deep-dish pastry shell, store-bought or homemade (unbaked)
- Vanilla ice cream, for serving (optional)
Equipment Needed
- Large mixing bowl
- Electric mixer
- Measuring cups and spoons
- 9-inch deep-dish pie plate
- Parchment paper or aluminum foil
- Oven
Instructions
- Preheat your oven to 350°F (175°C). Make sure your oven rack is in the center position for even baking.
- In a large mixing bowl, cream together the vegetable shortening, brown sugar, granulated sugar, and vanilla extract using an electric mixer on medium speed. Cream until the mixture is light and fluffy. This usually takes about 3-5 minutes.
- Beat in the eggs, one at a time, mixing well after each addition. Ensure each egg is fully incorporated into the creamed mixture before adding the next. This helps prevent curdling and ensures a smooth batter.
- In a separate bowl, whisk together the all-purpose flour, baking soda, and salt. This ensures that the baking soda and salt are evenly distributed throughout the flour, which is crucial for proper leavening and flavor.
- Gradually blend the dry ingredients into the wet ingredients, mixing on low speed until just combined. Be careful not to overmix, as this can develop the gluten in the flour and result in a tough pie.
- Stir in the semi-sweet chocolate chips and chopped walnuts until they are evenly distributed throughout the batter. Use a spatula to gently fold them in, ensuring that they don’t get crushed.
- Spoon the chocolate chip mixture into the unbaked 9-inch deep-dish pastry shell, mounding it slightly in the center. This helps prevent the pie from sinking in the middle during baking.
- Bake in the preheated oven for 10 minutes, or until the top is lightly browned. This initial burst of heat helps set the crust and the top layer of the filling.
- Reduce the oven temperature to 250°F (120°C). This lower temperature allows the center of the pie to cook through without burning the top.
- Cover the pie loosely with parchment paper or aluminum foil to prevent the top from over-browning. Ensure the cover doesn’t touch the top of the pie to avoid sticking.
- Bake for approximately 1 hour, or until the center is set to your desired firmness. For a chewier texture, bake for slightly less time. A good test is to gently shake the pie; the center should jiggle slightly but not be liquid.
- Remove the pie from the oven and let it cool on a wire rack. The pie will continue to set as it cools.
- Serve warm or at room temperature with a scoop of vanilla ice cream, if desired.
Expert Tips & Tricks
- Use quality chocolate: The quality of your chocolate chips directly impacts the overall flavor of the pie. Opt for good-quality semi-sweet chocolate chips for the best results.
- Toast the walnuts: Toasting the walnuts before adding them to the batter enhances their flavor and adds a pleasant crunch to the pie. Spread the walnuts on a baking sheet and toast them in a 350°F oven for 5-7 minutes, or until fragrant.
- Adjust baking time: Baking times may vary depending on your oven. Keep a close eye on the pie and adjust the baking time as needed to achieve your desired level of doneness. Remember, a slightly underbaked pie will be chewier, while an overbaked pie will be drier.
- Prevent a soggy crust: To prevent a soggy crust, you can pre-bake the pie shell for 10 minutes before adding the filling. This helps to create a barrier between the filling and the crust.
- Make it ahead: You can prepare the pie filling ahead of time and store it in the refrigerator for up to 24 hours. When you’re ready to bake, simply pour the filling into the pie shell and bake as directed.
Serving & Storage Suggestions
Serve the Whiffletree Chocolate Chip Pie warm or at room temperature. A scoop of vanilla ice cream complements the rich, chocolatey flavor of the pie perfectly. You can also add a dollop of whipped cream or a drizzle of chocolate sauce for an extra touch of indulgence.
Leftover pie can be stored in an airtight container at room temperature for up to 2 days or in the refrigerator for up to 5 days. To reheat, warm slices in a 350°F oven for 5-10 minutes, or until heated through. You can also microwave individual slices for 20-30 seconds. For longer storage, you can freeze the pie for up to 3 months. Wrap the pie tightly in plastic wrap and then in aluminum foil before freezing. Thaw the pie overnight in the refrigerator before reheating.
Nutritional Information
| Nutrient | Amount per Serving | % Daily Value |
|---|---|---|
| Calories | 467 kcal | 23% |
| Total Fat | 25.4g | 39% |
| Saturated Fat | 8.1g | 41% |
| Cholesterol | 47mg | 16% |
| Sodium | 266mg | 11% |
| Total Carbohydrate | 52.9g | 18% |
| Dietary Fiber | 2.1g | 8% |
| Sugars | 21.9g | 73% |
| Protein | 4.5g | 9% |
Note: Nutritional information is an estimate and may vary based on specific ingredients and portion sizes.
Variations & Substitutions
- Gluten-Free: Use a gluten-free pie crust and substitute the all-purpose flour with a gluten-free all-purpose flour blend.
- Nut-Free: Omit the walnuts or substitute them with sunflower seeds or pumpkin seeds.
- Different Chocolate: Experiment with different types of chocolate chips, such as dark chocolate, milk chocolate, or white chocolate. You can also add chopped chocolate chunks for a more intense chocolate flavor.
- Add Spices: Add a pinch of cinnamon, nutmeg, or cardamom to the batter for a warm, spiced flavor.
- Salted Caramel: Drizzle salted caramel sauce over the baked pie for a decadent treat.
FAQs (Frequently Asked Questions)
Q: Can I use a store-bought pie crust?
A: Absolutely! A store-bought crust works perfectly fine, especially for a quick and easy dessert. Just make sure it’s a deep-dish crust to accommodate the filling.
Q: How do I know when the pie is done?
A: The center of the pie should be set but still slightly jiggly. If you insert a toothpick into the center, it should come out with moist crumbs attached, not wet batter.
Q: Can I make this pie ahead of time?
A: Yes, you can bake the pie a day ahead and store it at room temperature or in the refrigerator. Reheat it slightly before serving for the best flavor and texture.
Q: What if my pie crust is browning too quickly?
A: If your pie crust is browning too quickly, you can cover the edges with aluminum foil or use a pie shield to protect them.
Q: Can I freeze this pie?
A: Yes, you can freeze the baked pie for up to 3 months. Wrap it tightly in plastic wrap and then in aluminum foil before freezing. Thaw it overnight in the refrigerator before reheating.
Final Thoughts
Whiffletree Chocolate Chip Pie is more than just a dessert; it’s a memory, a tradition, and a slice of pure happiness. It is an incredibly easy pie to make, but always elicits “oohs” and “aahs”. So, I encourage you to try this recipe and create your own memories with it. Don’t be afraid to experiment with variations and make it your own. And most importantly, share it with loved ones and enjoy the smiles it brings. Consider serving it alongside a steaming mug of coffee or a scoop of your favorite ice cream. Happy baking!