
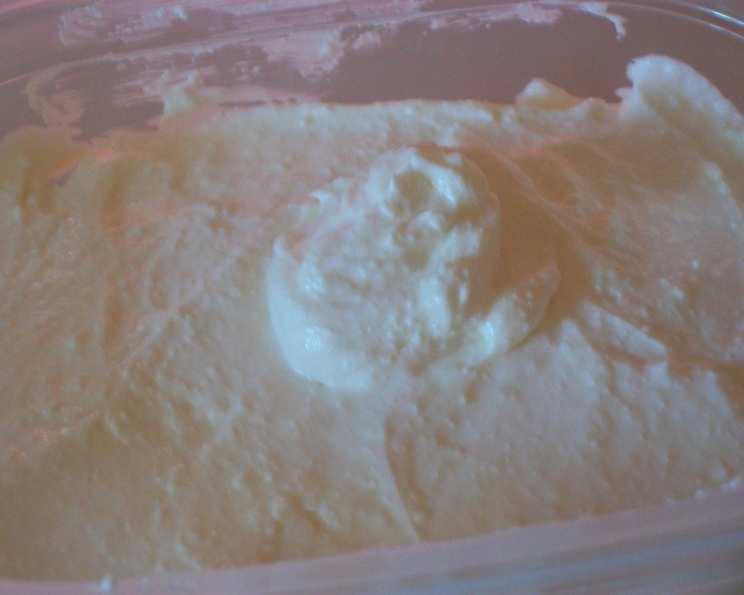
Homemade Whipped Cream Cheese: A Culinary Revelation
I remember one particular Sunday morning. The aroma of freshly brewed coffee filled the air, and my grandmother, a woman who could coax magic from the simplest ingredients, was in the kitchen. She was whipping up a batch of cream cheese, not for a cheesecake, but for our bagels. I was mesmerized as she transformed a simple block of cream cheese into a cloud-like dream. The taste was unforgettable – a far cry from anything store-bought. It was tangier, richer, and infinitely more satisfying. This recipe reminds me of her, and the simple pleasures in life.
Recipe Overview
- Prep Time: 2 minutes
- Total Time: 7 minutes
- Yields: 16 tablespoons
- Serves: 16
- Dietary Type: Vegetarian
Ingredients
- 240 g cream cheese, softened (low-fat, light, nonfat, regular, anything you wish)
- 2-3 tablespoons milk
Equipment Needed
- Mixer (stand mixer or hand mixer)
- Mixing bowl
- Spatula
Instructions
-
First, ensure your cream cheese is properly softened. You can either soften the cream cheese in your microwave in short bursts, or leave it out on your kitchen top for a while (about an hour or two). This step is crucial for achieving the perfect whipped consistency. The softer the cream cheese, the easier it will be to whip.
-
In a mixing bowl, place the softened cream cheese.
-
Using your mixer (either a stand mixer with the whisk attachment or a hand mixer), begin to beat the cream cheese until it becomes smooth and whipped. Start on a low speed to prevent splattering and gradually increase the speed. Scrape down the sides of the bowl as needed to ensure even mixing.
-
At this point, gradually add in the milk, one tablespoon at a time. Continue beating the mixture after each addition, observing the consistency.
-
Add milk until you get your desired “whipped” consistency. Remember, you’re aiming for a light, airy, and spreadable texture. Be careful not to add too much milk at once, as this can make the cream cheese too thin.
-
Once you have achieved the desired consistency, give it a final mix to ensure everything is well combined.
-
Your homemade whipped cream cheese is now ready to be used!
Expert Tips & Tricks
- Softening the Cream Cheese: The key to light and fluffy whipped cream cheese is properly softened cream cheese. If you’re short on time, microwaving it in 15-second intervals works, but keep a close watch to prevent it from melting. Room temperature is ideal.
- Milk Alternatives: Feel free to experiment with different types of milk. Whole milk will create a richer texture, while skim milk will result in a lighter version. You can even use cream for an extra decadent treat.
- Flavor Infusions: Don’t be afraid to get creative with flavors! Add a pinch of garlic powder and some chopped chives for a savory spread, or a dash of vanilla extract and a sprinkle of cinnamon for a sweet topping.
- Over-Mixing: Be careful not to over-mix the cream cheese after adding the milk. Over-mixing can cause it to become thin and watery.
- Adjusting Consistency: If your whipped cream cheese is too thick, add a little more milk, one teaspoon at a time, until you reach your desired consistency. If it’s too thin, place it in the refrigerator for about 30 minutes to firm up slightly.
Serving & Storage Suggestions
Homemade whipped cream cheese is incredibly versatile. Spread it on bagels, toast, or crackers. Use it as a filling for pastries or cakes. Serve it with fresh fruit or vegetables. For a savory option, try it with smoked salmon and capers.
- Storage: Store your homemade whipped cream cheese in an airtight container in the refrigerator. It will keep for up to a week.
- Room Temperature: Do not leave whipped cream cheese at room temperature for more than two hours, as it can spoil quickly.
- Freezing: Freezing is not recommended, as it can alter the texture and make it grainy.
Nutritional Information
| Nutrient | Amount per Serving | % Daily Value |
|---|---|---|
| Calories | 53.6 kcal | – |
| Calories from Fat | 47 kcal | – |
| Total Fat | 5.3 g | 8% |
| Saturated Fat | 3.3 g | 16% |
| Cholesterol | 16.8 mg | 5% |
| Sodium | 45.3 mg | 1% |
| Total Carbohydrate | 0.5 g | 0% |
| Dietary Fiber | 0 g | 0% |
| Sugars | 0 g | 0% |
| Protein | 1.2 g | 2% |
Note: Nutritional information is an estimate and may vary depending on the specific ingredients used.
Variations & Substitutions
- Dairy-Free Whipped Cream Cheese: While this recipe traditionally uses dairy-based cream cheese and milk, you can experiment with plant-based alternatives. Use a dairy-free cream cheese alternative made from nuts or tofu, and substitute the milk with almond, soy, or oat milk. Keep in mind that the taste and texture may differ slightly.
- Honey Whipped Cream Cheese: Add a tablespoon of honey while whipping for a touch of natural sweetness.
- Herb & Garlic Whipped Cream Cheese: Incorporate finely chopped fresh herbs like chives, dill, or parsley, along with a minced clove of garlic, for a savory and aromatic spread.
- Spicy Whipped Cream Cheese: Add a pinch of red pepper flakes or a dash of your favorite hot sauce for a little kick.
- Lemon Zest Whipped Cream Cheese: Add the zest of one lemon for a bright and citrusy flavor.
FAQs (Frequently Asked Questions)
Q: Can I use a food processor instead of a mixer?
A: While a food processor can be used, a mixer (either stand or hand mixer) generally yields a lighter and fluffier texture. The whisk attachment on a mixer is designed to incorporate air into the cream cheese, creating a whipped effect.
Q: How do I know when the cream cheese is softened enough?
A: The cream cheese should be soft enough that you can easily press into it with your finger, but not so soft that it’s melted. It should yield slightly to pressure.
Q: Can I use flavored cream cheese to start with?
A: Yes, you can use flavored cream cheese as a base, but be mindful of the existing flavors and adjust the milk accordingly. Also, store-bought flavored cream cheeses often have added stabilizers that might affect the final whipped consistency.
Q: What if I add too much milk?
A: If you accidentally add too much milk and the mixture becomes too thin, you can try placing it in the refrigerator for about 30 minutes to firm up slightly. Alternatively, you can add a small amount of powdered sugar to help thicken it.
Q: Is it necessary to scrape down the sides of the bowl while mixing?
A: Yes, scraping down the sides of the bowl is important to ensure that all of the cream cheese is evenly mixed and that no lumps remain.
Final Thoughts
I sincerely hope you give this simple yet sensational recipe a try. Homemade whipped cream cheese elevates even the most humble of breakfasts, and the customization options are endless. Whether you slather it on a toasted bagel, dollop it on a slice of cake, or enjoy it with fresh berries, this recipe is sure to become a staple in your kitchen. I’d love to hear about your creative variations and culinary adventures with this recipe. Share your feedback and photos – happy whipping!