
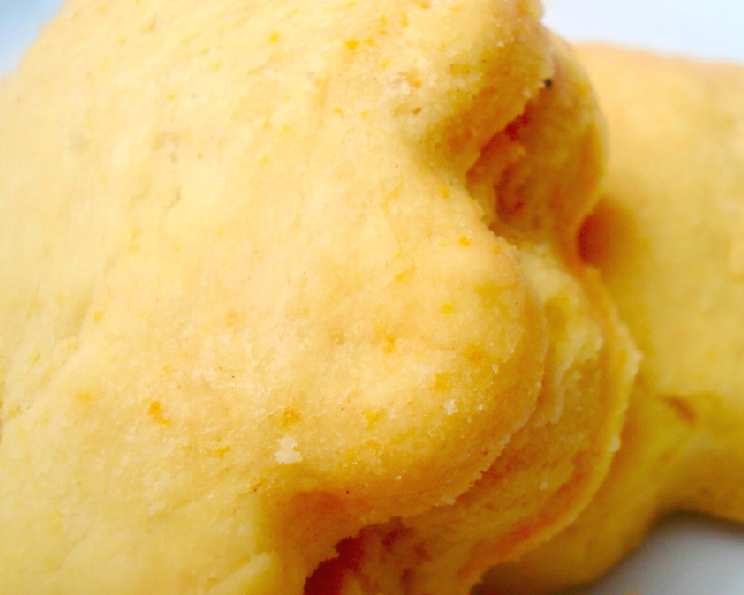
Whipping Cream Biscuits: A Baker’s Dream
The scent of freshly baked biscuits always transports me back to my grandmother’s kitchen. I can almost feel the warmth radiating from her vintage oven, see the flour dusting her apron, and hear the gentle clinking of her mixing bowls. But it wasn’t just any biscuit; it was always these biscuits – impossibly tender, golden-brown pillows of delight that seemed to melt in your mouth. She swore her secret was the whipping cream, and after years of experimenting, I think she was right. These whipping cream biscuits are a culinary hug, simple to make and utterly unforgettable.
Recipe Overview
- Prep Time: 10 minutes
- Cook Time: 15 minutes
- Total Time: 25 minutes
- Yields: 24 biscuits
- Dietary Type: Vegetarian
Ingredients
- 2 cups flour, sifted
- 1 1/2 teaspoons sugar
- 1 teaspoon salt
- 1 tablespoon baking powder
- 3/4 cup chilled butter, diced
- 1 cup whipping cream
- 2 tablespoons whipping cream
Equipment Needed
- Large bowl
- Butter knife or pastry blender
- Rolling pin
- Clean glass or cookie cutter
- Ungreased baking sheet
Instructions
-
Preheat your oven to 425 degrees Fahrenheit (220 degrees Celsius). It’s crucial that the oven is fully heated before the biscuits go in for maximum rise.
-
In a large bowl, whisk together the sifted flour, sugar, salt, and baking powder. Sifting ensures a lighter, more tender biscuit.
-
Add the chilled, diced butter to the dry ingredients. This is where technique matters. You want to incorporate the butter into the flour without melting it. Use your fingers or a pastry blender (or even two butter knives in a slicing motion) to cut the butter into the flour until the mixture resembles coarse crumbs. You should still see small pieces of butter – these create steam in the oven, leading to flaky layers.
-
Pour in half of the whipping cream (1/2 cup) and gently work the dough with your hands. Don’t overmix! You want a shaggy dough.
-
Add the remaining whipping cream (1/2 cup + 2 tablespoons) and knead the mixture just 9 or 10 times. The dough will still be somewhat loose and not perfectly smooth – that’s perfectly fine, in fact, that is what we want! Over-kneading develops gluten, which results in tough biscuits.
-
Lightly flour a clean surface. Turn the dough out onto the floured surface and gently roll it out with a rolling pin until it’s about 1/2 inch thick. Be careful not to press down too hard, as this will compress the layers.
-
Using the rim of a clean glass or a cookie cutter (about 2-3 inches in diameter), cut out the biscuits. Avoid twisting the cutter, as this seals the edges and prevents them from rising properly. Press straight down and lift straight up. Re-roll the scraps as needed, but keep in mind that the re-rolled dough will be slightly tougher.
-
Place the cut-out biscuits onto an ungreased baking sheet, spacing them about an inch apart.
-
Bake in the preheated 425-degree Fahrenheit oven for about 15 minutes, or until the biscuits are golden brown. Keep a close eye on them during the last few minutes of baking to prevent burning. Ovens can vary, so adjust the baking time as needed.
Expert Tips & Tricks
- Keep Everything Cold: The key to flaky biscuits is cold butter and cold cream. Cold ingredients prevent the butter from melting too quickly, allowing it to create steam and those desirable layers during baking. Consider chilling your flour and bowl beforehand as well, especially on a warm day.
- Handle with Care: Overmixing is the enemy of tender biscuits. Handle the dough as little as possible to prevent gluten development.
- Don’t Twist: As mentioned in the instructions, avoid twisting the cutter when cutting out the biscuits. This seals the edges and inhibits rising.
- For Extra Golden Brownness: Before baking, brush the tops of the biscuits with a little melted butter or extra whipping cream for a richer color and flavor.
- Make-Ahead Tip: You can prepare the dough ahead of time, cut out the biscuits, and store them in the refrigerator (covered) for up to 24 hours before baking. This is great for busy mornings!
- High Altitude Adjustments: If you live at a high altitude, you may need to reduce the amount of baking powder slightly (by about 1/4 teaspoon) to prevent the biscuits from rising too quickly and then collapsing.
Serving & Storage Suggestions
These whipping cream biscuits are best served warm, straight from the oven. They’re delicious on their own or with a dollop of butter, jam, honey, or even savory toppings like sausage gravy.
- Serving: Serve warm with butter, jam, honey, or gravy.
- Room Temperature: Store cooled biscuits in an airtight container at room temperature for up to 2 days.
- Refrigerator: Store in an airtight container in the refrigerator for up to 5 days.
- Freezer: For longer storage, freeze the baked biscuits in a single layer on a baking sheet until solid, then transfer them to a freezer-safe bag or container. They can be frozen for up to 2 months.
- Reheating: To reheat, bake frozen biscuits in a preheated 350-degree Fahrenheit oven for 10-15 minutes, or until warmed through. You can also microwave them for a quick reheat, but they won’t be as crispy.
Nutritional Information
Please note that these values are estimates and may vary based on specific ingredients and portion sizes.
| Nutrient | Amount per Serving | % Daily Value |
|---|---|---|
| Calories | 129 kcal | 6% |
| Total Fat | 10g | 15% |
| Saturated Fat | 6.2g | 31% |
| Cholesterol | 30.6mg | 10% |
| Sodium | 197.4mg | 8% |
| Total Carbohydrate | 8.7g | 3% |
| Dietary Fiber | 0.3g | 1% |
| Sugars | 0.3g | 1% |
| Protein | 1.4g | 3% |
Variations & Substitutions
- Buttermilk Biscuits: Substitute buttermilk for the whipping cream for a tangier flavor and slightly denser texture. You may need to add a bit more buttermilk to achieve the desired consistency.
- Cheese Biscuits: Add shredded cheddar cheese (about 1/2 cup) to the dry ingredients for cheesy, savory biscuits.
- Herb Biscuits: Incorporate fresh herbs like rosemary, thyme, or chives (about 1-2 tablespoons, finely chopped) into the dough for a fragrant twist.
- Sweet Biscuits: Add a tablespoon or two of honey or maple syrup to the dough for a sweeter treat.
- Gluten-Free Biscuits: Use a gluten-free flour blend designed for baking, but be aware that the texture may be slightly different. You may also need to add a binding agent like xanthan gum.
- Vegan Biscuits: Substitute a vegan butter alternative for the butter and a plant-based cream (such as coconut cream or cashew cream) for the whipping cream. Be sure to use a brand that whips well.
FAQs (Frequently Asked Questions)
Q: Why are my biscuits flat?
A: This is often caused by using warm butter or overmixing the dough. Make sure your butter and cream are cold, and handle the dough gently. Expired baking powder can also lead to flat biscuits.
Q: Can I use a food processor to cut in the butter?
A: While you can, it’s easy to over-process the butter in a food processor, which can result in tough biscuits. It’s generally best to use your fingers, a pastry blender, or two butter knives.
Q: What if I don’t have whipping cream?
A: You can use heavy cream as a substitute, as it has a similar fat content. However, avoid using milk or half-and-half, as they won’t provide the same richness and tenderness.
Q: How do I prevent the bottoms of my biscuits from burning?
A: Place a piece of parchment paper on the baking sheet before adding the biscuits. You can also try using a double baking sheet to insulate the bottoms from the direct heat.
Q: Can I add fruit to these biscuits?
A: Yes! Gently fold in blueberries, cranberries, or chopped strawberries into the dough before rolling it out.
Final Thoughts
These whipping cream biscuits are more than just a recipe; they’re a reminder of simpler times and the joy of baking. Don’t be intimidated by the process – with a little practice, you’ll be whipping up batch after batch of these golden-brown beauties in no time. So preheat that oven, gather your ingredients, and let the aroma of freshly baked biscuits fill your home. And when you take that first bite, I hope you’ll taste a little bit of my grandmother’s love in every tender, flaky layer. I encourage you to leave your feedback; I’d love to hear how these worked for you! These pair perfectly with a steaming mug of coffee or a comforting bowl of soup. Happy baking!