
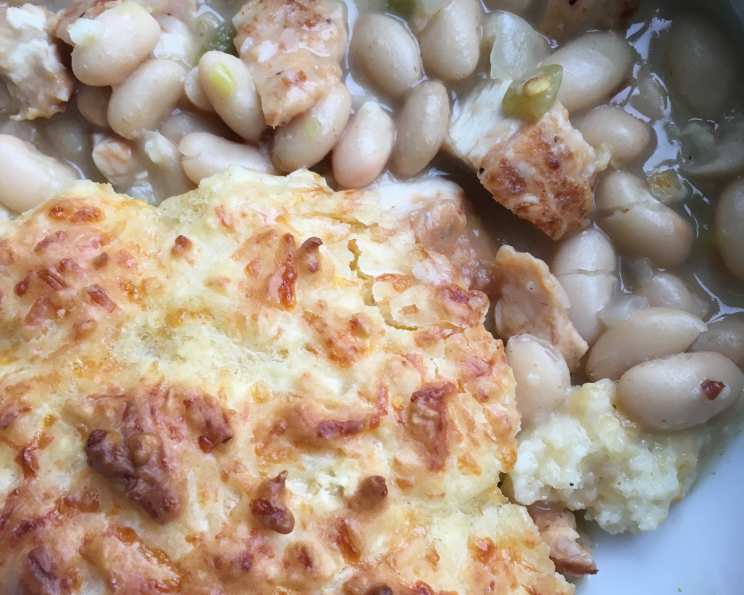
White Chicken Chili Pot Pie: A Comforting Classic Reimagined
The aroma of a bubbling pot pie has always transported me back to my grandmother’s cozy kitchen. I can almost feel the warmth radiating from the oven and hear her humming softly as she crimped the edges of the golden crust. While I’ve cherished her traditional chicken pot pie, I’m always looking for new ways to spin old favorites. This White Chicken Chili Pot Pie offers that familiar comfort but with a zesty kick, and it’s perfect for a chilly evening.
Recipe Overview
- Prep Time: 15 minutes
- Cook Time: 25 minutes
- Total Time: 40 minutes
- Servings: 6
- Yield: 1 pie
- Dietary Type: Adaptable (can be made gluten-free)
Ingredients
- 2 teaspoons light olive oil
- 1 medium onion, diced
- 1 (5 ounce) can diced green chilies, drained
- 2 teaspoons ground cumin
- 1 teaspoon salt
- 1/2 teaspoon red pepper flakes
- 1/4 cup White Lily All-Purpose Flour
- 2 (15 ounce) cans great northern beans
- 1 (15 ounce) can chicken broth, reduced sodium
- 1 1/2 cups cooked and diced chicken breasts
- 1 cup White Lily Self-Rising Flour
- 1 1/2 cups shredded Monterey Jack cheese
- 1/2 cup milk
- 1 large egg
Equipment Needed
- Large skillet
- 2-quart baking dish or 12-inch cast-iron skillet
Instructions
-
Preheat your oven to 375 degrees Fahrenheit (190 degrees Celsius). This ensures that the crust will bake evenly and the filling will be heated through properly.
-
In a large skillet, heat the light olive oil over medium heat. Add the diced onion and cook for about 4 minutes, or until the onions become translucent and softened. Stir frequently to prevent burning.
-
Add the drained diced green chilies, ground cumin, salt, red pepper flakes, and White Lily All-Purpose Flour to the skillet. Stir continuously for about 2 minutes, or until the mixture thickens slightly and the flour has lightly browned. This step is crucial for developing the flavor and thickening the chili base.
-
Pour in the great northern beans (undrained) and reduced sodium chicken broth. Bring the mixture to a boil, then reduce the heat and simmer for 10 minutes, or until the chili has thickened to your desired consistency. Stir occasionally to prevent sticking.
-
Gently fold in the cooked and diced chicken breasts. Ensure the chicken is evenly distributed throughout the chili mixture.
-
Pour the chicken chili mixture into a 2-quart baking dish or a 12-inch cast-iron skillet. If using a cast-iron skillet, be careful as it will be hot.
-
In a separate bowl, prepare the cheese biscuit crust. Combine the White Lily Self-Rising Flour, shredded Monterey Jack cheese, milk, and egg. Mix until just combined; be careful not to overmix, as this can result in a tough crust. The dough should be slightly sticky.
-
Drop spoonfuls of the biscuit dough over the top of the chili, spreading it evenly to cover as much of the surface as possible. Alternatively, you can gently spread the dough using a spatula, but avoid pressing it too firmly into the chili.
-
Bake in the preheated oven for 25 minutes, or until the biscuit crust is golden brown and cooked through. A toothpick inserted into the center of the crust should come out clean.
-
Remove from the oven and let cool for a few minutes before serving. This allows the filling to set slightly and prevents it from being too runny.
Expert Tips & Tricks
- Spice It Up: If you like a bit more heat, add a pinch of cayenne pepper or use hot green chilies.
- Cheese Selection: While Monterey Jack is classic, feel free to experiment with other cheeses like pepper jack for a spicier kick or a blend of cheddar and mozzarella for a richer flavor.
- Make-Ahead Magic: Prepare the chili filling a day ahead and store it in the refrigerator. This allows the flavors to meld together even more. When ready to bake, simply top with the biscuit crust and bake as directed.
- Crust Variations: For a richer crust, substitute buttermilk for regular milk. You can also add a touch of garlic powder or dried herbs to the biscuit dough for extra flavor.
Serving & Storage Suggestions
Serve the White Chicken Chili Pot Pie warm, directly from the baking dish or skillet. Garnish with a dollop of sour cream or Greek yogurt, a sprinkle of fresh cilantro, or a drizzle of hot sauce for added flair. Leftovers can be stored in an airtight container in the refrigerator for up to 3 days. Reheat in the oven at 350°F (175°C) until warmed through, or microwave in intervals, stirring occasionally, until heated. Freezing is not recommended as the texture of the crust and filling may change.
Nutritional Information
| Nutrient | Amount per Serving | % Daily Value |
|---|---|---|
| Calories | 394.9 kcal | N/A |
| Calories from Fat | 117 g | 30% |
| Total Fat | 13 g | 20% |
| Saturated Fat | 6.7 g | 33% |
| Cholesterol | 63.2 mg | 21% |
| Sodium | 1347.1 mg | 56% |
| Total Carbohydrate | 47.7 g | 15% |
| Dietary Fiber | 9.1 g | 36% |
| Sugars | 2 g | 8% |
| Protein | 22.5 g | 44% |
Variations & Substitutions
- Gluten-Free Option: Substitute the White Lily Self-Rising Flour and White Lily All-Purpose Flour with a gluten-free blend. Ensure the blend contains xanthan gum for proper binding.
- Vegetarian Version: Replace the chicken with sautéed mushrooms or crumbled vegetarian meat substitute for a satisfying vegetarian option.
- Dairy-Free: Use a dairy-free shredded cheese alternative and almond or soy milk in the biscuit crust.
- Different Beans: Use any type of bean you like! Navy beans, cannellini beans or even black beans can be used.
- Crust Alternatives: Instead of a biscuit topping, try using pre-made puff pastry for a flaky crust.
FAQs (Frequently Asked Questions)
Q: Can I use rotisserie chicken in this recipe?
A: Absolutely! Using rotisserie chicken is a great shortcut and adds a lot of flavor. Just shred the chicken and add it to the chili as directed.
Q: Can I make this in individual ramekins?
A: Yes, you can divide the chili mixture into individual ramekins and top each with biscuit dough before baking. Adjust the baking time accordingly, checking for doneness after about 20 minutes.
Q: What if I don’t have White Lily flour?
A: While White Lily flour is known for its soft texture, you can use another brand of all-purpose flour. For the self-rising flour, you can make your own by adding 1 1/2 teaspoons of baking powder and 1/4 teaspoon of salt per cup of all-purpose flour.
Q: How do I prevent the biscuit crust from getting soggy?
A: Make sure the chili filling isn’t too watery before adding the biscuit dough. You can also bake the pot pie on a baking sheet to help the bottom crust crisp up.
Q: Can I add vegetables to the chili?
A: Definitely! Corn, bell peppers, or zucchini would all be delicious additions to the chili filling. Just add them along with the green chilies and cook until tender.
Final Thoughts
I hope this White Chicken Chili Pot Pie brings as much warmth and satisfaction to your table as it does to mine. Don’t be afraid to experiment with different variations and make it your own. Whether you’re looking for a comforting weeknight meal or a crowd-pleasing dish for a gathering, this pot pie is sure to impress. Share your creations and feedback – I’d love to hear how you’ve personalized this recipe!