
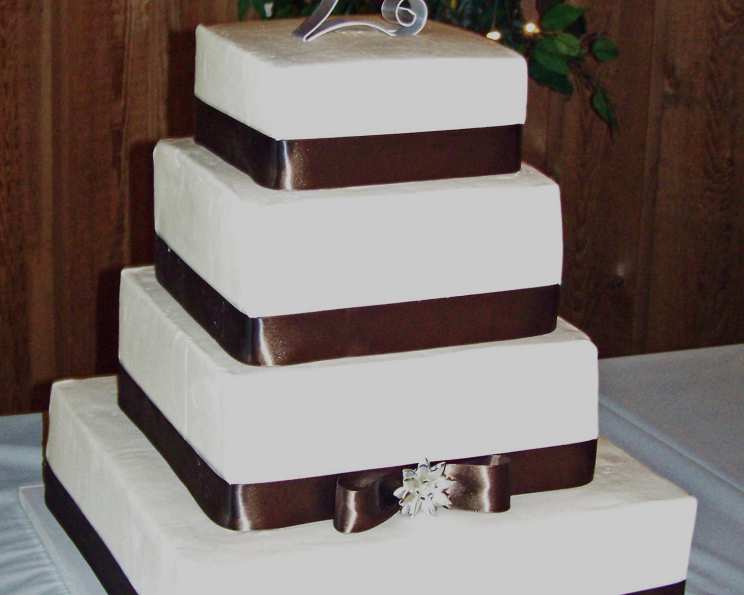
The Quintessential White Wedding Cake: A Baker’s Secret Revealed
I’ll never forget the first wedding cake I ever tasted. I was a flower girl, barely tall enough to see over the towering confection, and the baker had created a masterpiece of pristine white frosting and delicate sugar roses. The taste? Sublimely light, airy, and subtly flavored – a perfect complement to the joyous occasion. It sparked a lifelong fascination with baking, particularly the art of creating a truly exceptional white cake that is both beautiful and delicious. This recipe, inspired by a seasoned wedding cake artisan, captures that same magic.
Recipe Overview
- Prep Time: 20 minutes
- Cook Time: 30-35 minutes
- Total Time: 50-55 minutes
- Servings: 8
- Yields: 1 cake
- Dietary Type: Vegetarian (can be modified to be dairy-free with appropriate substitutions)
Ingredients
- 1 (18 1/4 ounce) box Betty Crocker Super Moist White Cake Mix
- 1/4 cup all-purpose flour
- 1 1/3 cups water
- 1/4 cup canola oil
- 1 teaspoon almond extract
- 3 egg whites (or 3 whole eggs, see note below)
Note: If using 3 whole eggs instead of egg whites, decrease the amount of water to 1 1/4 cups. This alteration provides a richer flavor and slightly denser crumb.
Equipment Needed
- Two 9-inch round cake pans
- Mixing bowls
- Electric mixer (stand or hand-held)
- Measuring cups and spoons
- Rubber spatula
- Parchment paper (optional)
- Cooling rack
- Grease (butter or baking spray)
- Flour (for dusting pans)
Instructions
-
Preheat your oven to 350°F (175°C). Ensure the oven rack is positioned in the center. This promotes even baking and prevents burning.
-
Prepare the cake pans. Generously grease the two 9-inch round cake pans with butter or baking spray. Then, lightly flour the pans, tapping out any excess. For extra insurance against sticking, you can line the bottoms of the pans with circles of parchment paper.
-
Combine all ingredients in a large mixing bowl. This includes the white cake mix, all-purpose flour, water, canola oil, almond extract, and egg whites (or whole eggs, if substituting).
-
Begin mixing on low speed. Use an electric mixer (either a stand mixer or a hand-held mixer) to beat all the ingredients together on low speed until just combined. This initial low-speed mixing prevents flour from flying everywhere and ensures the wet and dry ingredients begin to emulsify.
-
Increase the mixing speed. Once the ingredients are mostly combined, increase the mixer speed to medium. Beat the batter for about 2 minutes. The batter will be thick and may appear slightly lumpy at this stage. This is normal. The key is to incorporate air into the batter without overmixing.
-
Divide the batter evenly. Pour the batter into the prepared cake pans, ensuring that each pan receives an equal amount. A kitchen scale can be helpful for achieving perfect uniformity.
-
Bake in the preheated oven. Place the cake pans in the preheated oven and bake for 30-35 minutes. Start checking for doneness around the 30-minute mark.
-
Check for doneness. To test if the cakes are done, insert a toothpick or a thin skewer into the center of one of the cakes. If the toothpick comes out clean or with just a few moist crumbs attached, the cake is done. Be careful not to overbake, as this can result in a dry cake. Slight jiggle is fine!
-
Cool the cakes in the pans. Once baked, remove the cake pans from the oven and let them cool for about 10 minutes. This allows the cakes to firm up slightly, making them easier to handle.
-
Invert the cakes onto a cooling rack. After 10 minutes, carefully invert the cakes onto a wire cooling rack. Remove the parchment paper (if used) and let the cakes cool completely before frosting. This prevents the frosting from melting and ensures a smooth, even finish.
Expert Tips & Tricks
- The Secret Ingredient: A touch of almond extract elevates the flavor of the white cake, adding a subtle warmth and complexity that complements the sweetness. Don’t skip it! If you prefer vanilla, you can absolutely swap them one-to-one, but the almond truly makes it special.
- Cake Release Magic: For perfectly clean cake release, try using a homemade cake release paste instead of just greasing and flouring the pans. Combine equal parts of vegetable shortening, all-purpose flour, and vegetable oil. Mix until smooth and brush onto the pans. Cakes will slide out effortlessly.
- Even Layers: To ensure perfectly even cake layers, use baking strips wrapped around the outside of the cake pans. These strips help to insulate the pans and promote even baking, preventing the cakes from doming in the center. You can buy these online or make them yourself using strips of damp towel secured with safety pins.
- Leveling the Layers: If your cake layers do dome slightly, use a serrated knife to carefully level them before frosting. This will create a stable and professional-looking cake. Gently saw across the top of the cake, rotating it as you go, to remove any unevenness.
- Moisture is Key: To keep the cakes extra moist while they cool, wrap them tightly in plastic wrap while they are still slightly warm. This will trap the moisture and prevent them from drying out.
Serving & Storage Suggestions
Once the cakes are completely cooled, you can frost them with your favorite frosting. A classic buttercream frosting is a wonderful choice, but a light and airy whipped cream frosting or a tangy cream cheese frosting would also be delicious.
Decorate the cake with fresh flowers, sprinkles, or edible pearls for a truly festive presentation.
Leftover cake should be stored in an airtight container at room temperature for up to 2 days or in the refrigerator for up to 5 days. For longer storage, you can freeze the cake layers (unfrosted) for up to 2 months. Wrap them tightly in plastic wrap and then place them in a freezer bag. Thaw overnight in the refrigerator before frosting.
Nutritional Information
| Nutrient | Amount per Serving | % Daily Value |
|---|---|---|
| Calories | 349.5 kcal | N/A |
| Calories from Fat | 108 | N/A |
| Total Fat | 12.1 g | 18% |
| Saturated Fat | 2 g | 9% |
| Cholesterol | 0 mg | 0% |
| Sodium | 456.4 mg | 19% |
| Total Carbohydrate | 55.7 g | 18% |
| Dietary Fiber | 0.1 g | 0% |
| Sugars | 28.6 g | N/A |
| Protein | 4.2 g | 8% |
Note: Nutritional information is an estimate and may vary based on specific ingredients and serving sizes.
Variations & Substitutions
- Dairy-Free: Substitute the canola oil with melted coconut oil and use a dairy-free frosting. Ensure your cake mix is also dairy-free; some contain milk powder.
- Lemon Infusion: Add the zest of one lemon to the batter for a bright and citrusy flavor.
- Chocolate Marble: Before pouring the batter into the pans, reserve about 1/4 of the batter and gently fold in 2 tablespoons of unsweetened cocoa powder. Swirl this chocolate batter into the white batter for a beautiful marble effect.
- Spice Cake Variation: Add 1 teaspoon of ground cinnamon and 1/2 teaspoon of ground nutmeg to the batter for a warm and comforting spice cake.
- Berry Delight: Fold in 1 cup of fresh or frozen berries (such as raspberries, blueberries, or strawberries) into the batter before baking. This will add a burst of fruity flavor and a beautiful pop of color.
FAQs (Frequently Asked Questions)
Q: Can I use this recipe for cupcakes?
A: Yes, this recipe can easily be adapted for cupcakes. Reduce the baking time to about 18-20 minutes, or until a toothpick inserted into the center comes out clean.
Q: My cake is sinking in the middle. What am I doing wrong?
A: This is often caused by overmixing the batter or opening the oven door too frequently during baking. Avoid overmixing and resist the temptation to peek until the cakes are almost done.
Q: Can I make this cake ahead of time?
A: Absolutely! The cake layers can be baked, cooled, and wrapped tightly in plastic wrap for up to 2 days before frosting. You can also freeze them for longer storage.
Q: My frosting is too sweet. What can I do?
A: Add a pinch of salt or a squeeze of lemon juice to the frosting to balance the sweetness. You can also use a less sweet frosting recipe, such as a stabilized whipped cream frosting.
Q: Can I use a different size cake pan?
A: Yes, but you will need to adjust the baking time accordingly. If using smaller pans, the cakes will bake faster. If using larger pans, they will take longer to bake. Watch them carefully and check for doneness frequently.
Final Thoughts
This White Wedding Cake recipe is a testament to the idea that simple ingredients, when combined with care and attention, can create something truly extraordinary. Don’t be intimidated by the idea of baking a cake from scratch—this recipe is surprisingly easy to follow, and the results are well worth the effort. Whether you’re celebrating a special occasion or simply craving a slice of heavenly white cake, I encourage you to give this recipe a try. And don’t forget to experiment with variations and substitutions to make it your own! Share your creations, experiences, and feedback. Happy baking!