
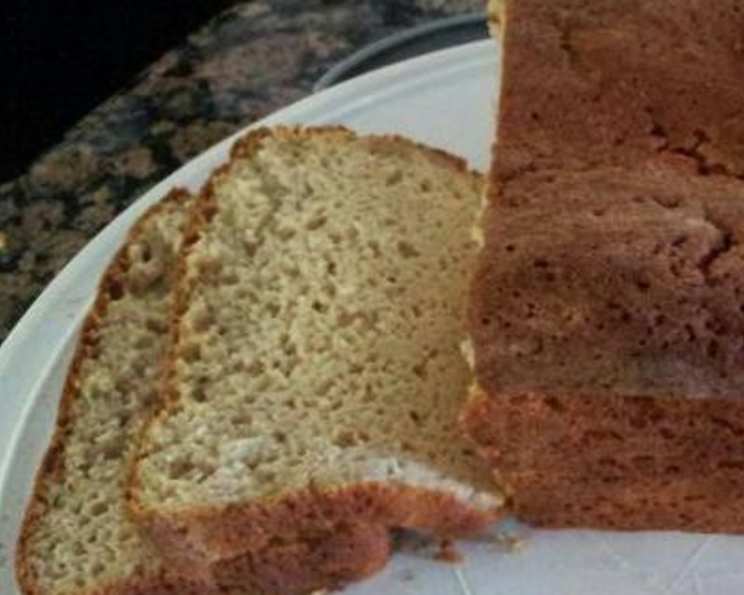
The Comfort of Home: Baking a Gluten & Dairy-Free Whole Grain Loaf
There’s something deeply comforting about the smell of baking bread wafting through the house. My grandmother, bless her heart, was a champion baker, but allergies sidelined many of her classic recipes for me. I yearned for the simple pleasure of a warm slice of wholesome bread. Countless attempts later, I finally cracked the code for a gluten and dairy-free loaf that doesn’t compromise on texture or flavor. This recipe, born from necessity and fueled by nostalgia, brings that same sense of warmth and home to my kitchen, and I’m thrilled to share it with you.
Recipe Overview
- Prep Time: 20 minutes
- Cook Time: 40-45 minutes
- Rise Time: 30 minutes
- Total Time: 1 hour 30 minutes – 1 hour 35 minutes
- Yield: 1 loaf
- Dietary Type: Gluten-Free, Dairy-Free
Ingredients
- 1 ¾ cups brown rice flour
- 1 ¾ cups oat flour
- 1 teaspoon salt
- 1 teaspoon xanthan gum
- 1 teaspoon guar gum
- 2 teaspoons baking powder
- 1 tablespoon yeast (I use quick rise)
- ¼ cup Earth Balance margarine, melted (or your preferred dairy-free butter alternative)
- ¼ cup honey
- 1 teaspoon lemon juice or 1 teaspoon vinegar
- 3 eggs or ¾ cup egg whites
- 1 cup warm water
Equipment Needed
- Stand mixer
- 9 x 5 inch loaf pan
- Parchment paper
- Cooking spray
- Mixing bowls
- Whisk
Instructions
- Begin by ensuring all your ingredients are at room temperature. This is crucial for proper gluten-free baking.
- Preheat your oven to the “warm” setting. This gentle warmth provides an ideal environment for the bread to rise.
- In the bowl of your stand mixer, combine all the dry ingredients: brown rice flour, oat flour, salt, xanthan gum, guar gum, baking powder, and yeast. Use the paddle attachment to whisk the ingredients together thoroughly, ensuring they are evenly distributed.
- In a separate bowl, combine the melted Earth Balance margarine, honey, lemon juice (or vinegar), and lightly beaten eggs (or egg whites).
- Add the liquid ingredients to the dry ingredients in the mixer bowl. Start mixing slowly to incorporate them.
- Gradually add the warm water (slightly warmer than room temperature) to the mixer. Mix slowly until the batter becomes thick. If the batter seems too stiff, add more water, one tablespoon at a time, until you reach the desired consistency.
- Continue mixing on medium-high speed for 3-5 minutes. You should be able to see beater tracks in the dough as it mixes. If the dough is too wet and the beater moves freely, it won’t hold its shape.
- While the dough is mixing, prepare a 9 x 5 inch loaf pan. Spray it generously with cooking oil and line it with parchment paper, leaving an overhang on the sides for easy removal after baking.
- Scrape the prepared dough into the loaf pan and smooth the top.
- Cover the top of the loaf pan loosely with aluminum foil. Ensure the foil is sprayed with cooking spray to prevent it from sticking to the rising dough.
- Turn off your preheated oven and place the loaf pan inside. Allow the dough to rise for approximately 30 minutes, or until it has risen about 1 inch over the top of the pan.
- After the rising period, remove the foil. Bake the loaf in a preheated oven at 375°F (190°C) for 40 to 45 minutes.
- To check for doneness, tap the top of the loaf. It should sound hollow. You can also insert a toothpick into the center; it should come out clean, though a few moist crumbs are acceptable.
- Once baked, remove the loaf from the oven and let it cool completely in the pan before slicing. This is important to prevent the bread from becoming gummy.
Expert Tips & Tricks
- Room Temperature Matters: Ensuring your ingredients are at room temperature is crucial for a smooth batter and even rise. Cold ingredients can hinder the yeast activity.
- Water Temperature is Key: Too hot, and you’ll kill the yeast. Too cold, and it won’t activate properly. Aim for lukewarm water, around 105-115°F (40-46°C).
- The Foil Tent Trick: The foil tent prevents the top of the bread from browning too quickly while the inside is still cooking. Make sure to remove it during the last 15 minutes of baking to achieve a golden crust.
- Don’t Overmix: Overmixing gluten-free dough can lead to a dense, tough bread. Mix until just combined, scraping down the sides of the bowl as needed.
- Cool Completely: Patience is key! Allow the bread to cool completely before slicing to prevent it from crumbling. I often leave it overnight for the best results.
Serving & Storage Suggestions
This whole grain gluten & dairy-free bread is delicious served warm with a drizzle of honey or a dollop of your favorite dairy-free butter alternative. It also makes excellent toast or sandwiches. For storage, keep the loaf wrapped tightly in plastic wrap or in an airtight container at room temperature for up to 3 days. You can also store it in the refrigerator for up to a week, or freeze it for longer storage (up to 2 months). To reheat, simply toast individual slices or warm the entire loaf in a low oven (300°F/150°C) for 10-15 minutes.
Nutritional Information
Please note that the following is an estimate, and actual values may vary based on specific ingredients used.
| Nutrient | Amount per Serving | % Daily Value |
|---|---|---|
| Calories | 200 kcal | 10% |
| Total Fat | 8g | 12% |
| Saturated Fat | 2g | 10% |
| Cholesterol | 40mg | 13% |
| Sodium | 250mg | 11% |
| Total Carbohydrate | 30g | 10% |
| Dietary Fiber | 3g | 12% |
| Sugars | 6g | – |
| Protein | 5g | 10% |
Variations & Substitutions
- Vegan Option: Substitute the eggs with a flax egg (1 tablespoon ground flaxseed mixed with 3 tablespoons of water, let sit for 5 minutes to thicken).
- Sweetener Variations: Instead of honey, you can use maple syrup or agave nectar. Keep in mind that these substitutions might slightly alter the flavor and texture.
- Spice It Up: Add a teaspoon of cinnamon, nutmeg, or cardamom for a warm, comforting flavor.
- Seed Power: Incorporate 2 tablespoons of flax seeds, chia seeds, or sunflower seeds for added nutrition and texture.
FAQs (Frequently Asked Questions)
Q: Can I use a different type of gluten-free flour?
A: While I recommend using brown rice flour and oat flour for the best results, you can experiment with other gluten-free flours. However, the texture may vary, and you might need to adjust the liquid accordingly.
Q: Why do I need xanthan gum and guar gum?
A: These gums act as binding agents in gluten-free baking, helping to create structure and prevent the bread from crumbling. They mimic the role of gluten.
Q: Can I make this bread without a stand mixer?
A: Yes, you can. Use a large bowl and a sturdy spoon or spatula to mix the ingredients. Be sure to mix thoroughly and beat the dough vigorously for the recommended time.
Q: My bread is gummy inside. What went wrong?
A: This could be due to underbaking or not allowing the bread to cool completely before slicing. Ensure you bake the bread until it sounds hollow when tapped and let it cool completely before slicing.
Q: How do I store the bread to keep it fresh?
A: Wrap the cooled bread tightly in plastic wrap or store it in an airtight container at room temperature. For longer storage, freeze slices individually and thaw as needed.
Final Thoughts
This recipe is more than just a set of instructions; it’s an invitation to create something nourishing and comforting in your own kitchen. Don’t be afraid to experiment with variations and make it your own. The simple act of baking bread, especially one you can fully enjoy without dietary concerns, is incredibly rewarding. I encourage you to give this recipe a try, share your creations, and let me know how it turns out. Enjoy!