
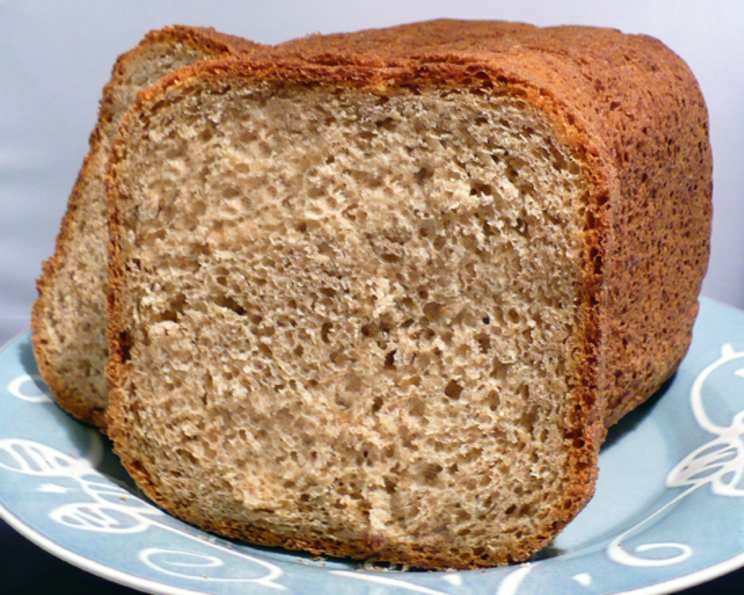
The Surprisingly Delicious Whole Wheat Bread (Bread Machine)
I remember my grandmother, bless her heart, trying to get me to eat whole wheat bread as a kid. It was always so dense and…well, frankly, boring. It tasted more like cardboard than bread! It wasn’t until years later, experimenting in my own kitchen, that I discovered the magic of a good whole wheat loaf, especially when made in a bread machine. This recipe has become my go-to, proving that whole wheat can be incredibly flavorful and satisfying – a far cry from those childhood memories. Now, the aroma of freshly baked whole wheat bread fills my home with warmth and deliciousness.
Recipe Overview
- Prep Time: 15 minutes
- Cook Time: Varies (see instructions)
- Total Time: Varies (see instructions)
- Servings: Approx. 16 slices
- Yield: 1 (2-pound) loaf
- Dietary Type: Vegetarian
Ingredients
- 1 1/3 cups milk
- 1/4 cup water
- 2 tablespoons honey
- 4 teaspoons butter
- 2 cups whole wheat flour
- 2 cups bread flour
- 1 teaspoon salt
- 1 1/4 teaspoons yeast
Equipment Needed
- Bread machine
- 9×5 inch bread pan (optional)
Instructions
-
Add the ingredients to your bread machine pan in the order recommended by your machine’s manufacturer. Generally, this means starting with the liquids: the milk, water, honey, and butter.
-
Next, add the dry ingredients: the whole wheat flour, bread flour, and salt.
-
Finally, make a small well in the center of the dry ingredients and add the yeast. This prevents the yeast from prematurely activating before the mixing process begins.
-
Select the whole grain cycle on your bread machine, if available. If not, use the basic white bread cycle. Choose your desired crust color (light, medium, or dark).
-
Start the bread machine. Allow the machine to run its course, which includes the kneading, rising, and baking phases.
-
Alternatively, you can use the bread machine solely for the dough cycle. Once the dough cycle is complete, remove the dough from the machine.
-
Grease a 9×5 inch bread pan.
-
Shape the dough into a loaf and place it in the prepared bread pan.
-
Cover the pan with a clean kitchen towel and let the dough rise in a warm place for approximately 30-45 minutes, or until it has doubled in size.
-
Preheat your oven to 350°F (175°C).
-
Bake the loaf in the preheated oven for approximately 30-35 minutes, or until the crust is golden brown and the loaf sounds hollow when tapped on the bottom. The internal temperature should reach around 200°F (93°C).
-
Remove the bread from the oven and let it cool in the pan for 10 minutes before transferring it to a wire rack to cool completely.
Expert Tips & Tricks
- Flour Power: While the recipe calls for a 50/50 blend of whole wheat and bread flour, you can adjust the ratio to your liking. For a nuttier, denser loaf, increase the amount of whole wheat flour. Be aware that using 100% whole wheat flour may result in a slightly heavier texture.
- Sweetness Adjustment: If you prefer a sweeter loaf, you can increase the amount of honey. Alternatively, you could substitute some of the honey with maple syrup for a different flavor profile.
- The Water Test: The amount of water may need slight adjustments depending on your flour and climate. If the dough appears too dry (crumbly and not coming together), add a tablespoon of water at a time until it forms a smooth ball. If it’s too wet (sticky and not holding its shape), add a tablespoon of flour at a time.
- Butter Matters: Using softened butter, rather than melted, helps to create a more tender crumb.
- Yeast Activity: Ensure your yeast is fresh by proofing it before adding it to the other ingredients. To proof, combine the yeast with a teaspoon of sugar and a quarter cup of warm water. If it foams up after 5-10 minutes, it’s good to go.
Serving & Storage Suggestions
This whole wheat bread is delicious served warm with butter, jam, or honey. It’s also excellent for making sandwiches, toast, or croutons.
- Room Temperature: Store cooled bread in an airtight container at room temperature for up to 3 days.
- Refrigerator: For longer storage, store the bread in an airtight container in the refrigerator for up to a week. However, refrigeration can dry out the bread, so it’s best to toast or reheat it before serving.
- Freezer: To freeze, wrap the cooled loaf tightly in plastic wrap, then place it in a freezer bag. It can be stored in the freezer for up to 2 months. Thaw completely at room temperature before serving. You can also freeze individual slices for quick and easy toast. To reheat, wrap the bread in foil and bake in a preheated oven at 350°F (175°C) for 10-15 minutes.
Nutritional Information
| Nutrient | Amount per Serving (approx. 1 slice) | % Daily Value |
|---|---|---|
| Calories | 138 kcal | – |
| Total Fat | 2.2g | 3% |
| Saturated Fat | 1.2g | 5% |
| Cholesterol | 5.4mg | 1% |
| Sodium | 164.7mg | 6% |
| Total Carbohydrate | 26g | 8% |
| Dietary Fiber | 2.1g | 8% |
| Sugars | 2.3g | – |
| Protein | 4.4g | 8% |
Note: Nutritional information is an estimate and may vary based on specific ingredients and serving size.
Variations & Substitutions
- Seeded Sensation: Add 1/4 cup of mixed seeds (sunflower, pumpkin, flax) to the dough for added texture and nutrition.
- Herbed Delight: Mix in 1 tablespoon of dried herbs (rosemary, thyme, oregano) for a savory twist.
- Sweet and Spicy: Add 1/4 cup of dried cranberries and a pinch of cinnamon for a festive flavor.
- Dairy-Free Option: Substitute the milk with almond milk, soy milk, or oat milk.
- Gluten-Free Adaptation: While this recipe specifically uses wheat flour, experiment with gluten-free bread flour blends. Note that you may need to adjust the liquid content and baking time.
FAQs (Frequently Asked Questions)
Q: My whole wheat bread is always so dense. How can I make it lighter?
A: Using a combination of whole wheat and bread flour, as this recipe suggests, helps to create a lighter texture. Also, make sure not to over-knead the dough.
Q: Can I use all-purpose flour instead of bread flour?
A: While you can use all-purpose flour, bread flour has a higher protein content, which helps to develop gluten and create a chewier, more structured loaf. The texture may be different with all-purpose flour.
Q: My bread machine bread always collapses in the middle. What am I doing wrong?
A: This can happen if there’s too much liquid in the dough, or if the yeast is too active. Try reducing the amount of water slightly, or use slightly less yeast.
Q: How do I know when the bread is done baking?
A: The best way to check for doneness is to insert a food thermometer into the center of the loaf. It should reach an internal temperature of around 200°F (93°C). You can also tap on the bottom of the loaf; it should sound hollow.
Q: Can I make this recipe without a bread machine?
A: Yes, you can! Follow the instructions for the dough cycle, then remove the dough, shape it into a loaf, let it rise, and bake it in the oven as described in the recipe.
Final Thoughts
Don’t let the reputation of whole wheat bread scare you away! This recipe is a testament to the fact that it can be incredibly delicious and satisfying. It’s a simple, wholesome bread that will fill your kitchen with an irresistible aroma and nourish your body with goodness. Give it a try, experiment with variations, and let me know what you think! I’m confident you’ll be pleasantly surprised. Pair it with a hearty soup or a simple salad for a complete and comforting meal. Happy baking!