
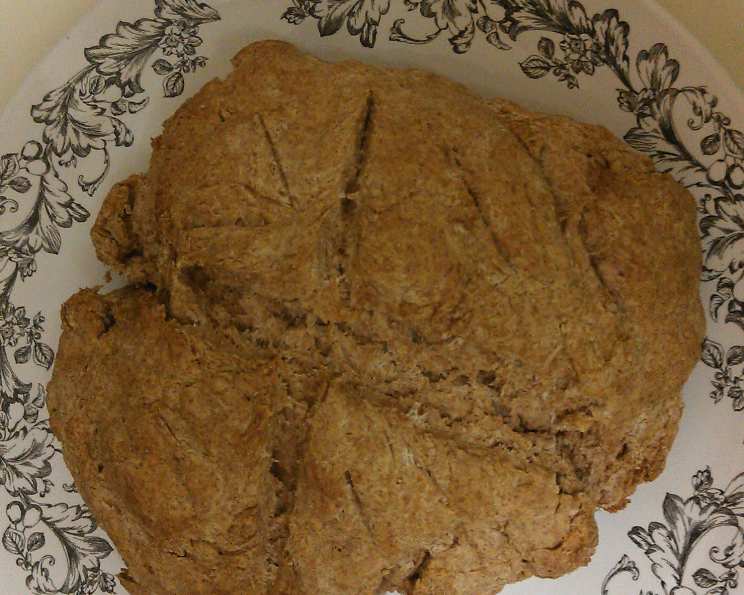
The Comfort of Crust: Baking Whole Wheat Bread Without Yeast
My grandmother, bless her heart, had a knack for filling our home with the most incredible aromas. While everyone else seemed to be baking sourdough, she was always tinkering with simpler recipes. I remember the distinctive, slightly sweet, and earthy scent of her whole wheat bread wafting from the kitchen, a comforting prelude to evenings spent around the dinner table. It wasn’t fancy, but it was honest, wholesome, and utterly satisfying – a taste of home I carry with me to this day. This recipe is my attempt to recreate that simple magic, no yeast required.
Recipe Overview
- Prep Time: 15 minutes
- Cook Time: 40-50 minutes
- Total Time: 55-65 minutes
- Servings: 10
- Yield: 1 loaf
- Dietary Type: Vegetarian
Ingredients
- 2 cups whole wheat flour
- 1 cup all-purpose flour
- ¼ cup white sugar
- 2 teaspoons baking powder
- 1 teaspoon baking soda
- 1 teaspoon salt
- 1 ½ cups buttermilk (or 1 ½ cups soured milk)
- ¼ cup molasses
- ¼ cup cooking oil
Equipment Needed
- Large bowl
- Small bowl
- Measuring cups and spoons
- Whisk or spoon
- 9x5x3 inch loaf pan
- Oven
- Cooling rack
Instructions
-
Preheat your oven to 350°F (175°C). Prepare your 9x5x3 inch loaf pan by greasing it thoroughly. You can use cooking spray, butter, or oil to prevent the bread from sticking.
-
In a large bowl, combine all six dry ingredients: whole wheat flour, all-purpose flour, white sugar, baking powder, baking soda, and salt.
-
Stir the dry ingredients thoroughly to ensure they are evenly distributed. This is crucial for the bread to rise properly and have a consistent texture.
-
Make a well in the center of the dry ingredients. This creates a space to pour in the wet ingredients.
-
In a small bowl, put the buttermilk (or soured milk), molasses, and cooking oil.
-
Stir the wet ingredients until the molasses has thinned and is mixed in well. Ensure the molasses is fully incorporated, as it contributes significantly to the bread’s flavor and color.
-
Pour the wet ingredients into the well in the center of the dry ingredients.
-
Stir the mixture just enough to combine. Be careful not to overmix the batter, as this can develop the gluten in the flour and result in a tough bread. A few lumps are okay.
-
Turn the batter into the prepared, greased loaf pan. Spread it evenly in the pan.
-
Bake in the preheated oven at 350°F (175°C) for 40 to 50 minutes.
-
Check for doneness by inserting a toothpick into the center of the loaf. If the toothpick comes out clean or with only a few moist crumbs attached, the bread is done. If the toothpick comes out with wet batter, continue baking for a few more minutes and check again.
-
Once the bread is baked, remove it from the oven and let it cool in the pan for about 10 minutes.
-
After 10 minutes, remove the bread from the pan and place it on a cooling rack to cool completely. This prevents the bottom of the bread from becoming soggy.
Note: If you don’t have buttermilk, you can easily make soured milk by adding 1 ½ tablespoons of lemon juice or white vinegar to 1 ½ cups of milk. Let it sit for 5-10 minutes until it curdles slightly. Graham flour can also be used instead of whole wheat flour for a slightly different flavor and texture.
Expert Tips & Tricks
- Don’t overmix the batter: Overmixing develops the gluten in the flour, leading to a tough, dense bread. Stir just until the wet and dry ingredients are combined.
- Use room-temperature ingredients: This helps the ingredients combine more easily and evenly.
- Adjust baking time as needed: Oven temperatures can vary, so keep an eye on the bread while it’s baking. If it starts to brown too quickly, tent it with foil.
- For a richer flavor, try using brown sugar instead of white sugar, or adding a tablespoon of honey to the wet ingredients.
- Add-ins: Consider incorporating ingredients like chopped nuts, seeds (sunflower, flax), or dried fruit (raisins, cranberries) to add texture and flavor. Stir them in gently after mixing the batter.
- Make it ahead: You can mix the dry ingredients ahead of time and store them in an airtight container. When ready to bake, simply add the wet ingredients and proceed with the recipe.
Serving & Storage Suggestions
This whole wheat bread is delicious served warm with butter, jam, or honey. It’s also great for sandwiches, toast, or as a side to soups and stews. To serve attractively, slice the bread evenly and arrange it on a platter.
To store leftover bread, wrap it tightly in plastic wrap or place it in an airtight container. It will last for 2-3 days at room temperature or up to a week in the refrigerator. For longer storage, you can freeze the bread for up to 2-3 months. To freeze, slice the bread and wrap it individually in plastic wrap, then place the slices in a freezer bag. Thaw at room temperature or in the microwave. Reheat in the oven or toaster for the best texture.
Nutritional Information
Here’s an approximate nutritional breakdown per slice (assuming 10 slices per loaf):
| Nutrient | Amount per Serving | % Daily Value |
|---|---|---|
| Calories | 220 kcal | 11% |
| Total Fat | 8g | 10% |
| Saturated Fat | 1g | 5% |
| Cholesterol | 0mg | 0% |
| Sodium | 280mg | 12% |
| Total Carbohydrate | 34g | 12% |
| Dietary Fiber | 4g | 16% |
| Sugars | 8g | |
| Protein | 5g | 10% |
Note: Nutritional information is an estimate and may vary based on specific ingredients and serving sizes.
Variations & Substitutions
- Graham Flour Bread: Substitute the whole wheat flour with graham flour for a nuttier flavor.
- Sweetened Bread: Increase the amount of sugar to ½ cup for a sweeter loaf.
- Spiced Bread: Add ½ teaspoon of ground cinnamon, nutmeg, or allspice to the dry ingredients for a warm, spiced flavor.
- Savory Bread: Omit the sugar and add herbs like rosemary, thyme, or oregano for a savory loaf. You can also add grated cheese.
- Vegan Option: Replace the buttermilk with a plant-based milk alternative like almond or soy milk, and add 1 tablespoon of apple cider vinegar.
- Gluten-Free Option: This recipe is not naturally gluten-free, but experimenting with a gluten-free flour blend could yield good results. You may need to adjust the liquid content and add a binder like xanthan gum.
FAQs (Frequently Asked Questions)
Q: Why is my bread dense and heavy?
A: Overmixing the batter is a common cause. Also, be sure your baking powder and baking soda are fresh, as they lose their effectiveness over time.
Q: Can I use honey instead of molasses?
A: Yes, you can substitute honey for molasses, but it will change the flavor and color of the bread slightly. Use the same amount (¼ cup).
Q: How do I make soured milk if I don’t have buttermilk?
A: Simply add 1 ½ tablespoons of lemon juice or white vinegar to 1 ½ cups of milk. Let it sit for 5-10 minutes until it curdles slightly.
Q: Can I freeze this bread?
A: Yes, you can freeze the bread for up to 2-3 months. Wrap it tightly in plastic wrap or place it in a freezer bag.
Q: What if my bread is browning too quickly?
A: Tent the loaf with foil during the last 15-20 minutes of baking to prevent it from burning.
Final Thoughts
This recipe is a testament to the fact that sometimes, the simplest things are the most satisfying. This no-yeast whole wheat bread is a comforting, wholesome loaf that’s perfect for any occasion. I encourage you to give it a try, experiment with different variations, and share your feedback. Pair it with a warm bowl of soup on a chilly evening, or enjoy it toasted with your favorite spread. Happy baking!