
Rustic Whole Wheat Ciabatta: A Taste of Home
The scent of freshly baked bread has always transported me back to my grandmother’s kitchen. I remember the warmth radiating from her ancient oven as she pulled out loaves of crusty bread, the air thick with yeasty goodness. While her recipe was a closely guarded secret, I’ve spent years chasing that memory, striving to recreate that simple, honest flavor. This whole wheat ciabatta, with its airy crumb and satisfyingly chewy crust, is as close as I’ve come. Each bite is a reminder of family, tradition, and the pure joy of homemade bread.
Recipe Overview
- Prep Time: 20 minutes
- Cook Time: 30-35 minutes
- Total Time: 3 hours (includes rise time)
- Servings: 4 loaves or 32 rolls
- Yield: Variable, based on size
- Dietary Type: Vegetarian
Ingredients
- 1000 g Bread Flour
- 400 g White Whole Wheat Flour (unbleached)
- 1 tablespoon Active Dry Yeast
- 10 g Sugar (2 tsp)
- 1 liter Water
- 15 g Kosher Salt (1 T)
- Olive oil or cooking spray for greasing
Equipment Needed
- Mixing bowl
- Dough hook attachment (for stand mixer, optional)
- Greased countertop
- Dough riser or large bowl
- Pizza stones (2, optional)
- Bench knife or scraper
- Parchment paper
- Pizza peel or inverted cookie tray
- Cookie sheet
- Wire racks
Instructions
- Begin by accurately measuring all of your dry ingredients directly into your mixing bowl: bread flour, white whole wheat flour, active dry yeast, and sugar. Precise measurements are key for consistent results in baking.
- Add the water to the dry ingredients.
- Using a dough hook attachment on your stand mixer (or mixing by hand), mix the ingredients until a smooth, elastic dough ball is formed. This typically takes about 5 minutes with a mixer.
- Turn the dough out onto a greased countertop. You can use olive oil or cooking spray to prevent sticking.
- Knead the dough into a ball for about 1 minute.
- Place the dough into a dough riser or a large bowl that has been lightly coated with oil. Spray the top of the dough with oil to prevent it from drying out.
- Cover the bowl tightly and let the dough rise in a warm place for 2 hours, or until it has doubled in size. This first rise is crucial for developing the flavor and texture of the ciabatta.
- While the dough is rising, preheat your oven to 450°F (232°C) with two pizza stones inside (one per shelf, if possible). If you don’t have pizza stones, you can bake directly on baking sheets, but the stones help create a crispier crust. Also, place a cookie sheet on the bottom shelf of the oven; this will be used to create steam. Make sure the stones and cookie sheet are in the oven when you start pre-heating it.
- Once the dough has doubled, turn it out onto a lightly floured countertop.
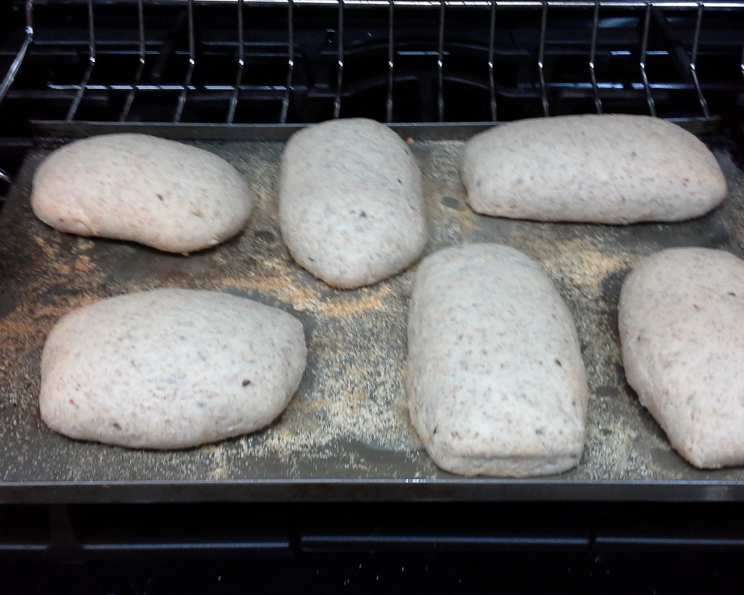
- Divide the dough into four equal pieces. At this point, you can shape each piece into a large, long ciabatta-style loaf, or you can proceed to make rolls.
- If making rolls, divide each of the four dough balls into 6-8 pieces using a bench knife or scraper.
- Whether making loaves or rolls, gently form the dough into its desired shape. For ciabatta, aim for a long, flat shape, handling the dough as little as possible to maintain its airy texture.
- Place the loaves or rolls onto two sheets of parchment paper that are roughly the same size as your pizza stones (2 loaves per sheet, or 12-16 rolls per sheet). This makes it easier to transfer the bread to the hot stones.
- Cover the dough and let it rise for a second time for 45 minutes. This second rise allows the bread to further develop its airy texture.
- After the second rise, sprinkle the loaves with flour and slash the tops with a sharp serrated knife. This step is optional for rolls. Slashing the loaves allows them to expand properly during baking and creates a visually appealing crust.
- Place the parchment paper with the loaves/rolls in the preheated oven using a pizza peel or an inverted cookie tray.
- At the same time that you place the loaves/rolls in the oven, put a cup of ice into the cookie sheet on the bottom shelf. The ice will melt and create steam, which helps to create a crusty exterior.
- Bake at 425°F (220°C) for 30-35 minutes, or until the loaves/rolls are golden brown and sound hollow when tapped on the bottom. If your oven has a convection bake setting, switch to convection for the last 10 minutes of baking for extra crispiness.
- Transfer the baked ciabatta to wire racks to cool completely before slicing and serving.
Expert Tips & Tricks
- Dough Temperature: Pay attention to the water temperature. If your room is cold, slightly warm the water to activate the yeast effectively. If your room is hot, use cooler water to prevent over-proofing.
- Don’t Overwork the Dough: Ciabatta is best when the dough is handled gently. Overworking will result in a dense, less airy crumb.
- Steam is Key: The steam bath created by the ice is essential for that signature ciabatta crust. If you don’t have pizza stones, you can still create steam by placing a pan of hot water in the oven during baking.
- Proofing Environment: A consistent, warm environment is crucial for proofing. If your kitchen is cold, try placing the dough in a slightly warmed oven (turned off!) or near a warm stovetop.
Serving & Storage Suggestions
Serve your freshly baked ciabatta warm with a drizzle of olive oil and a sprinkle of sea salt. It’s fantastic for sandwiches, bruschetta, or simply enjoyed on its own. Store leftover ciabatta in an airtight container at room temperature for up to 2 days. For longer storage, wrap it tightly in plastic wrap and freeze for up to 2 months. To reheat, thaw completely and warm in a 350°F (175°C) oven for 5-10 minutes to restore its crustiness.
Nutritional Information
(Estimates will vary based on loaf/roll size)
| Nutrient | Amount per Serving | % Daily Value |
|---|---|---|
| Calories | 250 kcal | 13% |
| Total Fat | 2g | 3% |
| Saturated Fat | 0.5g | 3% |
| Cholesterol | 0mg | 0% |
| Sodium | 200mg | 9% |
| Total Carbohydrate | 50g | 18% |
| Dietary Fiber | 4g | 14% |
| Sugars | 1g | 2% |
| Protein | 7g | 14% |
Variations & Substitutions
- Herb Infusion: Add fresh rosemary, thyme, or oregano to the dough for an herbaceous twist.
- Cheese Ciabatta: Incorporate grated Parmesan or Asiago cheese into the dough for a savory flavor.
- Olive Ciabatta: Add chopped Kalamata olives to the dough for a Mediterranean flair.
- Gluten-Free: While a true gluten-free ciabatta is challenging, experiment with gluten-free bread flour blends, keeping in mind that the texture will be different. You may need to add xanthan gum to help bind the ingredients.
FAQs (Frequently Asked Questions)
Q: Why is my ciabatta so dense?
A: Over-kneading the dough, not allowing it to rise sufficiently, or using too much flour can all contribute to a dense ciabatta. Be gentle with the dough and ensure proper proofing.
Q: Can I use all bread flour instead of the whole wheat flour?
A: Yes, you can substitute bread flour for the whole wheat flour, but the flavor and texture will be slightly different. The whole wheat adds a nuttier flavor and a more rustic texture.
Q: Can I make the dough ahead of time and bake it later?
A: Yes, you can refrigerate the dough after the first rise for up to 24 hours. When ready to bake, bring it to room temperature for about 30 minutes before shaping and baking.
Q: Do I really need the pizza stones?
A: While not strictly necessary, pizza stones help to create a crispy crust by providing a hot, even surface for baking. If you don’t have them, you can still bake the ciabatta on a regular baking sheet, but the crust may not be as crisp.
Q: How do I know when the ciabatta is done baking?
A: The ciabatta is done when it is golden brown and sounds hollow when tapped on the bottom. An internal temperature of 200-210°F (93-99°C) is also a good indicator.
Final Thoughts
This whole wheat ciabatta recipe is more than just a set of instructions; it’s an invitation to connect with the time-honored tradition of bread baking. Don’t be intimidated by the process! Embrace the imperfections, experiment with flavors, and most importantly, enjoy the rewarding experience of creating something delicious with your own hands. I encourage you to try this recipe and share your creations! Pair it with a hearty soup, a fresh salad, or simply enjoy it with a smear of butter and a cup of coffee. Happy baking!