
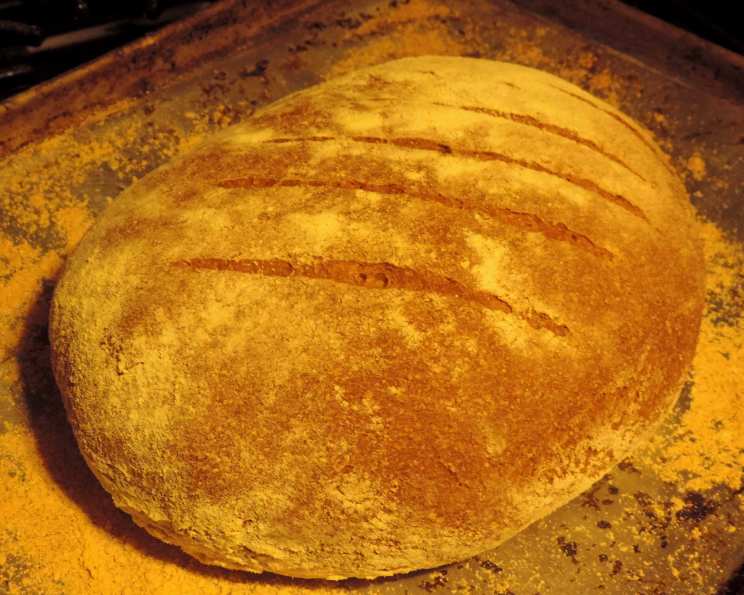
The Soulful Simplicity of Whole Wheat Sourdough
I remember the first time I truly understood the magic of sourdough. It wasn’t in a fancy bakery, but in my own humble kitchen. My starter, lovingly nicknamed “Bubbles,” had finally reached the point of robust activity, and the aroma of fermentation filled the air. The resulting loaf, a simple whole wheat sourdough, emerged from the oven with a deeply browned crust and a tangy aroma that spoke of simpler times. That loaf, shared with family and friends, cemented my love for the process and the unparalleled flavor of slow-fermented bread. The satisfaction of creating something so elemental, so nourishing, from just a few simple ingredients is a feeling I chase with every bake.
Recipe Overview
- Prep Time: 30 minutes (plus sourdough starter feeding)
- Cook Time: 40-45 minutes
- Total Time: 3-4 hours (including rising times)
- Servings: 16
- Yield: 1 loaf
- Dietary Type: Vegetarian
Ingredients
- 1 cup sourdough starter, fed and ready to use
- 1 cup and 2 tablespoons lukewarm water
- 3 cups whole wheat flour (or 3 cups King Arthur White Whole Wheat Flour)
- 2 tablespoons gluten (optional – helps with texture)
- 1 teaspoon salt
- 1 teaspoon instant yeast
- 2 tablespoons vegetable oil
Equipment Needed
- Large mixing bowl
- Measuring cups and spoons
- 9″ x 5″ loaf pan
- Clean kitchen towel
- Baking sheet or pizza stone
- Parchment paper (optional)
- Digital thermometer
Instructions
-
In a large mixing bowl, combine the sourdough starter, lukewarm water, whole wheat flour, gluten (if using), salt, instant yeast, and vegetable oil. Mix until a shaggy dough forms. The dough will seem quite sticky at this stage, which is normal for a high-hydration whole wheat bread.
-
Let the dough rest, covered with a damp cloth or plastic wrap, for 20 minutes. This process, called autolysing, allows the flour to fully hydrate, resulting in a better texture in the final loaf.
-
After the rest period, knead the dough on a lightly floured surface for 8-10 minutes, or until it becomes fairly smooth and slightly sticky. You can also use a stand mixer with a dough hook for this step. Be patient; whole wheat dough can be a bit more stubborn than white flour dough.
-
Place the dough in a lightly greased bowl, turning to coat. Cover the bowl with plastic wrap or a damp cloth, and let it rise in a warm place until almost doubled in size, about 60 to 90 minutes. The rising time will vary depending on the temperature of your kitchen and the strength of your starter.
-
Gently fold the dough over a few times on a lightly floured work surface to redistribute the gases and strengthen the gluten.
-
Shape the dough into an 8″ log and place it in a greased 9″ x 5″ loaf pan.
-
Cover the loaf pan with plastic wrap or a damp cloth and let it rise until it’s crowned about 1″ over the rim of the pan, approximately 60 to 90 minutes. This is the final proofing stage, so make sure the dough has enough room to expand in the oven.
-
Towards the end of the rising time, preheat the oven to 350°F (175°C).
-
Bake the bread for 40 to 45 minutes, or until the loaf is golden brown and a digital thermometer inserted into the center registers 205°F to 210°F (96°C to 99°C). If the top of the loaf is browning too quickly, you can tent it with aluminum foil.
-
Remove the bread from the oven and let it sit in the pan for 5 minutes, then turn it out onto a rack to cool completely before slicing. This prevents the bread from becoming gummy.
-
For a more artisan-style loaf with a crispier crust, you can also bake this sourdough freeform: Shape the dough into a rough oval and gently wrap it in a clean, floured dishtowel. Allow to rise about 60-90 minutes.
-
After about 60 minutes, place a flat aluminum baking tray, baking stone, or large seasoned cast iron skillet in the oven. Preheat the oven to 450°F (232°C) and continue preheating the baking surface for 20 minutes or so.
-
Dust the hot baking sheet/stone with cornmeal. Then carefully roll the risen dough out of the towel and onto the baking sheet/stone. Score the top of the loaf with a sharp knife or lame. This allows the bread to expand properly in the oven and creates a beautiful aesthetic.
-
Bake at 450°F (232°C) for approximately 15 minutes, then lower the temperature to 400°F (204°C) and bake for another 15 minutes, or until the temperature inside the loaf measures about 200°F (93°C).
-
Let cool completely on a wire rack before slicing and serving.
-
Enjoy!
Expert Tips & Tricks
- Sourdough Starter is Key: The quality of your sourdough starter will directly impact the flavor and rise of your bread. Make sure your starter is active and bubbly before using it.
- Gluten is Your Friend: Whole wheat flour can sometimes produce a denser loaf. Adding gluten helps to improve the texture and rise.
- Adjust Hydration: The amount of water needed may vary depending on the humidity and the type of whole wheat flour you use. Start with the specified amount and adjust as needed to create a dough that is slightly sticky but manageable.
- Scoring Matters: Properly scoring the loaf before baking is crucial for controlling expansion and preventing unsightly cracks. Use a sharp knife or lame for a clean cut.
- Oven Temperature is Critical: Ensure your oven is properly preheated before baking. An accurate oven thermometer is a worthwhile investment.
Serving & Storage Suggestions
This whole wheat sourdough is delicious on its own, toasted with butter, or used for sandwiches. It pairs well with soups, salads, and cheeses.
- Storage: Store the cooled loaf in a bread bag or airtight container at room temperature for up to 3 days. For longer storage, slice the bread and freeze it for up to 2 months.
- Reheating: To refresh stale bread, lightly dampen the crust and bake in a preheated oven at 350°F (175°C) for 5-10 minutes.
- Freezing: Slice the bread before freezing for easy access to individual portions. Reheat frozen slices in a toaster or oven.
Nutritional Information
Please note that the following values are estimates and can vary based on specific ingredients and portion sizes.
| Nutrient | Amount per Serving | % Daily Value |
|---|---|---|
| Calories | 102 kcal | 5% |
| Total Fat | 2.6g | 3% |
| Saturated Fat | 0.3g | 2% |
| Cholesterol | 0mg | 0% |
| Sodium | 160mg | 7% |
| Total Carbohydrate | 18g | 7% |
| Dietary Fiber | 2.7g | 11% |
| Sugars | 0.1g | 0% |
| Protein | 3.4g | 7% |
Variations & Substitutions
- Spelt Sourdough: Substitute spelt flour for the whole wheat flour for a slightly sweeter and nuttier flavor.
- Rye Sourdough: Add a portion of rye flour (up to 50%) for a more complex and earthy taste.
- Seeded Sourdough: Incorporate seeds such as sunflower, pumpkin, or sesame into the dough for added texture and flavor.
- Herb Sourdough: Mix in fresh or dried herbs such as rosemary, thyme, or oregano for an aromatic twist.
- Sweet Sourdough: Add a touch of honey or maple syrup for a subtly sweet loaf, perfect for breakfast toast.
FAQs (Frequently Asked Questions)
Q: My sourdough starter isn’t very active. What can I do?
A: Make sure you’re feeding your starter regularly with equal parts flour and water. A warmer environment can also help boost its activity.
Q: Why is my whole wheat sourdough so dense?
A: Whole wheat flour contains more bran, which can inhibit gluten development. Using vital wheat gluten, allowing for sufficient rise time, and avoiding over-kneading can help.
Q: Can I use all-purpose flour instead of whole wheat flour?
A: Yes, but the flavor and nutritional profile will be different. You may need to adjust the hydration as all-purpose flour absorbs water differently.
Q: My bread is browning too quickly. What should I do?
A: Tent the loaf with aluminum foil during the last 15-20 minutes of baking to prevent excessive browning.
Q: How do I know when my sourdough is done baking?
A: The best way is to use a digital thermometer. The internal temperature should reach 205-210°F (96-99°C). The loaf should also sound hollow when tapped on the bottom.
Final Thoughts
This whole wheat sourdough recipe is more than just a set of instructions; it’s an invitation to connect with the age-old tradition of bread making. The simple act of nurturing a sourdough starter, patiently kneading the dough, and watching the loaf rise in the oven is incredibly rewarding. Don’t be afraid to experiment with variations and make this recipe your own. I encourage you to bake this loaf, share it with loved ones, and experience the simple joy of homemade sourdough. Your kitchen will thank you, and your taste buds will sing!