
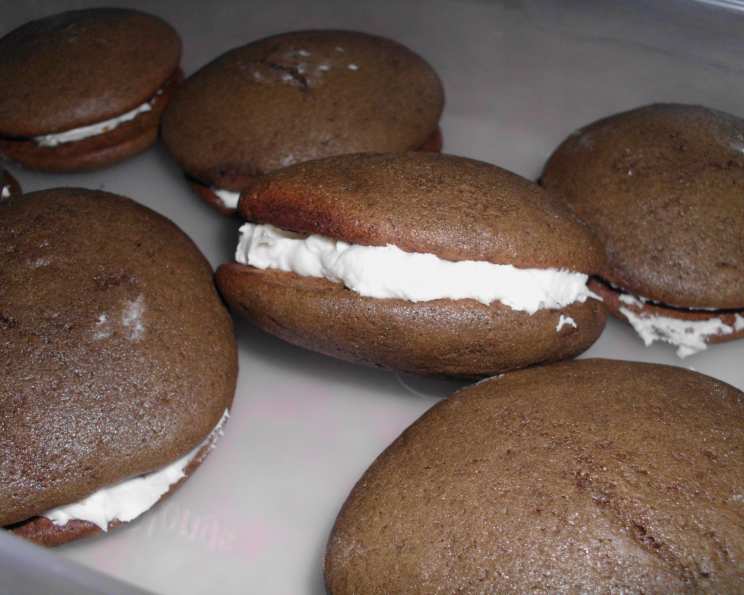
Whoopie Pies: A Taste of Childhood
The first time I encountered a whoopie pie, I was at a small-town bake sale in rural Pennsylvania. Nestled among the chocolate chip cookies and frosted cupcakes were these intriguing, plump, almost comically oversized sandwich cookies. One bite, and I was hooked. The tender, cakey chocolate rounds, paired with the sweet, creamy filling, were pure comfort, a sweet symphony that transported me back to simpler times. This recipe brings me right back to that day, a reminder of small-town charm and big, delicious flavors.
Recipe Overview
- Prep Time: 20 minutes
- Cook Time: 10-12 minutes
- Total Time: 35 minutes
- Yields: 15 pies
- Serves: 15
- Dietary Type: Vegetarian
Ingredients
For the Cakes:
- 2/3 cup vegetable shortening
- 1 cup sugar
- 2 large eggs
- 2 1/2 cups flour
- 1/2 cup Dutch-processed cocoa powder
- 1 1/2 teaspoons baking soda
- 1/2 teaspoon salt
- 1/4 teaspoon cream of tartar
- 1 cup milk
- 1 1/2 teaspoons vanilla extract
For the Filling:
- 1/4 cup butter, softened
- 1 teaspoon vanilla extract
- 3 cups sifted confectioners’ sugar
- 1/4 teaspoon salt
- 4 tablespoons milk
Equipment Needed
- Stand mixer or hand mixer
- Large mixing bowls
- Measuring cups and spoons
- Sifter
- Cookie sheets
- Parchment paper
- Spatula
- Wire rack
Instructions
-
Preheat your oven to 375°F (190°C). Line your cookie sheets with parchment paper. This prevents sticking and makes cleanup a breeze.
-
In a large mixing bowl, cream together the 2/3 cup vegetable shortening and 1 cup sugar using a stand mixer or hand mixer on medium speed. Beat until the mixture is light and fluffy, about 2-3 minutes.
-
Add the 2 large eggs to the creamed mixture, one at a time, beating well after each addition. Ensure each egg is fully incorporated before adding the next to maintain a smooth batter.
-
In a separate bowl, sift together 2 1/2 cups flour, 1/2 cup Dutch-processed cocoa powder, 1 1/2 teaspoons baking soda, 1/2 teaspoon salt, and 1/4 teaspoon cream of tartar. Sifting ensures that there are no lumps in the batter.
-
In a measuring cup, combine 1 cup milk and 1 1/2 teaspoons vanilla extract. Set aside.
-
Gradually add the dry ingredients to the wet ingredients in the mixing bowl, alternating with the milk mixture. Begin and end with the dry ingredients. Mix on low speed until just combined, being careful not to overmix. Overmixing can lead to tough cakes. Mix well after each addition.
-
Drop tablespoons of the batter onto the prepared cookie sheets, leaving about 2 inches between each dollop. The batter should be thick enough to hold its shape.
-
Bake in the preheated oven for 10-12 minutes, or until the cakes are puffed and firm to the touch. A toothpick inserted into the center should come out clean, though a few moist crumbs are acceptable. Do not overbake, as this can result in dry whoopie pies.
-
Remove the cookie sheets from the oven and let the cakes cool on the cookie sheets for a few minutes before transferring them to a wire rack to cool completely.
-
While the cakes are cooling, prepare the filling. In a separate mixing bowl, cream together 1/4 cup softened butter, 1 teaspoon vanilla extract, 3 cups sifted confectioners’ sugar, and 1/4 teaspoon salt.
-
Gradually add 4 tablespoons milk, one tablespoon at a time, until the filling reaches a spreadable consistency. You may need slightly more or less milk depending on the humidity and the consistency of your butter.
-
Once the cakes are completely cool, assemble the whoopie pies. Spread a generous amount of filling on the flat side of one cake and top with another cake, flat side down. Gently press the two cakes together to create a sandwich.
Expert Tips & Tricks
- Use Dutch-processed cocoa powder: This type of cocoa powder has a richer, smoother flavor and a darker color, which will result in a more decadent whoopie pie.
- Don’t overmix the batter: Overmixing develops the gluten in the flour, leading to tough cakes. Mix until just combined.
- For even baking, use an oven thermometer: Ovens can vary in temperature, so using an oven thermometer ensures that your whoopie pies are baking at the correct temperature.
- Cool the cakes completely before filling: Warm cakes can melt the filling, resulting in a messy whoopie pie.
- Make the filling ahead of time: The filling can be made a day or two in advance and stored in an airtight container in the refrigerator. Let it come to room temperature before using.
- For a more intense chocolate flavor, add a teaspoon of instant espresso powder to the dry ingredients.
- Adjust the filling to your liking: If you prefer a less sweet filling, reduce the amount of confectioners’ sugar. For a tangier filling, add a tablespoon of cream cheese.
Serving & Storage Suggestions
Serve your whoopie pies immediately or store them in an airtight container at room temperature for up to 2 days. For longer storage, keep them in the refrigerator for up to a week. You can also freeze them for up to 2 months. To thaw, simply place them in the refrigerator overnight.
Whoopie pies are delightful on their own, but they also pair well with a glass of cold milk, a cup of hot coffee, or even a scoop of vanilla ice cream. They are perfect for bake sales, potlucks, or a simple afternoon treat.
Nutritional Information
| Nutrient | Amount per Serving | % Daily Value |
|---|---|---|
| Calories | 359.7 kcal | N/A |
| Calories from Fat | 127 g | 35% |
| Total Fat | 14.2 g | 21% |
| Saturated Fat | 5.5 g | 27% |
| Cholesterol | 35.8 mg | 11% |
| Sodium | 290.3 mg | 12% |
| Total Carbohydrate | 56 g | 18% |
| Dietary Fiber | 1.5 g | 6% |
| Sugars | 37 g | 148% |
| Protein | 4.2 g | 8% |
Note: Nutritional information is an estimate and may vary based on specific ingredients and portion sizes.
Variations & Substitutions
- Gluten-Free Whoopie Pies: Substitute the all-purpose flour with a gluten-free all-purpose flour blend. You may need to add a binder like xanthan gum for better texture.
- Peanut Butter Filling: Replace the butter in the filling with peanut butter for a peanut butter-flavored filling.
- Maple Filling: Use maple extract instead of vanilla extract in the filling and add a tablespoon of maple syrup for a maple-flavored filling.
- Seasonal Flavors: Add pumpkin puree and pumpkin pie spice to the cake batter for pumpkin whoopie pies in the fall. Add peppermint extract to the filling for peppermint whoopie pies during the holidays.
- Cream Cheese Filling: Use half butter and half cream cheese for a tangy filling.
FAQs (Frequently Asked Questions)
Q: Can I use salted butter instead of unsalted butter in the filling?
A: Yes, but omit the 1/4 teaspoon of salt from the filling recipe to avoid overly salty whoopie pies.
Q: Can I make the batter ahead of time?
A: It’s best to bake the whoopie pies right after mixing the batter, as the baking soda starts to react as soon as it’s mixed with the wet ingredients. If you must make it ahead, store the batter in the refrigerator for no more than 2 hours.
Q: How do I know when the whoopie pies are done?
A: The whoopie pies are done when they are puffed and firm to the touch. A toothpick inserted into the center should come out clean, though a few moist crumbs are acceptable.
Q: My whoopie pies are flat. What did I do wrong?
A: Flat whoopie pies can be caused by overmixing the batter, using too much liquid, or not using enough leavening. Make sure to measure your ingredients accurately and avoid overmixing the batter.
Q: Can I freeze whoopie pies?
A: Yes, you can freeze whoopie pies for up to 2 months. Wrap them individually in plastic wrap and then place them in an airtight container or freezer bag. Thaw in the refrigerator overnight.
Final Thoughts
These whoopie pies are more than just a dessert; they’re a slice of nostalgia, a reminder of simpler times and homemade goodness. Don’t be intimidated by the list of ingredients – the process is straightforward, and the results are well worth the effort. Whether you’re baking for a crowd or just yourself, I encourage you to give this recipe a try. Share your creations with friends and family, and let the smiles that follow be your reward. Enjoy!