
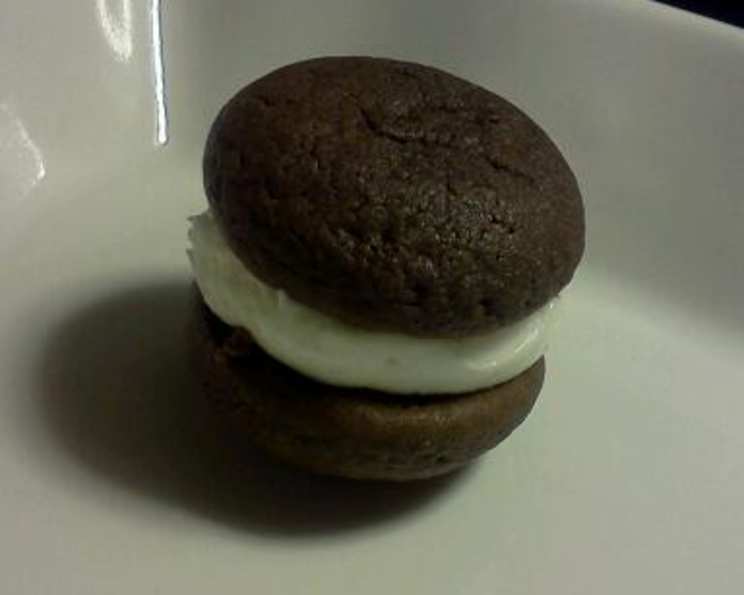
Whoopie Pies: The Soft Sandwich Cookie of Childhood Dreams
My grandmother, a true matriarch of the kitchen, had a mysterious metal tin she reserved for only the most special occasions. It was always cool to the touch, even on the warmest summer days. Inside, nestled between layers of parchment paper, were these glorious, cloud-like chocolate cushions embracing a sweet, creamy filling. We called them “Happy Cakes” then, but I know now they were Whoopie Pies. That first bite was pure magic, the soft chocolate yielding to the sweet vanilla, a taste of pure joy that instantly transported me to a place of warmth and love. I’ve strived to recreate that magic ever since, tweaking and perfecting this recipe to bring that same happiness to my own family.
Recipe Overview:
- Prep Time: 20 minutes
- Cook Time: 7 minutes
- Total Time: 27 minutes
- Yields: 3 dozen cookies / 1.5 dozen Whoopie Pies
- Serves: 13
- Dietary Type: Comfort Food
Ingredients:
For the Cookies:
- 1 cup shortening
- 2 cups white sugar
- 2 eggs
- 1 cup buttermilk
- 1 1/2 teaspoons vanilla extract
- 4 cups all-purpose flour
- 2 teaspoons baking soda
- 1 teaspoon salt
- 1 cup unsweetened cocoa powder
- 1 cup warm water
For the Filling:
- 1/2 cup shortening
- 1 cup butter, softened
- 4 cups powdered sugar
- 1/4 cup heavy whipping cream
- 1 teaspoon vanilla extract
Equipment Needed:
- Mixing bowls
- Electric mixer (stand or hand-held)
- Measuring cups and spoons
- Baking sheets
- Parchment paper or silicone baking mats
- Cookie scoop or spoon
- Spatula
Instructions:
-
Preheat your oven to 400°F (200°C). This higher temperature helps create the characteristic domed shape of the whoopie pie cookies.
-
In a large mixing bowl, cream together the shortening and white sugar using an electric mixer until light and fluffy. This step is crucial for achieving a tender cookie.
-
Add the eggs, one at a time, mixing well after each addition. Ensure each egg is fully incorporated into the creamed mixture before adding the next.
-
Incorporate the buttermilk and vanilla extract into the wet ingredients. Blend until just combined. Be careful not to overmix at this stage.
-
In a separate bowl, whisk together the all-purpose flour, baking soda, salt, and cocoa powder. This ensures even distribution of the dry ingredients.
-
Gradually add the dry ingredients to the wet ingredients, mixing on low speed until just combined. Avoid overmixing, which can lead to tough cookies.
-
Slowly pour in the warm water and mix until the batter is smooth and uniform. The warm water helps to bloom the cocoa powder, intensifying its flavor.
-
Prepare your baking sheets by lining them with parchment paper or silicone baking mats. This prevents the cookies from sticking and makes cleanup a breeze.
-
Drop spoonfuls of batter onto the prepared baking sheets, leaving about 2 inches of space between each cookie. The cookies should be about the size of a 50-cent piece (approximately 2 inches in diameter). A cookie scoop works great for ensuring uniform size.
-
Bake in the preheated oven for 7 minutes. Watch closely; the cookies are done when they spring back lightly to the touch and the tops are set. If you don’t have a thick baking sheet, use the upper racks in the oven to prevent burning on the bottom.
-
Remove the cookies from the oven and let them cool on the baking sheets for a few minutes before transferring them to a wire rack to cool completely.
-
Prepare the filling: In a large mixing bowl, combine the softened butter and shortening with an electric mixer until smooth and creamy.
-
Gradually add the powdered sugar, mixing on low speed until incorporated. Increase the speed to medium and beat until light and fluffy.
-
Pour in the heavy whipping cream and vanilla extract, and continue to beat until the filling is smooth and creamy.
-
Assemble the whoopie pies: Once the cookies are completely cooled, spread a generous amount of filling on the flat side of one cookie and top with another cookie, flat side down, to create a sandwich.
-
Repeat with the remaining cookies and filling.
Expert Tips & Tricks:
- Don’t overmix the batter: Overmixing develops the gluten in the flour, resulting in tough cookies. Mix only until the ingredients are just combined.
- Use room temperature ingredients: Room temperature butter, shortening, and eggs emulsify better, creating a smoother batter and a more tender cookie.
- Chill the filling (optional): For a firmer filling, refrigerate it for 30 minutes before assembling the whoopie pies.
- For a more intense chocolate flavor: Use dark cocoa powder.
- Prevent spreading: If your cookies are spreading too much, chill the batter for 30 minutes before scooping.
- Don’t have buttermilk?: Use a tablespoon of lemon juice or white vinegar in regular milk to substitute buttermilk.
Serving & Storage Suggestions:
Whoopie pies are best served at room temperature. They make a delightful dessert for parties, potlucks, or a simple family treat.
- Serving: Arrange whoopie pies on a platter or cake stand for an attractive presentation. Dust with powdered sugar for an extra touch of elegance.
- Storage: Store assembled whoopie pies in an airtight container in the refrigerator for up to 3 days.
- Freezing: You can freeze assembled whoopie pies for up to 2 months. Wrap them individually in plastic wrap before placing them in a freezer-safe container. Thaw in the refrigerator before serving.
- Cookie Storage: You can freeze the cookies by themselves as well.
Nutritional Information:
| Nutrient | Amount per Serving | % Daily Value |
|---|---|---|
| Calories | 788.8 kcal | N/A |
| Calories from Fat | 375g | 48% |
| Total Fat | 41.7 g | 64% |
| Saturated Fat | 16.9 g | 84% |
| Cholesterol | 73.2 mg | 24% |
| Sodium | 533.5 mg | 22% |
| Total Carbohydrate | 102 g | 33% |
| Dietary Fiber | 3.2 g | 12% |
| Sugars | 68.1 g | 272% |
| Protein | 7.1 g | 14% |
Note: Nutritional information is an estimate and may vary based on specific ingredients and portion sizes.
Variations & Substitutions:
- Gluten-Free Whoopie Pies: Substitute a gluten-free all-purpose flour blend for the regular flour. You may need to add a binder, such as xanthan gum, to help with the texture.
- Pumpkin Whoopie Pies: Add 1 cup of pumpkin puree to the cookie batter and adjust the spices (cinnamon, nutmeg, ginger) to taste.
- Chocolate Chip Whoopie Pies: Fold 1 cup of chocolate chips into the cookie batter.
- Peanut Butter Filling: Substitute peanut butter for half of the butter in the filling for a delicious peanut butter flavor.
- Maple Cream Filling: Use maple extract in place of vanilla and a tablespoon of maple syrup to the buttercream.
FAQs (Frequently Asked Questions):
Q: Why are my whoopie pies flat?
A: This could be due to overmixing the batter, using too much liquid, or not having the oven hot enough. Make sure to follow the recipe closely and avoid overmixing.
Q: Can I make the cookie dough ahead of time?
A: Yes, you can refrigerate the cookie dough for up to 24 hours. Let it come to room temperature slightly before scooping and baking.
Q: What’s the best way to fill the whoopie pies?
A: You can use a piping bag for a neat and even filling, or simply spread the filling with a spatula.
Q: My filling is too soft. What can I do?
A: Add more powdered sugar, a tablespoon at a time, until the desired consistency is reached. You can also chill the filling in the refrigerator for a firmer texture.
Q: Can I use a different type of milk in the cookie batter?
A: Yes, you can substitute regular milk or almond milk for the buttermilk, but the buttermilk adds a slight tang that enhances the flavor.
Final Thoughts:
These Whoopie Pies are more than just a dessert; they’re a reminder of simpler times, of the warmth of home, and the joy of sharing something delicious with loved ones. I encourage you to try this recipe and experience the magic for yourself. Don’t be afraid to experiment with variations and make them your own. And most importantly, share your creations with others and spread the happiness one soft, sweet sandwich cookie at a time. Maybe one day, it will remind you of your grandma!