
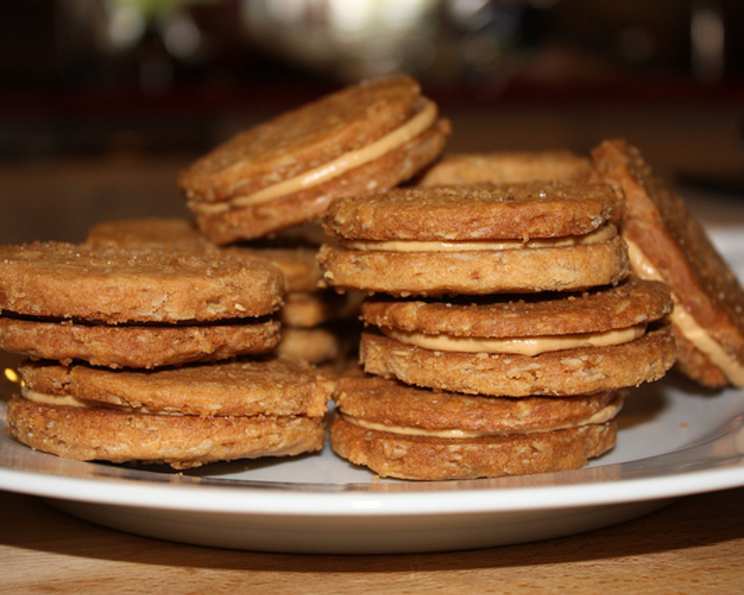
Wichcraft Peanut Butter Cream’wich Cookies: A Nostalgic Treat
My grandmother, a woman who believed every problem could be solved with a little butter and sugar, had a cookie jar that was legendary. It wasn’t just the sheer volume of treats within, but the stories each cookie seemed to hold. While chocolate chip was the constant favorite, it was the peanut butter sandwich cookies, soft and yielding, that held a special place in my heart. One bite transported me back to her sunny kitchen, the scent of baking clinging to the air, and the comforting weight of her apron-clad hug. These Wichcraft Peanut Butter Cream’wich Cookies evoke that same feeling – a simple pleasure, perfectly executed, and guaranteed to bring a smile.
Recipe Overview
- Prep Time: 20 minutes
- Cook Time: 20 minutes
- Total Time: 40 minutes
- Servings: 12
- Yield: 24 cookies
- Dietary Type: Vegetarian
Ingredients
For the Cookies:
- 3⁄4 cup unsalted butter (1.5 sticks)
- 1 cup oats, old fashioned rolled
- 1⁄3 cup sugar
- 1⁄2 cup brown sugar (dark)
- 1⁄2 cup peanut butter (creamy)
- 1 cup all-purpose flour
- 2 tablespoons all-purpose flour
- 1 teaspoon baking soda
- 1 teaspoon kosher salt
For the Filling:
- 4 tablespoons unsalted butter, softened
- 1⁄2 teaspoon salt
- 1⁄4 cup confectioners’ sugar
- 3⁄4 cup peanut butter (creamy)
Equipment Needed
- Oven
- Cookie sheets
- Parchment paper
- Cooling rack
- Stand mixer (or hand mixer)
- Mixing bowls
- Measuring cups and spoons
- Rolling pin
- 2.5″ round cookie cutter (or similar)
- Piping bag (optional)
Instructions
-
Preheat your oven to 350°F (175°C). Make sure your oven rack is positioned in the center.
-
Melt 3⁄4 cup butter in a saucepan over medium heat. Once melted, add 1 cup old-fashioned rolled oats. Cook for 5-7 minutes, stirring frequently, until the oats are nicely toasted and fragrant. This step is crucial for adding a nutty depth to the cookies. Be careful not to burn the oats; lower the heat if needed.
-
Pour the toasted oats onto a cookie sheet and spread them out in a thin layer. Allow them to cool completely. This prevents the oats from continuing to cook and becoming too hard.
-
In the bowl of a stand mixer fitted with the paddle attachment (or using a hand mixer in a large bowl), combine the remaining 1/2 cup butter, 1⁄3 cup sugar, and 1⁄2 cup brown sugar. Mix on medium speed until the mixture is smooth and no chunks of butter remain. This step ensures a uniform texture for the cookies.
-
Add 1⁄2 cup peanut butter to the butter and sugar mixture and mix until well combined. Scrape down the sides of the bowl to ensure everything is evenly incorporated.
-
Add the cooled toasted oats to the mixture and blend until just combined. Avoid overmixing at this stage.
-
In a separate bowl, whisk together 1 cup + 2 tablespoons all-purpose flour, 1 teaspoon baking soda, and 1 teaspoon kosher salt. This ensures the leavening agent (baking soda) and salt are evenly distributed throughout the flour.
-
Gradually add the dry ingredients to the wet ingredients, mixing on low speed until just combined. Be careful not to overmix the dough, as this can result in tough cookies. The dough should be smooth.
-
Chill the dough in the freezer for 5 minutes. This helps to firm it up and makes it easier to roll out.
-
Transfer the dough to a large surface covered with parchment paper. Lightly dust the dough with flour to prevent sticking. Top with another large sheet of parchment paper.
-
Roll the dough between the two sheets of parchment paper until it is approximately 1/4 inch thick. Using parchment paper prevents the dough from sticking to the rolling pin and work surface.
-
Cut the dough into 2.5-inch cookies using a round cookie cutter (or a glass or other suitable shape). Space the cookies about 1/2 inch apart on an ungreased cookie sheet.
-
Bake for 20 minutes, turning the pan halfway through baking to ensure even browning. The cookies should be golden brown around the edges and slightly soft in the center.
-
Transfer the baked cookies to a cooling rack and allow them to cool completely.
-
While the cookies are cooling, prepare the filling. In the bowl of a stand mixer (or using a hand mixer), combine 4 tablespoons softened butter, 1⁄2 teaspoon salt, 1⁄4 cup confectioners’ sugar, and 3⁄4 cup peanut butter.
-
Mix on medium speed until the filling is smooth and creamy. Adjust the amount of confectioners’ sugar to your preference for sweetness.
-
Once the cookies are completely cooled, assemble the cream’wiches. Place half of the cookies with the top side down.
-
Using a piping bag fitted with a round tip (or a spoon), distribute the filling evenly onto the flat sides of the cookies.
-
Top with another cookie, pressing down gently to create a sandwich.
Expert Tips & Tricks
- Toasting the oats is essential for the cookies’ flavor. Don’t skip this step!
- If the dough is too sticky to roll out, add a little more flour, one tablespoon at a time, until it reaches a workable consistency.
- For a richer flavor, use natural peanut butter. Just make sure it’s well stirred before measuring.
- If you don’t have a piping bag, use a ziplock bag and snip off one of the corners to create a makeshift piping bag.
- Make the cookie dough ahead of time and store it in the refrigerator for up to 2 days.
- For a smoother filling, ensure the butter is properly softened before mixing. You can even use a stand mixer to whip the butter first, creating an even lighter, airier cream.
- If you want a slightly chewy cookie, underbake them by a minute or two.
Serving & Storage Suggestions
Serve these Peanut Butter Cream’wich Cookies with a cold glass of milk or a warm cup of coffee. They are perfect for afternoon snacks, desserts, or even as a treat in a lunchbox.
Store the cookies in an airtight container at room temperature for up to 3 days. For longer storage, you can refrigerate them for up to a week or freeze them for up to a month. To freeze, wrap the cookies individually in plastic wrap and then place them in a freezer-safe bag or container. Thaw at room temperature before serving.
Nutritional Information
| Nutrient | Amount per Serving | % Daily Value |
|---|---|---|
| Calories | 452.8 kcal | N/A |
| Calories from Fat | 269 g | 59% |
| Total Fat | 29.9 g | 46% |
| Saturated Fat | 12.7 g | 63% |
| Cholesterol | 40.7 mg | 13% |
| Sodium | 524.2 mg | 21% |
| Total Carbohydrate | 39.8 g | 13% |
| Dietary Fiber | 3.3 g | 13% |
| Sugars | 19.4 g | N/A |
| Protein | 10.3 g | 20% |
Note: Nutritional information is an estimate and may vary based on specific ingredients and portion sizes.
Variations & Substitutions
- Gluten-Free: Substitute the all-purpose flour with a gluten-free blend. Make sure to use a blend that contains xanthan gum or another binding agent.
- Different Nut Butters: Experiment with almond butter, cashew butter, or even sunflower seed butter for a different flavor profile.
- Chocolate Chips: Add chocolate chips to the cookie dough or filling for an extra touch of indulgence.
- Maple Syrup: Replace the granulated sugar with maple syrup for a more complex flavor.
- Spiced Cookies: Add a pinch of cinnamon, nutmeg, or ginger to the cookie dough for a warm, spiced flavor.
FAQs (Frequently Asked Questions)
Q: Can I use crunchy peanut butter instead of creamy?
A: Yes, you can use crunchy peanut butter in both the cookies and the filling. It will add a bit of texture to the cookies.
Q: Do I have to chill the dough before rolling it out?
A: Chilling the dough is highly recommended. It makes the dough easier to handle and prevents it from spreading too much during baking.
Q: Can I make the filling ahead of time?
A: Yes, the filling can be made ahead of time and stored in the refrigerator for up to 2 days. Allow it to come to room temperature before using.
Q: The cookies spread too much during baking. What did I do wrong?
A: This can happen if the butter was too soft or if the oven temperature was too low. Make sure your butter is only slightly softened and your oven is properly preheated.
Q: Can I freeze the assembled cookies?
A: Yes, you can freeze the assembled cookies. Wrap them individually in plastic wrap and then place them in a freezer-safe bag or container. Thaw at room temperature before serving.
Final Thoughts
These Wichcraft Peanut Butter Cream’wich Cookies are more than just a recipe; they’re a journey back to simpler times. The combination of toasted oats, peanut butter, and creamy filling creates a truly irresistible treat. Don’t be afraid to experiment with variations and substitutions to make them your own. I encourage you to gather your ingredients, preheat your oven, and create your own batch of these delightful cookies. And please, share your feedback and photos – I’d love to see your creations! Pair them with a tall glass of ice-cold milk for the perfect nostalgic indulgence. Happy baking!