
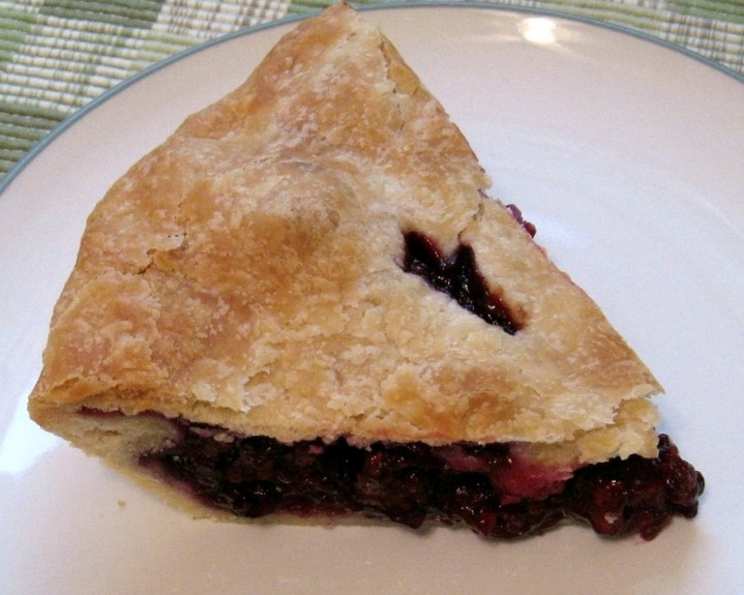
Wild Blackberry or Dewberry Pie: A Taste of Summer
The sun-drenched days of late summer always bring back memories of blackberry expeditions. My grandmother, with her worn straw hat and berry-stained fingers, would lead us through fields thick with thorny bushes, each laden with juicy, dark berries. The sweet-tart aroma filled the air as we carefully plucked the plumpest ones, occasionally sneaking a few into our mouths before they even made it into the basket. Those berries, baked into a warm, comforting pie, were the very essence of summer on a plate – a tradition I’ve cherished and passed down through generations.
Recipe Overview
- Prep Time: 20 minutes
- Cook Time: 50-60 minutes
- Total Time: 1 hour 10 minutes
- Servings: 6
- Yield: 1 pie
- Dietary Type: Vegetarian
Ingredients
- 3/4 cup sugar
- 1/4 teaspoon cinnamon (optional)
- 1/3 cup cornstarch
- 2 tablespoons butter, cut into small pieces
- 1 tablespoon fresh lemon juice
- 4 cups fresh blackberries or 4 cups dewberries
- 1 recipe pastry for a double-crust pie (use your favorite recipe or mine)
Equipment Needed
- 9-inch pie dish
- Large mixing bowl
- Measuring cups and spoons
- Pastry blender or food processor (for crust, if making homemade)
- Rolling pin (for crust, if making homemade)
Instructions
-
Preheat your oven to 425 degrees Fahrenheit (220 degrees Celsius). It’s crucial to have a hot oven to ensure a crispy, golden crust.
-
Prepare your pie crust. You can use your preferred recipe or a store-bought crust. If making your own, ensure it’s chilled well before rolling it out. This will help prevent shrinkage during baking.
-
In a large mixing bowl, combine the blackberries (or dewberries), sugar, and cinnamon (if using). Gently toss to coat the berries evenly with the sugar and spice mixture. Be careful not to crush the berries during this process.
-
Add the cornstarch to the berry mixture. Lightly mix until the cornstarch is well distributed. The cornstarch acts as a thickening agent, preventing the pie filling from becoming too runny.
-
Carefully pour the berry filling into the pastry-lined pie pan. Distribute the filling evenly across the bottom crust.
-
Sprinkle the fresh lemon juice evenly over the filling. The lemon juice adds a touch of brightness and complements the sweetness of the berries.
-
Dot the top of the berry filling with the butter pieces. The butter will melt during baking, adding richness and flavor to the filling.
-
Cover the filling with the top pie crust. Trim any excess crust off around the pie’s edge, leaving about an inch of overhang.
-
Seal the edges of the top and bottom crusts. You can do this by crimping the edges with a fork or using your fingers to create a decorative pattern. A well-sealed crust will prevent the filling from leaking out during baking.
-
Cut several slits in the top pie crust. These slits allow steam to escape during baking, preventing the crust from becoming soggy.
-
Bake for 50-60 minutes, or until the crust is golden brown and the juice begins to bubble through the slits in the crust. Keep a close eye on the pie during the last 15-20 minutes of baking. If the crust starts to brown too quickly, you can tent it with aluminum foil to prevent burning.
-
Remove the pie from the oven and place it on a wire rack to cool completely before slicing. This is essential to allow the filling to set properly. Cutting into a warm pie will result in a runny mess. Patience is key!
Expert Tips & Tricks
- Berry Selection: Fresh, ripe berries are essential for the best flavor. Avoid berries that are mushy or moldy. If using frozen berries, thaw them completely and drain off any excess liquid before using them in the filling.
- Crust Perfection: For a perfectly flaky crust, use cold butter and ice water when making your own. Don’t overwork the dough, and chill it thoroughly before rolling it out.
- Preventing a Soggy Bottom Crust: To prevent a soggy bottom crust, you can blind-bake the bottom crust for about 15 minutes before adding the filling. This will help to crisp it up.
- Thickening the Filling: If you prefer a thicker filling, you can increase the amount of cornstarch to 1/2 cup. However, be careful not to add too much, as it can give the filling a gummy texture.
- Egg Wash for Shine: Before baking, brush the top crust with an egg wash (1 egg beaten with 1 tablespoon of water or milk). This will give the crust a beautiful golden sheen.
- Make Ahead: The filling can be prepared a day in advance and stored in the refrigerator. The pie crust can also be made ahead and stored in the refrigerator or freezer.
Serving & Storage Suggestions
Serve the pie at room temperature or slightly warm. A scoop of vanilla ice cream or a dollop of whipped cream is the perfect complement to the sweet-tart flavor of the blackberry pie.
Leftover pie can be stored at room temperature for up to 2 days or in the refrigerator for up to 4 days. To reheat, warm the pie in a preheated oven at 350 degrees Fahrenheit (175 degrees Celsius) for about 10-15 minutes, or until heated through.
For longer storage, the pie can be frozen for up to 3 months. Wrap the pie tightly in plastic wrap and then in aluminum foil. To thaw, place the pie in the refrigerator overnight or at room temperature for several hours. Reheat as directed above.
Nutritional Information
| Nutrient | Amount per Serving | % Daily Value |
|---|---|---|
| Calories | 515.9 kcal | N/A |
| Calories from Fat | N/A | 44% |
| Total Fat | 25.1 g | 38% |
| Saturated Fat | 7.6 g | 38% |
| Cholesterol | 10.2 mg | 3% |
| Sodium | 354.1 mg | 14% |
| Total Carbohydrate | 69.4 g | 23% |
| Dietary Fiber | 6.2 g | 24% |
| Sugars | 29.8 g | N/A |
| Protein | 5.2 g | 10% |
Note: Nutritional information is an estimate and may vary based on specific ingredients and serving sizes.
Variations & Substitutions
- Gluten-Free: Use a gluten-free pie crust recipe or a store-bought gluten-free crust.
- Vegan: Use a vegan pie crust recipe and substitute the butter with a vegan butter substitute.
- Spice Variations: Experiment with different spices, such as nutmeg, allspice, or cardamom.
- Mixed Berry Pie: Combine blackberries with other berries, such as raspberries, blueberries, or strawberries.
- Crumb Topping: Instead of a top crust, try a crumb topping made with flour, butter, sugar, and oats.
FAQs (Frequently Asked Questions)
Q: Can I use frozen blackberries or dewberries?
A: Yes, you can use frozen berries. Thaw them completely and drain off any excess liquid before using. You might need to increase the amount of cornstarch slightly to compensate for the extra moisture.
Q: My pie crust always shrinks during baking. What am I doing wrong?
A: Crust shrinkage is usually caused by overworking the dough or using too much water. Make sure to use cold butter and ice water, and don’t overmix the dough. Chilling the dough before rolling it out can also help.
Q: How can I tell when the pie is done?
A: The pie is done when the crust is golden brown and the juice begins to bubble through the slits in the crust. You can also insert a toothpick into the filling – it should come out slightly thickened, not watery.
Q: My pie filling is too runny. How can I fix it?
A: If the filling is too runny, you can try baking the pie for a longer period of time or increasing the amount of cornstarch in the filling next time.
Q: Can I freeze the baked pie?
A: Yes, you can freeze the baked pie. Wrap it tightly in plastic wrap and then in aluminum foil. Thaw overnight in the refrigerator before serving.
Final Thoughts
This Wild Blackberry or Dewberry Pie is more than just a dessert; it’s a celebration of summer’s bounty and a connection to cherished memories. Whether you gather your own berries or purchase them from the store, I encourage you to try this recipe and experience the joy of a homemade pie. Feel free to experiment with different spices or variations to create your own signature version. And don’t forget to share your creation with loved ones – because good food is always best enjoyed together! Pair it with a glass of sweet iced tea for the ultimate summer treat. Enjoy!