
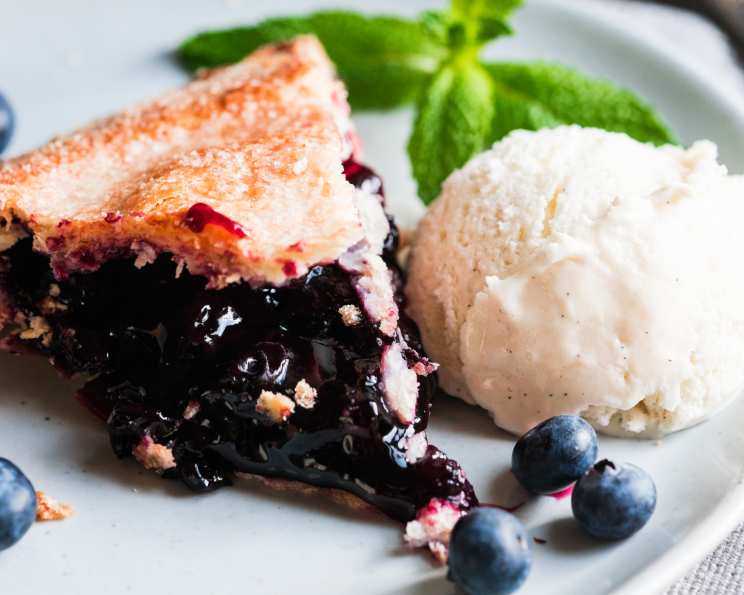
Wild Huckleberry Pie: A Taste of the Mountains
The memory is as vivid as the purple stain left on my fingers: sun-drenched afternoons spent with my grandmother, hiking through the dense forests of the Pacific Northwest. We’d clamber over fallen logs and carefully navigate the undergrowth, our eyes peeled for the telltale signs of wild huckleberries. The thrill of discovering a bush laden with those tiny, tart jewels was unparalleled, a treasure hunt culminating in the sweetest reward – a slice of my grandmother’s legendary huckleberry pie. That first bite, the explosion of flavor, is forever etched in my culinary soul.
Recipe Overview
- Prep Time: 30 minutes
- Cook Time: 45-55 minutes
- Total Time: 1 hour 15 minutes
- Servings: 12
- Yield: 1 pie
- Dietary Type: Vegetarian
Ingredients
- 5 cups northwest wild blue huckleberries
- 1 1/2 cups sugar
- 5 tablespoons cornstarch
- 4 tablespoons tapioca
- 1 teaspoon grated lemon rind (fresh)
- 3 tablespoons butter
- Double pie crust recipe (enough for a bottom and top crust) – Use your favorite recipe or a store-bought option.
Equipment Needed
- 9-inch pie dish
- Large mixing bowl
- Measuring cups and spoons
- Grater for lemon rind
- Oven
- Cooling rack
Instructions
-
First, prepare your pie crust. Whether you are making it from scratch or using a pre-made crust, ensure you have enough for both the bottom and top of your pie. Gently press the bottom crust into your 9-inch pie dish, ensuring it fits snugly against the bottom and sides.
-
In a large mixing bowl, combine the huckleberries, sugar, cornstarch, tapioca, and grated lemon rind. The tapioca and cornstarch act as thickening agents to prevent a runny pie filling. Stir the ingredients thoroughly with a spoon until everything is evenly distributed and the huckleberries are coated.
-
Carefully pour the huckleberry mixture into the prepared pie crust, spreading it evenly across the bottom.
-
Dot the top of the huckleberry mixture with 2 or 3 small dabs of butter. This will add richness and flavor to the filling as it bakes.
-
Carefully place the second pie crust (the top crust) over the huckleberry filling.
-
Once the top crust is correctly positioned, you should have approximately a 1-inch overlap. This overlap will be essential for crimping and sealing the pie.
-
Crimp or pinch the two crusts together, creating a decorative edge to seal the pie. This prevents the filling from leaking out during baking. You can use a fork to press the edges together, or create a more elaborate crimped design with your fingers.
-
At this point, the pie can be refrigerated until you are ready to bake it, or you can bake it immediately. If refrigerating, it can be baked within 24 hours.
-
To bake, preheat your oven to 450 degrees Fahrenheit.
-
Place the pie on the middle rack of your preheated oven and bake for 15 minutes. This initial high temperature helps to set the crust quickly and prevent a soggy bottom.
-
After 15 minutes, reduce the oven temperature to 350 degrees Fahrenheit and continue baking for 30-40 minutes, or until the filling starts to bubble over and the crust is a light golden brown. Keep a close eye on the pie during this stage to prevent the crust from burning. If the crust starts to brown too quickly, you can loosely tent it with foil.
-
Once the pie looks done and the crust has achieved a light golden-brown color, carefully remove it from the oven.
-
Place the baked pie on a cooling rack and let it cool completely before serving. This allows the filling to set properly and prevents it from being too runny when you slice it.
Expert Tips & Tricks
- Huckleberry Selection: Freshly picked, ripe huckleberries are ideal, but frozen huckleberries work well too. If using frozen berries, do not thaw them before mixing with the other ingredients. This will help prevent the filling from becoming too watery.
- Crust Perfection: For a perfectly golden crust, brush the top of the pie with an egg wash (1 egg beaten with 1 tablespoon of water) before baking. You can also sprinkle a little sugar over the top for extra sweetness and shine. Cut a few slits in the top crust to allow steam to escape during baking, preventing the crust from puffing up unevenly.
- Preventing a Soggy Bottom Crust: To prevent a soggy bottom crust, blind bake the bottom crust for 10 minutes before adding the filling. Let it cool slightly before filling. Another technique is to place a baking sheet in the oven while it preheats and place the pie directly on the hot baking sheet. This helps to crisp the bottom crust.
- Thickening Insurance: If you are concerned about the filling being too runny, you can add an extra tablespoon of cornstarch or tapioca. Alternatively, you can use clear jel instead.
- Lemon Zest Boost: Don’t skip the lemon zest! It brightens the huckleberry flavor and adds a subtle citrus note that complements the tartness of the berries.
Serving & Storage Suggestions
Serve your wild huckleberry pie warm or at room temperature. A scoop of vanilla ice cream or a dollop of whipped cream is the perfect accompaniment.
- Room Temperature: The pie can be stored at room temperature for up to 2 days.
- Refrigerator: To store the pie for longer, refrigerate it for up to 4 days. Cover the pie loosely with plastic wrap or foil to prevent it from drying out.
- Freezer: For long-term storage, freeze the pie for up to 3 months. Wrap the pie tightly in plastic wrap, then in foil, to prevent freezer burn. Thaw the pie in the refrigerator overnight before serving. To reheat, bake in a preheated oven at 350 degrees Fahrenheit for 15-20 minutes, or until warmed through.
Nutritional Information
| Nutrient | Amount per Serving | % Daily Value |
|---|---|---|
| Calories | 146 kcal | 7% |
| Total Fat | 2.9 g | 4% |
| Saturated Fat | 1.8 g | 9% |
| Cholesterol | 7.6 mg | 2% |
| Sodium | 25.9 mg | 1% |
| Total Carbohydrate | 30.9 g | 10% |
| Dietary Fiber | 0.1 g | 0% |
| Sugars | 25.1 g | – |
| Protein | 0.1 g | 0% |
Note: Nutritional information is an estimate and may vary based on specific ingredients and preparation methods.
Variations & Substitutions
- Gluten-Free Crust: Use a gluten-free pie crust recipe or a store-bought gluten-free crust.
- Different Berries: While huckleberries are the star of this pie, you can substitute other berries such as blueberries, raspberries, or blackberries, or even a mix. Keep in mind that the sweetness level of different berries may vary, so you may need to adjust the amount of sugar accordingly.
- Spice it up: Add a pinch of cinnamon or nutmeg to the huckleberry filling for a warm, spiced flavor.
- Vegan Option: Substitute the butter with a vegan butter alternative or shortening in both the filling and the crust.
FAQs (Frequently Asked Questions)
Q: Can I use frozen huckleberries?
A: Yes, frozen huckleberries work perfectly well. Do not thaw them before mixing them with the other filling ingredients.
Q: How can I prevent my pie crust from burning?
A: If the crust starts to brown too quickly, loosely tent it with foil during the last 15-20 minutes of baking.
Q: My pie filling is too runny. What can I do?
A: Next time, you can add an extra tablespoon of cornstarch or tapioca to the filling. Make sure the pie cools completely before slicing.
Q: Can I make the pie ahead of time?
A: Yes, you can assemble the pie and refrigerate it unbaked for up to 24 hours. You can also bake the pie ahead of time and reheat it before serving.
Q: What is the best way to reheat the pie?
A: To reheat, bake in a preheated oven at 350 degrees Fahrenheit for 15-20 minutes, or until warmed through. You can also microwave individual slices for a quicker option.
Final Thoughts
More than just a recipe, this Wild Huckleberry Pie is a taste of nostalgia, a connection to the mountains, and a reminder of cherished moments. I urge you to gather your ingredients, embrace the process, and create your own memories with this delightful dessert. Don’t hesitate to experiment with variations to suit your taste, and most importantly, share your creation with loved ones. A slice of huckleberry pie is best enjoyed with good company and a warm heart. Enjoy!