
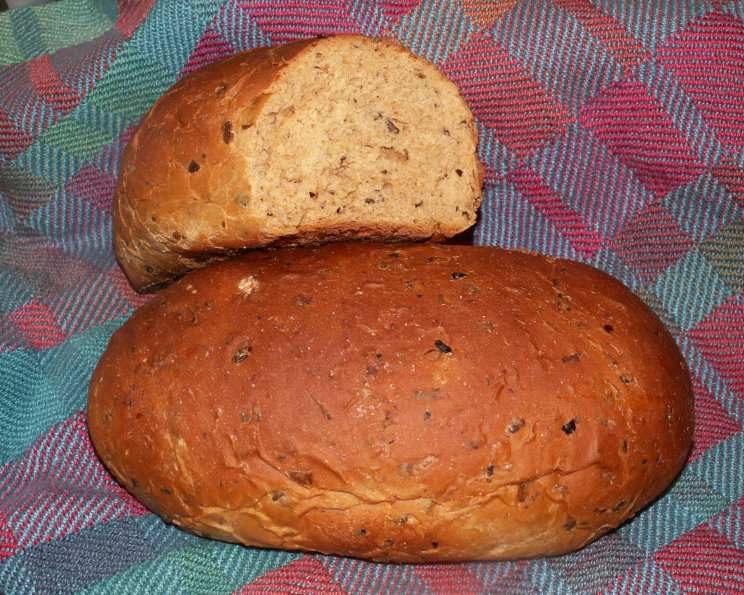
Wild Rice Bread: A Taste of the Earth
The scent of baking bread always takes me back to my grandmother’s kitchen. But this isn’t just any bread – it’s wild rice bread. I remember sneaking warm slices, the subtly nutty aroma filling the air, and the slightly chewy texture a delightful surprise. She always said it tasted like the earth itself, a perfect way to savor the harvest. This recipe, inspired by those cherished memories, brings that comforting flavor to your table.
Recipe Overview
- Prep Time: 20 minutes
- Cook Time: 33 minutes
- Total Time: 53 minutes
- Yield: 2 loaves
- Dietary Type: Vegetarian
Ingredients
- ¾ cup hot water
- ¼ cup molasses
- ¾ cup cooked wild rice
- 2 tablespoons potato flakes
- 1 tablespoon brown sugar
- 1 teaspoon salt
- 1 tablespoon melted butter
- 2 ½ cups bread flour
- 1 teaspoon yeast, plus ½ teaspoon more yeast
Equipment Needed
- Bread machine
- Two bread pans
- Mixing bowl (if not using bread machine)
- Measuring cups and spoons
Instructions
-
Combine Ingredients (Bread Machine Method): Place all ingredients into your bread maker in the order recommended by the manufacturer of your machine. This usually involves adding the liquids first, followed by the dry ingredients, with the yeast on top.
-
Start the Dough Cycle: Set your bread machine to the dough cycle. This cycle will mix the ingredients, knead the dough, and allow it to go through the first rise.
-
First Rise Completion: Once the dough cycle is complete, carefully remove the dough from the bread machine. It should have roughly doubled in size.
-
Divide and Shape: Gently punch down the dough to release any excess air. Divide the dough in half. Shape each half into a loaf by gently stretching and folding the dough, then tucking the ends underneath to create a smooth top.
-
Second Rise (Proofing): Grease two standard-sized bread pans. Place each loaf into a prepared pan. Cover the pans loosely with plastic wrap or a clean kitchen towel. Let the dough rise in a warm place for approximately 30-45 minutes, or until it has nearly doubled in size again. This is called the “second rise” or proofing.
-
Preheat Oven: While the dough is proofing, preheat your oven to 350 degrees Fahrenheit (175 degrees Celsius).
-
Bake: Carefully place the bread pans into the preheated oven. Bake for 33 minutes, or until the loaves are golden brown and sound hollow when tapped on the bottom.
-
Cool: Remove the bread from the oven and immediately turn the loaves out onto a wire rack to cool completely. Cooling on a wire rack prevents the bottom crust from becoming soggy.
Instructions (Alternative Method – No Bread Machine)
-
Combine Ingredients (No Bread Machine): In a large mixing bowl, dissolve the yeast in the warm water. Add the molasses, cooked wild rice, potato flakes, brown sugar, salt, and melted butter. Mix well.
-
Add Flour: Gradually add the bread flour, mixing until a shaggy dough forms.
-
Knead: Turn the dough out onto a lightly floured surface. Knead for 8-10 minutes, or until the dough is smooth and elastic.
-
First Rise: Place the dough in a greased bowl, turning to coat. Cover with plastic wrap and let rise in a warm place for 1-1.5 hours, or until doubled.
-
Punch Down, Divide, and Shape: Gently punch down the dough to release any excess air. Divide the dough in half. Shape each half into a loaf by gently stretching and folding the dough, then tucking the ends underneath to create a smooth top.
-
Second Rise (Proofing): Grease two standard-sized bread pans. Place each loaf into a prepared pan. Cover the pans loosely with plastic wrap or a clean kitchen towel. Let the dough rise in a warm place for approximately 30-45 minutes, or until it has nearly doubled in size again.
-
Preheat Oven: While the dough is proofing, preheat your oven to 350 degrees Fahrenheit (175 degrees Celsius).
-
Bake: Carefully place the bread pans into the preheated oven. Bake for 33 minutes, or until the loaves are golden brown and sound hollow when tapped on the bottom.
-
Cool: Remove the bread from the oven and immediately turn the loaves out onto a wire rack to cool completely. Cooling on a wire rack prevents the bottom crust from becoming soggy.
Expert Tips & Tricks
- Wild Rice Preparation: For the best flavor, cook your wild rice in vegetable broth instead of water. This infuses it with extra savory notes that complement the bread beautifully. Make sure the wild rice is fully cooked and slightly cooled before adding it to the dough.
- Yeast Activation: Ensure your yeast is active by proofing it first. Dissolve the yeast in the warm water with a pinch of sugar. If it foams within 5-10 minutes, it’s good to go! This will prevent any surprises during the rising process.
- Kneading Technique: Proper kneading is crucial for developing gluten, which gives the bread its structure. If kneading by hand, use a firm, rhythmic motion, pushing the dough away from you with the heel of your hand, then folding it back over itself.
- Oven Temperature: Ovens can vary. If your bread is browning too quickly, tent it with foil during the last 15 minutes of baking to prevent burning.
- Doneness Test: To ensure the bread is fully baked, insert a toothpick into the center. If it comes out clean, the bread is done. Alternatively, the internal temperature should reach around 200-210°F (93-99°C).
Serving & Storage Suggestions
This wild rice bread is delicious served warm with a smear of butter or a drizzle of honey. It also makes fantastic sandwiches or toast. For a truly indulgent experience, pair it with a hearty soup or stew.
- Storage: Store cooled bread in an airtight container at room temperature for up to 3 days.
- Refrigeration: For longer storage, wrap the bread tightly and refrigerate for up to a week.
- Freezing: Freeze wrapped bread for up to 2 months. Thaw completely at room temperature before serving. To refresh, warm in a 350°F (175°C) oven for 5-10 minutes.
Nutritional Information
| Nutrient | Amount per Serving | % Daily Value |
|---|---|---|
| Calories | 1001.1 kcal | N/A |
| Calories from Fat | 73 g | 7% |
| Total Fat | 8.1 g | 12% |
| Saturated Fat | 4 g | 20% |
| Cholesterol | 15.3 mg | 5% |
| Sodium | 1235.6 mg | 51% |
| Total Carbohydrate | 205.9 g | 68% |
| Dietary Fiber | 8.8 g | 35% |
| Sugars | 32 g | N/A |
| Protein | 26.4 g | 52% |
Note: Nutritional information is an estimate and may vary based on specific ingredients and portion sizes.
Variations & Substitutions
- Sweetness Boost: Add a tablespoon of honey or maple syrup for a slightly sweeter flavor.
- Nutty Enhancement: Incorporate ¼ cup of chopped walnuts, pecans, or pumpkin seeds for added texture and nutty flavor.
- Herb Infusion: Mix in 1-2 tablespoons of fresh herbs like rosemary, thyme, or sage for a savory twist.
- Whole Wheat Version: Replace up to half of the bread flour with whole wheat flour for a more rustic and nutritious bread.
- Dairy-Free Option: Substitute the melted butter with olive oil or a vegan butter substitute.
FAQs (Frequently Asked Questions)
Q: Can I use regular rice instead of wild rice?
A: While you can, the unique nutty flavor and chewy texture of wild rice are key to this recipe’s character. Regular rice will result in a significantly different bread.
Q: My bread is dense and heavy. What did I do wrong?
A: This could be due to several factors: insufficient kneading, inactive yeast, or not allowing the dough to rise properly. Ensure your yeast is fresh, knead the dough thoroughly, and give it enough time to rise in a warm place.
Q: Can I make this bread without a bread machine?
A: Yes, absolutely! The recipe includes instructions for both bread machine and hand-kneading methods.
Q: How do I know when the bread is done baking?
A: The bread should be golden brown and sound hollow when tapped on the bottom. You can also use a toothpick to check for doneness.
Q: Can I add other grains or seeds to this bread?
A: Certainly! Feel free to experiment with adding oats, flax seeds, or sunflower seeds for added texture and nutritional value.
Final Thoughts
This Wild Rice Bread is more than just a recipe; it’s a connection to simpler times and the bounty of nature. The earthy flavor and comforting aroma are sure to delight your senses and create lasting memories. Don’t be afraid to experiment with different variations and make it your own. I encourage you to try this recipe and share your experience with others. Perhaps pair it with a creamy tomato soup or a sharp cheddar for the perfect comforting meal. Happy baking!