
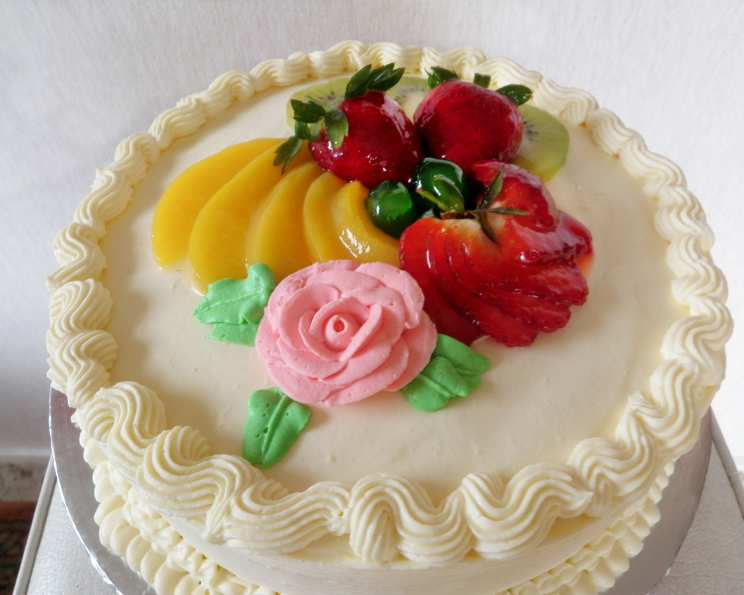
Wilton Stabilized Whipped Cream: The Secret to Perfect Frosting
The memory is crystal clear: my grandmother’s legendary strawberry shortcakes, piled high with what seemed like an impossible cloud of perfectly sculpted whipped cream. It held its shape for hours, defying the summer heat, and tasted like pure vanilla-infused heaven. Years later, I finally pried her secret from her – a touch of gelatin, transformed into this stabilized whipped cream that’s become a cornerstone of my own baking. No more weepy, collapsing cream – just pure, unwavering perfection, every single time.
Recipe Overview
- Prep Time: 5 minutes
- Cook Time: 2 minutes
- Total Time: 7 minutes
- Yields: 2 cups (approx.)
- Dietary Type: Vegetarian
Ingredients
- 1 teaspoon unflavored gelatin
- 4 teaspoons cold water
- 1 cup heavy whipping cream (35% fat)
- 1/4 cup sifted icing sugar (confectioners’ sugar)
Equipment Needed
- Small saucepan
- Electric mixer (handheld or stand mixer)
- Mixing bowl
Instructions
-
In a small pan, combine the gelatin and cold water. Allow the mixture to stand for a few minutes until the gelatin has softened and thickened slightly, forming a gel-like consistency. This process is known as “blooming” the gelatin.
-
Place the saucepan over very low heat. Stir the gelatin mixture constantly until the gelatin is completely dissolved. Be careful not to overheat the gelatin, as this can affect its setting properties. It should only take a minute or two to dissolve.
-
Remove the saucepan from the heat and allow the dissolved gelatin mixture to cool slightly. It’s crucial to let it cool but not set. You want it to be liquid and pourable, but not hot enough to melt the whipping cream when added. Aim for a lukewarm temperature.
-
In a mixing bowl, pour in the cold heavy whipping cream. Add the sifted icing sugar. Sifting the icing sugar helps to prevent lumps in your finished whipped cream.
-
Using an electric mixer (either handheld or stand mixer), begin to whip the cream and icing sugar together on medium speed. Whip until the cream starts to thicken slightly and soft peaks begin to form.
-
With the mixer running on low speed, slowly and steadily pour the cooled, dissolved gelatin mixture into the whipping cream. Ensure the gelatin is incorporated evenly. Don’t pour it in all at once, as this could cause the gelatin to clump.
-
Increase the mixer speed to high and continue whipping the cream until stiff peaks form. Stiff peaks mean that when you lift the beaters from the cream, the peaks will stand straight up without collapsing. Be careful not to overwhip, as this can cause the cream to become grainy.
Expert Tips & Tricks
-
Chill Out: For the best results, make sure your mixing bowl and whisk attachment are well-chilled before you begin. Cold equipment helps the whipping cream to whip up faster and hold its shape better. You can place the bowl and whisk in the freezer for about 15-20 minutes before starting.
-
Fat Content Matters: Use heavy whipping cream with a fat content of at least 35%. Lower fat cream will not whip properly.
-
Sweetness Level: Adjust the amount of icing sugar to your preference. If you prefer a less sweet whipped cream, reduce the amount to 2 tablespoons. For a sweeter whipped cream, increase it to 1/3 cup.
-
Flavor Boost: Enhance the flavor of your stabilized whipped cream by adding a teaspoon of vanilla extract, almond extract, or citrus zest while whipping.
-
Troubleshooting Runny Cream: If you accidentally add the gelatin mixture while it’s still too warm, and your cream doesn’t thicken, don’t panic! Place the mixture in the refrigerator for about 30 minutes to chill thoroughly, then try whipping it again.
Serving & Storage Suggestions
Wilton Stabilized Whipped Cream is incredibly versatile and can be used in a variety of ways:
- Cakes and Cupcakes: Use it to frost cakes and cupcakes. The stabilization ensures that the frosting will hold its shape beautifully for hours, even at room temperature.
- Pies and Tarts: Top pies and tarts with a generous dollop of stabilized whipped cream.
- Dessert Topping: Serve it as a topping for fruits, berries, ice cream, and other desserts.
- Hot Beverages: Add a swirl to hot chocolate, coffee, or other warm beverages.
Storage: Store leftover stabilized whipped cream in an airtight container in the refrigerator. It will keep for up to 3-4 days. The gelatin helps to prevent the cream from weeping or separating. Freezing is not recommended, as it can alter the texture.
Nutritional Information
| Nutrient | Amount per Serving | % Daily Value* |
|---|---|---|
| Calories | 473 kcal | N/A |
| Total Fat | 44g | 67% |
| Saturated Fat | 27g | 137% |
| Cholesterol | 163mg | 54% |
| Sodium | 48mg | 2% |
| Total Carbohydrate | 18g | 6% |
| Dietary Fiber | 0g | 0% |
| Sugars | 15g | 59% |
| Protein | 3g | 6% |
*Percent Daily Values are based on a 2,000 calorie diet.
Variations & Substitutions
- Dairy-Free Option: While this recipe relies on dairy-based whipping cream, you can experiment with coconut cream. Ensure the coconut cream is very cold, and only use the thick solid part from the top of the can. The gelatin may not work exactly the same, so you may need to adjust the quantity or consider other vegan stabilizers.
- Flavor Infusions: Infuse the whipping cream with different flavors by adding extracts like peppermint, lemon, or even a hint of rosewater. You could also steep herbs like lavender or rosemary in the cream for a more subtle flavor. Be sure to strain the cream before whipping.
- Espresso Whipped Cream: Add a teaspoon of instant espresso powder to the cream while whipping for a coffee-flavored treat.
- Boozy Whipped Cream: For an adult twist, add a tablespoon of your favorite liqueur, such as rum, brandy, or coffee liqueur, to the whipping cream while whipping.
FAQs (Frequently Asked Questions)
Q: Why do I need to use gelatin?
A: Gelatin acts as a stabilizer, preventing the whipped cream from separating and becoming watery. It helps the whipped cream hold its shape for a longer period, making it ideal for frosting cakes or topping desserts ahead of time.
Q: Can I use flavored gelatin?
A: It’s best to use unflavored gelatin so you have control over the final flavor of your whipped cream. Flavored gelatin will alter the color and taste.
Q: What happens if I overwhip the cream?
A: Overwhipping can cause the cream to become grainy and eventually turn into butter. If this happens, try adding a tablespoon or two of fresh, cold whipping cream and gently folding it in to smooth out the texture.
Q: Can I make this ahead of time?
A: Yes, stabilized whipped cream can be made a day or two in advance. Store it in an airtight container in the refrigerator. It will hold its shape much better than unstabilized whipped cream.
Q: My gelatin is lumpy and won’t dissolve. What should I do?
A: Make sure the gelatin is fully bloomed in cold water before heating. Use low heat and stir constantly. If lumps persist, you can try straining the gelatin mixture through a fine-mesh sieve before adding it to the cream.
Final Thoughts
Now that you’ve mastered the art of Wilton Stabilized Whipped Cream, the possibilities are endless. Imagine perfectly frosted cakes, elegant dessert toppings, and picture-perfect pies that hold their shape for hours. Don’t be afraid to experiment with different flavors and variations to create your own signature whipped cream masterpiece. I encourage you to try this recipe and share your creations – and any clever twists you come up with – with friends, family, and fellow baking enthusiasts. Happy baking!