
Mastering Royal Icing: A Chef’s Guide to Wilton’s Classic Recipe
My first encounter with royal icing was a baptism by fire – literally. As a young pastry apprentice, I was tasked with decorating hundreds of gingerbread men for a holiday event. The icing, made by a more seasoned baker, was a dream to work with: smooth, pliable, and holding its shape perfectly. Intrigued, I pressed her for the secret, and she simply smiled and said, “Wilton’s meringue powder, dear. It’s the only way.” From that moment on, I understood the power of a reliable recipe, and this Wilton’s royal icing has been a cornerstone of my decorating ever since.
Recipe Overview
- Prep Time: 10 minutes
- Cook Time: 0 minutes
- Total Time: 10 minutes
- Yields: 3 cups
- Dietary Type: Vegetarian, Gluten-Free, Dairy-Free (if using appropriate confectioners’ sugar)
Ingredients
- 3 tablespoons Wilton Meringue Powder
- 1 lb sifted confectioners’ sugar
- 6 tablespoons warm water
Equipment Needed
- Heavy-duty mixer (stand mixer recommended) or hand-held mixer
- Mixing bowl
- Measuring spoons
- Sifter
- Spatula
- Piping bags (optional, for decorating)
- Piping tips (optional, for decorating)
Instructions
-
Begin by ensuring your mixing bowl and whisk attachment are completely clean and free of any grease. This is crucial for the proper formation of stiff peaks.
-
In the mixing bowl, combine the Wilton Meringue Powder and the warm water. Use warm water as it helps the meringue powder dissolve more easily.
-
Beat the meringue powder and water mixture with your mixer until it forms a frothy mixture.
-
Gradually add the sifted confectioners’ sugar to the meringue mixture. Sifting is essential to remove any lumps and ensure a smooth, consistent icing. Add it a cup at a time, mixing on low speed to prevent a sugar cloud.
-
Continue to beat all ingredients together until the icing forms stiff peaks. This will take approximately 7-10 minutes at low speed with a heavy-duty stand mixer, or 10-12 minutes at high speed with a hand-held mixer.
-
The icing is ready when it holds its shape firmly and a peak forms when you lift the beater. You should be able to turn the bowl upside down (carefully!) without the icing sliding out.
-
If the icing is too thick, add a very small amount of warm water (1/2 teaspoon at a time) until you reach the desired consistency. If the icing is too thin, add more sifted confectioners’ sugar (1 tablespoon at a time). Remember, it’s easier to add more liquid or sugar than to correct an over-thinned or over-thickened icing.
Expert Tips & Tricks
- Consistency is key. Royal icing needs to be the right consistency for your desired use. For outlining cookies, you’ll want a thicker consistency. For flooding, you’ll need to thin it slightly. Test the consistency by dragging a knife through the icing. The line should disappear in about 10-15 seconds for flooding consistency.
- Coloring: Gel food coloring is best for royal icing as it doesn’t add extra liquid and affect the consistency. Add color gradually, mixing well after each addition.
- Preventing Crusting: Royal icing dries quickly. To prevent crusting while working, cover the bowl with a damp cloth or plastic wrap pressed directly onto the surface of the icing.
- Piping Perfection: When piping, hold the piping bag at a 45-degree angle and apply steady pressure. Practice on parchment paper first to get a feel for the icing flow.
- Troubleshooting: If your icing develops air bubbles, gently tap the bowl on the counter several times to release them. You can also use a scribe tool or toothpick to pop bubbles on the surface of decorated items.
- Flavor Enhancements: While the classic recipe is delicious, feel free to add a touch of flavor. A few drops of vanilla extract, almond extract, or lemon juice can add a subtle and delightful taste.
Serving & Storage Suggestions
Royal icing is best used immediately after preparing it, but it can be stored for later use.
- Short-term storage: Store the royal icing in an airtight container at room temperature for up to 2-3 days. Make sure to press plastic wrap directly onto the surface of the icing to prevent it from drying out.
- Long-term storage: For longer storage, royal icing can be frozen for up to 2-3 months. Thaw it in the refrigerator overnight and re-beat it to restore its original consistency.
- Serving: Use royal icing to decorate cookies, cakes, gingerbread houses, and other desserts. Let the icing dry completely before handling or packaging decorated items. Drying time depends on the thickness of the icing, but it typically takes several hours or overnight.
Nutritional Information
| Nutrient | Amount per Serving | % Daily Value |
|---|---|---|
| Calories | 588 kcal | N/A |
| Total Fat | 0 g | 0% |
| Saturated Fat | 0 g | 0% |
| Cholesterol | 0 mg | 0% |
| Sodium | 3.9 mg | 0% |
| Total Carbohydrate | 150.8 g | 50% |
| Dietary Fiber | 0 g | 0% |
| Sugars | 147.9 g | N/A |
| Protein | 0 g | 0% |
Note: Nutritional information is an estimate and may vary based on specific ingredients and serving sizes.
Variations & Substitutions
- Vegan Royal Icing: While this recipe uses meringue powder, which is traditionally made with egg whites, Wilton’s Meringue Powder is made using alternative proteins, and thus is considered to be vegan.
- Flavor Infusions: Experiment with different extracts like peppermint, orange, or rum to add unique flavor profiles to your icing.
- Citrus Zest: Add a teaspoon of lemon, lime, or orange zest for a burst of fresh flavor.
- Spice It Up: A pinch of cinnamon, nutmeg, or ginger can add warmth and depth to your royal icing, especially during the holiday season.
FAQs (Frequently Asked Questions)
Q: Why is my royal icing cracking?
A: This usually happens when the icing dries too quickly. Make sure your icing is not too thick and avoid drying decorated items in direct sunlight or in front of a fan.
Q: My royal icing is too thin. How can I fix it?
A: Gradually add sifted confectioners’ sugar, one tablespoon at a time, until you reach the desired consistency. Mix well after each addition.
Q: Can I make royal icing without a mixer?
A: While it’s possible, it’s much more challenging. A mixer helps to incorporate air into the icing, creating a stable and consistent texture. If you don’t have a mixer, be prepared for a serious arm workout and allow for a longer mixing time.
Q: How long does royal icing take to dry?
A: Drying time depends on the thickness of the icing and the humidity levels. Generally, it takes several hours or overnight for royal icing to dry completely.
Q: Can I use royal icing for other decorations besides cookies?
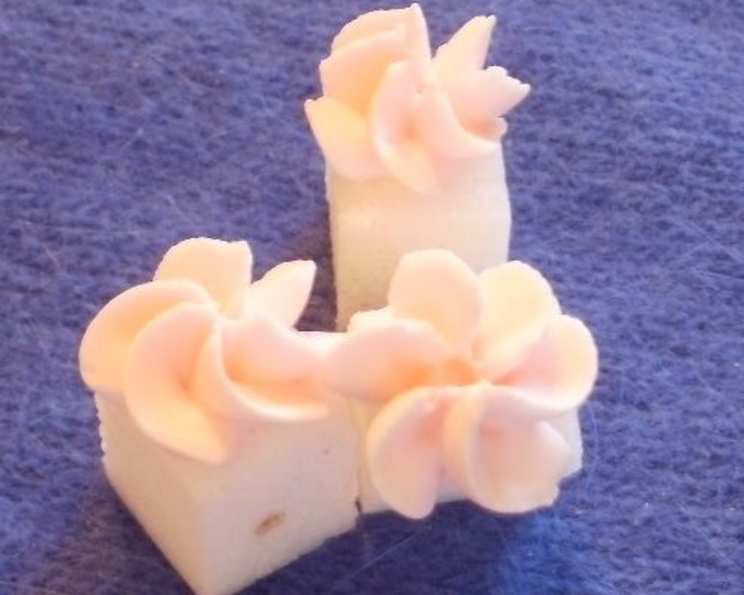
A: Absolutely! Royal icing is versatile and can be used for decorating cakes, gingerbread houses, and other desserts. It’s also great for creating edible decorations like flowers and figurines.
Final Thoughts
Now that you’re armed with the secrets to Wilton’s Royal Icing, I encourage you to unleash your inner artist and transform ordinary treats into edible masterpieces! Don’t be afraid to experiment with colors, flavors, and techniques. Share your creations with friends and family, and most importantly, have fun! And if you discover any new tips or tricks along the way, please share them – we’re all in this sugary adventure together. After all, the best part of baking is sharing the delicious results (and maybe a few perfectly decorated cookies) with the people you love.