
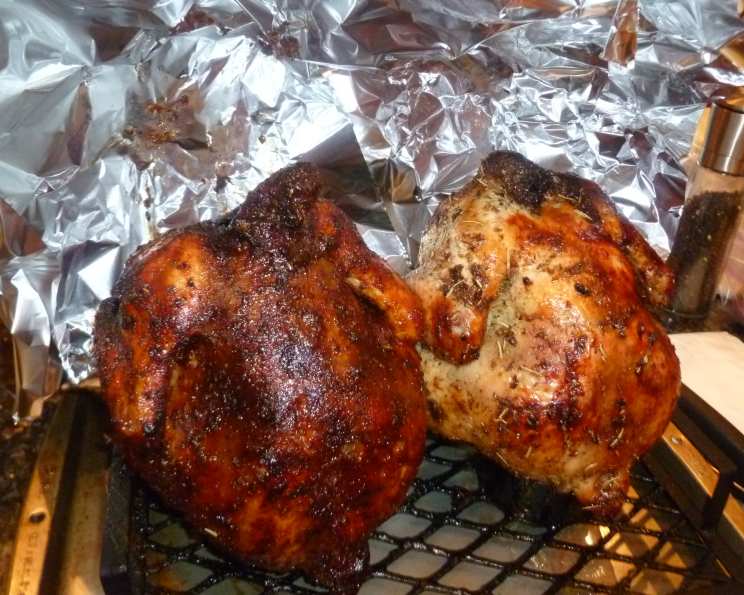
Wine-Steamed Beer Can Chicken: A Culinary Revelation
I’ll never forget the first time I saw someone cooking chicken this way. It was at a local barbecue competition, and the aroma wafting from their grill was intoxicating. The sight of a chicken seemingly perched on a can, slowly turning golden brown, was both intriguing and slightly absurd. I watched, fascinated, as they pulled it off the grill, the skin glistening and crisp, and the meat practically falling off the bone. That day, I knew I had to learn the secrets of “beer can chicken,” and after countless iterations, I’ve perfected a wine-steamed version that’s guaranteed to impress.
Recipe Overview
- Prep Time: 15 minutes
- Cook Time: 1 hour
- Total Time: 1 hour 15 minutes
- Servings: 4
- Dietary Type: Gluten-Free
Ingredients
- 1 (4 – 4 1/2 lb) fresh roasting chicken
- 1 tablespoon olive oil
- 1 garlic clove, minced (more if you desire)
- 1 tablespoon fresh thyme leaves, minced
- 1/4 teaspoon kosher salt
- 1/4 teaspoon fresh ground black pepper
- 3/4 cup dry Chardonnay wine or Sauvignon Blanc wine
Equipment Needed
- Barbecue grill (gas or charcoal)
- 12-ounce soda or beer can
- Small bowl
- Instant-read meat thermometer
- Oven mitts
- Large carving fork
- Carving platter or cutting board
Instructions
-
Begin by prepping the chicken. Remove the giblets from the chicken and discard. Rinse the chicken thoroughly, both inside and out, under cold running water. Pat the chicken completely dry with paper towels; this step is crucial for achieving crispy skin.
-
Trim any excess skin and fat around the body cavity of the chicken. This helps to render off extra fat during cooking and allows for more even cooking.
-
In a small bowl, prepare the herb mixture. Combine the olive oil, minced garlic, minced fresh thyme leaves, kosher salt, and freshly ground black pepper. Mix well until a fragrant paste forms.
-
With your fingers, gently loosen the skin over the breast of the chicken, being careful not to tear the skin. Work your fingers between the skin and the breast meat to create a pocket for the herb mixture.
-
Evenly rub the thyme mixture over the breast meat beneath the skin. This ensures that the flavor permeates the chicken as it cooks.
-
Prepare your barbecue grill for indirect-heat cooking. For a charcoal grill, arrange the coals on either side, leaving a space in the center for the chicken. For a gas grill, preheat the grill to medium-low heat and turn off one or more burners to create an indirect heat zone.
-
Rinse a 12-ounce soda or beer can and shake it dry. This step is important to remove any residue or contaminants.
-
Pour the Chardonnay wine or Sauvignon Blanc wine into the can. The wine will steam inside the chicken, infusing it with a delicate and aromatic flavor.
-
Carefully lower the chicken over the can until the can is inside the body cavity. The can should sit snugly inside the chicken, providing support.
-
Gently pull the chicken’s legs forward so that the chicken stands upright on the can, forming a tripod. Ensure the chicken is stable and won’t tip over easily.
-
Carefully set the chicken and can, in this upright position, on the center of the grill, ensuring it is not over direct heat. For a charcoal grill, cover the grill and open the vents to allow for proper airflow. For a gas grill, close the lid.
-
Cook the chicken until an instant-read meat thermometer inserted through the thickest part of the breast to the bone reaches 160°F (71°C). This typically takes about 1 hour, but cooking times can vary depending on the grill and the size of the chicken. Monitor the internal temperature closely to avoid overcooking.
-
Once the chicken reaches the correct internal temperature, use oven mitts to carefully remove the chicken with the can from the grill, keeping it upright to avoid spills.
-
Let the chicken stand on the can for 15 minutes before carving. This allows the juices to redistribute throughout the meat, resulting in a more tender and flavorful bird.
-
Holding a towel around the can to steady it and protect your hands from the heat, use a large carving fork to carefully remove the chicken from the can to a carving platter or cutting board.
-
Carve the chicken and serve immediately. Add salt and pepper to taste. Enjoy!
Expert Tips & Tricks
- For even crispier skin, pat the chicken dry again halfway through the cooking process.
- Add wood chips to your charcoal grill for a smoky flavor. Applewood or hickory chips work particularly well with chicken.
- If you’re using a gas grill, place a pan of water under the chicken to help maintain moisture.
- Don’t be afraid to experiment with different herbs and spices. Rosemary, sage, or paprika can all add unique flavor profiles.
- If the chicken skin starts to brown too quickly, tent it with foil to prevent burning.
Serving & Storage Suggestions
Serve the Wine-Steamed Beer Can Chicken hot off the grill with your favorite sides. Roasted vegetables, mashed potatoes, or a fresh salad are all excellent accompaniments.
Leftover chicken can be stored in an airtight container in the refrigerator for up to 3-4 days. To reheat, simply warm in the oven at 350°F (175°C) until heated through. You can also shred the leftover chicken and use it in sandwiches, salads, or soups. Freezing is not recommended as it can alter the texture.
Nutritional Information
| Nutrient | Amount per Serving | % Daily Value |
|---|---|---|
| Calories | 1048.7 kcal | N/A |
| Calories from Fat | 678 g | 65% |
| Total Fat | 75.3 g | 115% |
| Saturated Fat | 21 g | 105% |
| Cholesterol | 331.4 mg | 110% |
| Sodium | 420.2 mg | 17% |
| Total Carbohydrate | 1.6 g | 0% |
| Dietary Fiber | 0.1 g | 0% |
| Sugars | 0.4 g | 1% |
| Protein | 77.9 g | 155% |
Note: Nutritional information is an estimate and may vary based on specific ingredients and cooking methods.
Variations & Substitutions
- For a spicier kick, add a pinch of cayenne pepper or a dash of hot sauce to the herb mixture.
- Use a different type of wine, such as Rosé or Pinot Grigio, to change the flavor profile.
- Instead of fresh thyme, use dried thyme or a blend of Italian herbs.
- For a citrusy twist, add a few slices of lemon or orange to the wine in the can.
FAQs (Frequently Asked Questions)
Q: Why use wine instead of beer in beer can chicken?
A: Wine provides a more delicate and nuanced flavor compared to beer, adding a touch of elegance to the dish.
Q: Is it safe to cook with a soda or beer can?
A: Yes, as long as the can is clean and not lined with plastic. The aluminum won’t leach into the food at grilling temperatures.
Q: How do I know when the chicken is done?
A: The best way to check for doneness is to use an instant-read meat thermometer. Insert it into the thickest part of the breast, avoiding the bone. The chicken is done when it reaches an internal temperature of 160°F (71°C).
Q: Can I cook this recipe in the oven?
A: Yes, you can cook this recipe in the oven. Preheat your oven to 375°F (190°C) and bake the chicken for about 1 hour and 15 minutes, or until the internal temperature reaches 160°F (71°C).
Q: What if my chicken tips over on the grill?
A: Make sure the chicken is balanced properly on the can before placing it on the grill. You can also use a grilling stand designed specifically for beer can chicken for added stability.
Final Thoughts
This Wine-Steamed Beer Can Chicken recipe is a fun, flavorful, and surprisingly easy way to impress your friends and family. The combination of crispy skin, juicy meat, and the subtle aroma of wine creates a truly memorable culinary experience. Don’t be intimidated by the unique cooking method – once you try it, you’ll be hooked! So, fire up your grill, grab a bottle of your favorite white wine, and get ready to enjoy the best chicken you’ve ever tasted. I encourage you to share your own variations and experiences with this recipe; happy grilling!