
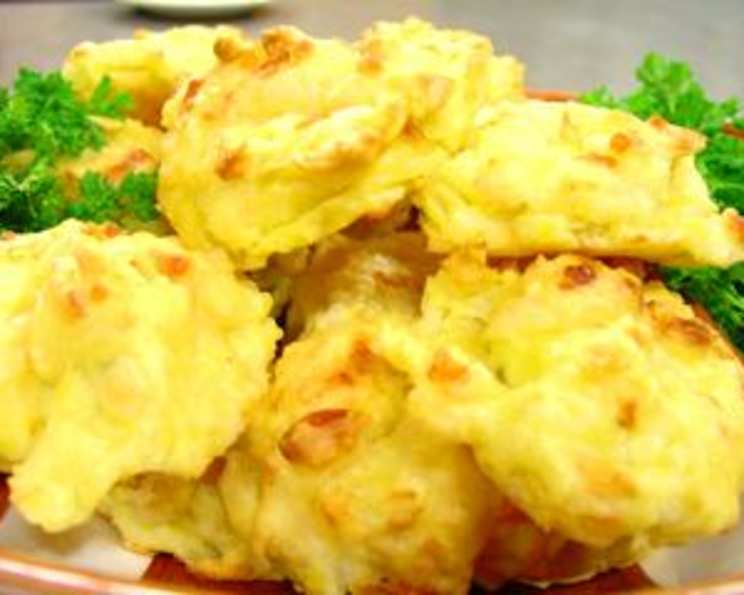
Wisconsin Asiago Cheese Puffs
The aroma alone transports me back to my grandmother’s cozy kitchen. Every holiday, without fail, a platter of these golden, savory puffs graced the table, a testament to her Wisconsin roots. The sharp tang of the Asiago, the gentle warmth of pepper from the Pepato, and the irresistible airy texture – each bite was a little piece of home. It was always a mad dash to grab them before they disappeared! I am excited to share this heirloom recipe with you, tweaked ever so slightly over the years, but always true to its delicious core.
Recipe Overview
- Prep Time: 15 minutes
- Cook Time: 20 minutes
- Total Time: 35 minutes
- Servings: 8
- Dietary Type: Vegetarian
Ingredients
- 1 tablespoon butter
- 1 tablespoon olive oil
- 1/2 teaspoon salt
- Cayenne pepper, to taste
- 1 cup water
- 1 cup flour
- 4 eggs
- 1/2 cup Asiago cheese, finely shredded
- 1/2 cup Parmesan cheese, grated
- 1/2 cup Pecorino Pepato cheese, shredded
Equipment Needed
- Small saucepan
- Mixing bowl
- Electric mixer (optional, but recommended)
- Greased cookie sheets
- Measuring cups and spoons
Instructions
-
Preheat your oven to 400°F (200°C). Make sure the oven is fully preheated before proceeding to ensure the puffs rise properly.
-
In a small saucepan, combine the butter, olive oil, salt, cayenne pepper, and water. Bring this mixture to a boil over medium heat. Watch closely to prevent scorching.
-
Once boiling, immediately add the flour all at once. Reduce the heat to low and stir vigorously with a wooden spoon or heat-resistant spatula until the mixture forms a smooth ball that pulls away from the sides of the pan. This step is crucial for developing the gluten and creating a proper dough.
-
Continue to cook the dough over low heat, stirring constantly, for about 1-2 minutes. This allows the dough to dry out slightly, which is essential for achieving a light and airy texture. The mixture should be drier, but still smooth.
-
Transfer the dough to a mixing bowl. If using an electric mixer, beat on low speed for a minute to cool the dough slightly. This prevents the eggs from cooking when you add them. If mixing by hand, let the dough cool for a few minutes before proceeding.
-
Beat in the eggs, one at a time, ensuring each egg is fully incorporated before adding the next. The mixture will initially look curdled, but keep beating until it becomes smooth and glossy. This is a key step in creating the puff structure.
-
Stir in the Asiago cheese, Parmesan cheese, and Pecorino Pepato cheese until evenly distributed throughout the dough.
-
Drop tablespoonfuls of the batter onto greased cookie sheets, leaving some space between each puff to allow for expansion. You can use a spoon or a small cookie scoop for more uniform shapes.
-
Bake for 20 minutes, or until the cheese puffs are lightly browned and firm. Keep a close eye on them during the last few minutes of baking to prevent burning. They should be golden brown and puffed up.
-
Serve immediately. These puffs are best enjoyed warm, when they are at their crispiest and most flavorful.
Expert Tips & Tricks
- Achieving the Perfect Puff: The key to airy cheese puffs lies in the dough’s consistency. Make sure the dough is smooth and glossy after incorporating the eggs. If the dough seems too wet, add a tablespoon of flour at a time until it reaches the right consistency.
- Cheese Selection: Feel free to experiment with different types of hard cheeses, but make sure they are finely grated or shredded for even distribution. Gruyere, aged cheddar, or even a smoked Gouda can add interesting flavor profiles.
- Make-Ahead Option: The dough can be prepared ahead of time and stored in the refrigerator for up to 24 hours. Bring it to room temperature before baking.
- Freezing for Later: Baked cheese puffs can be frozen for up to a month. Reheat them in a preheated oven at 350°F (175°C) for about 5-7 minutes until warmed through and crispy.
- Preventing Flat Puffs: Avoid opening the oven door during baking, as this can cause the puffs to deflate. Also, make sure your oven is properly preheated.
- Flavor Boost: Consider adding a pinch of garlic powder, onion powder, or dried herbs like thyme or rosemary to the dough for an extra layer of flavor.
- Lighter Puffs: For a lighter variation, use 2 whole eggs and 4 egg whites instead of 4 whole eggs.
Serving & Storage Suggestions
Serve these delightful cheese puffs immediately as an appetizer, snack, or side dish. They pair wonderfully with soups, salads, or charcuterie boards. For an elegant presentation, arrange them on a platter lined with parchment paper and garnish with fresh herbs like parsley or chives.
Leftover cheese puffs are best stored in an airtight container in the refrigerator. They will lose some of their crispness as they sit, but they can be reheated in a toaster oven or oven to restore some of their original texture. They are generally best consumed within 2-3 days.
Nutritional Information
| Nutrient | Amount per Serving | % Daily Value |
|---|---|---|
| Calories | 148 kcal | 7% |
| Total Fat | 7.5g | 11% |
| Saturated Fat | 3g | 15% |
| Cholesterol | 115mg | 38% |
| Sodium | 287mg | 11% |
| Total Carbohydrate | 12.4g | 4% |
| Dietary Fiber | 0.4g | 1% |
| Sugars | 0.3g | 1% |
| Protein | 7.2g | 14% |
Note: Nutritional information is an estimate and may vary based on specific ingredients and preparation methods.
Variations & Substitutions
- Spicy Cheese Puffs: Increase the amount of cayenne pepper or add a pinch of red pepper flakes for a spicier kick.
- Herbaceous Cheese Puffs: Incorporate fresh or dried herbs like rosemary, thyme, or oregano into the dough for an herbaceous twist.
- Garlic Cheese Puffs: Add a clove of minced garlic or a teaspoon of garlic powder to the dough for a savory garlic flavor.
- Gluten-Free Cheese Puffs: Substitute the all-purpose flour with a gluten-free all-purpose flour blend. Be sure to check the blend for xanthan gum, as it may need to be added separately for the dough to bind properly.
- Vegan Cheese Puffs: This variation is tricky, as eggs are essential for the structure of the puffs. However, you could experiment with using a flax egg (1 tablespoon ground flaxseed mixed with 3 tablespoons water, let sit for 5 minutes) to replace one of the eggs and using a vegan cheese alternative. The results may vary.
- Cheese Swaps: Experiment with other hard cheeses like Gruyere, Comte, or aged Cheddar. Be sure to grate them finely for even distribution.
FAQs (Frequently Asked Questions)
Q: Why did my cheese puffs not puff up?
A: This is usually due to insufficient heat or not enough moisture in the dough. Make sure your oven is fully preheated to 400°F and that you cook the dough for the recommended time to dry it out slightly.
Q: Can I make these ahead of time?
A: Yes, you can prepare the dough ahead of time and store it in the refrigerator for up to 24 hours. Let it come to room temperature before baking. Baked cheese puffs can also be frozen for longer storage.
Q: What can I substitute for Pecorino Pepato cheese?
A: If you can’t find Pecorino Pepato, you can use a regular Pecorino Romano cheese and add a pinch of black pepper to the dough for a similar flavor.
Q: My cheese puffs are too brown on the bottom. What can I do?
A: Place a baking sheet on the rack below the cheese puffs to shield them from the direct heat. You can also lower the oven temperature by 25°F (15°C) and increase the baking time slightly.
Q: How do I prevent the cheese puffs from deflating after baking?
A: Avoid opening the oven door during baking, as this can cause them to deflate. Once they are golden brown and firm, turn off the oven and let them sit inside for a few minutes with the door slightly ajar to help them stabilize.
Final Thoughts
I hope this recipe brings as much joy to your kitchen as it has to mine. These Wisconsin Asiago Cheese Puffs are more than just a snack; they’re a taste of tradition, a symbol of warmth, and a reminder of the simple pleasures in life. Don’t be afraid to experiment with different cheeses and seasonings to make them your own. And most importantly, share them with loved ones and enjoy the deliciousness together! Perhaps try serving them alongside a crisp Sauvignon Blanc or a hearty tomato soup. I would love to hear about your experiences making them – share your comments and pictures!