
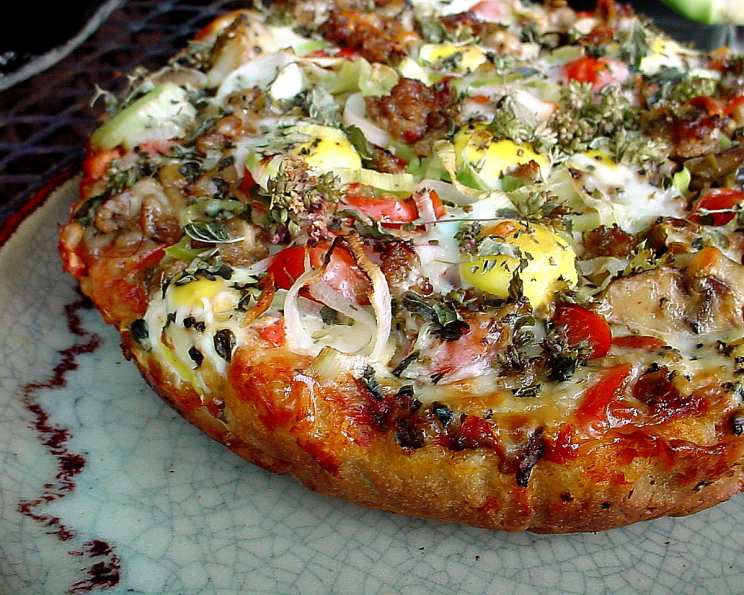
Mastering the Art of Wood-Fired Oven Pizza Dough: A Chef’s Guide
The scent of wood smoke, mingled with the tantalizing aroma of baking bread, instantly transports me back to summers spent in Italy. I remember watching, mesmerized, as a local pizzaiolo effortlessly stretched and twirled dough, launching it into the fiery depths of his wood-fired oven. The resulting pizza, charred and bubbly, was a simple masterpiece, a testament to the magic that unfolds when heat, flour, and passion collide. That memory is what inspired me to learn the art of creating the perfect wood-fired pizza dough, and I’m excited to share my knowledge with you.
Recipe Overview
- Prep Time: 20 minutes
- Rise Time: 2 hours
- Cook Time: 2-3 minutes
- Total Time: 2 hours 23 minutes
- Yield: 4-5 pizzas
- Servings: 10-14
- Dietary Type: Vegetarian
Ingredients
- 2 cups warm water
- 1 tablespoon dry yeast
- 1 tablespoon salt
- 1 tablespoon honey
- 5 cups unbleached flour, plus
- 2/3 cup unbleached flour, humidity dependent
Equipment Needed
- Large mixing bowl
- Measuring cups and spoons
- Stand mixer (optional, but recommended)
- Greased bowl for proofing
- Moist dish towel
- Floured surface
- Proofing tray (optional)
Instructions
- In a bowl, mix the warm water, dry yeast, salt, and honey together until all ingredients are completely dissolved. This step activates the yeast and ensures even distribution of the salt and honey.
- Pour the yeast mixture into a large mixing bowl. If using a stand mixer, attach the dough hook.
- Add the unbleached flour to the bowl.
- Mix the dough at a moderate speed for 8-10 minutes. If using a stand mixer, start on low speed and gradually increase to medium. If mixing by hand, knead vigorously on a floured surface.
- The dough is ready when it forms “ears” (a slightly elastic texture) and the mixing bowl is essentially dry. This indicates the gluten has developed sufficiently. Add the additional 2/3 cup of flour, a little at a time, if the dough is too sticky. The amount of flour needed may vary depending on the humidity.
- Place the dough in a lightly greased bowl, turning to coat all sides.
- Cover the bowl with a moist dish towel. This prevents the dough from drying out and forming a skin.
- Place the covered bowl in a warm area for about an hour, or until the dough has doubled in size. This is the first proofing, allowing the yeast to work its magic and develop flavor.
- Once the dough has doubled, gently turn it out onto a lightly floured surface.
- Divide the dough into 4 or 5 equal balls.
- Place the dough balls in a proofing tray or on a lightly floured surface, spaced apart.
- If you plan to use the dough immediately, let it rise for another hour. This second proofing further enhances the dough’s texture and flavor. If not, chill the dough balls in the refrigerator. Remove them from the refrigerator an hour before using to allow them to come to room temperature and relax.
Expert Tips & Tricks
- Temperature is Key: The water temperature is crucial for activating the yeast. Too hot, and you’ll kill the yeast. Too cold, and it won’t activate properly. Aim for lukewarm, around 105-115°F (40-46°C).
- Knead with Confidence: Don’t be afraid to knead the dough vigorously. This develops the gluten, which gives the pizza crust its chewy texture.
- The Windowpane Test: To check if the dough has been kneaded enough, try the windowpane test. Stretch a small piece of dough between your fingers. If it stretches thin enough to see light through it without tearing, the gluten is well-developed.
- Proofing Perfection: A warm environment is essential for proofing the dough. If your kitchen is cool, place the bowl in a turned-off oven with the light on, or near a warm stovetop.
- Cold Fermentation: For a more complex flavor, try cold fermenting the dough in the refrigerator for 24-72 hours. This slow fermentation allows the yeast to develop more nuanced flavors.
- Dough Handling: Handle the dough gently when shaping it. Avoid overworking it, as this can make the crust tough.
- Wood-Fired Oven Mastery: Wood-fired ovens require practice. Rotate the pizza frequently to ensure even cooking and prevent burning.
- Pizza Peel Prep: Use plenty of flour or cornmeal on your pizza peel to prevent the pizza from sticking when transferring it to the oven.
Serving & Storage Suggestions
Serve your wood-fired pizza immediately for the best flavor and texture. The crust is crispiest and the toppings are at their peak when fresh from the oven.
If you have leftover pizza, store it in an airtight container in the refrigerator for up to 2 days. Reheat it in a preheated oven at 350°F (175°C) for 5-10 minutes, or until heated through. You can also reheat individual slices in a skillet on the stovetop.
The uncooked dough can be stored in the refrigerator for up to 3 days. Wrap each dough ball tightly in plastic wrap to prevent it from drying out. You can also freeze the dough for up to 2 months. Thaw it overnight in the refrigerator before using.
Nutritional Information
| Nutrient | Amount per Serving | % Daily Value |
|---|---|---|
| Calories | 268 kcal | 13% |
| Total Fat | 0.8g | 1% |
| Saturated Fat | 0.1g | 0% |
| Cholesterol | 0mg | 0% |
| Sodium | 701mg | 29% |
| Total Carbohydrate | 56g | 19% |
| Dietary Fiber | 2.2g | 8% |
| Sugars | 1.9g | – |
| Protein | 7.8g | 16% |
Note: Nutritional information is an estimate and may vary based on specific ingredients and portion sizes.
Variations & Substitutions
- Gluten-Free Pizza Dough: Substitute the unbleached flour with a gluten-free blend of your choice. You may need to adjust the amount of water depending on the blend.
- Whole Wheat Pizza Dough: Replace up to half of the unbleached flour with whole wheat flour for a nuttier flavor and added fiber.
- Herb-Infused Pizza Dough: Add 1-2 tablespoons of dried herbs, such as oregano, basil, or rosemary, to the flour mixture for an aromatic crust.
- Spicy Pizza Dough: Add a pinch of red pepper flakes to the flour mixture for a touch of heat.
- Garlic Pizza Dough: Add 1-2 cloves of minced garlic to the dough during the mixing process.
FAQs (Frequently Asked Questions)
Q: Can I use active dry yeast instead of instant dry yeast?
A: Yes, you can. Use the same amount and proof it in the warm water for about 5-10 minutes before adding the other ingredients.
Q: What if my dough doesn’t rise?
A: Make sure your yeast is fresh and the water is warm enough. Also, ensure the room is warm enough for proofing. If the dough still doesn’t rise, the yeast may be inactive, and you’ll need to start over with fresh yeast.
Q: Can I make the dough ahead of time?
A: Absolutely! Making the dough ahead of time and refrigerating it (cold fermenting) actually improves the flavor. Just bring it to room temperature before shaping and baking.
Q: My pizza crust is tough. What did I do wrong?
A: Over-kneading or using too much flour can result in a tough crust. Be gentle when handling the dough and avoid adding excess flour during kneading.
Q: How do I prevent the pizza from sticking to the peel?
A: Use plenty of flour or cornmeal on your pizza peel. Make sure the peel is clean and dry before adding the dough. Shake the peel gently to ensure the pizza moves freely before launching it into the oven.
Final Thoughts
Creating wood-fired oven pizza dough might seem intimidating at first, but with a little practice and patience, you’ll be crafting pizzeria-quality pies in no time. This recipe is a fantastic starting point, and I encourage you to experiment with different flours, herbs, and toppings to create your own signature pizzas. Don’t be afraid to embrace the imperfections – each pizza is a unique creation. Gather your friends and family, fire up the oven, and enjoy the delicious rewards of your labor! And please, let me know how it goes – I love hearing about your culinary adventures!