
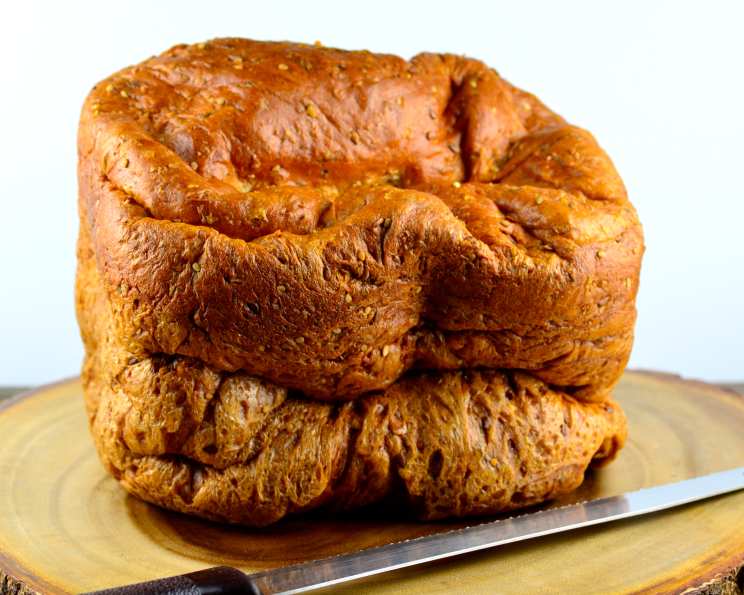
World-Famous Low Carb Bread
The aroma of baking bread, especially on a chilly autumn afternoon, always brings me back to my grandmother’s kitchen. I remember her flour-dusted apron and the comforting warmth radiating from the oven as she pulled out a golden-brown loaf. That memory is what fueled my passion for baking, and later, my journey into creating delicious and satisfying breads that fit specific dietary needs. This low-carb bread manages to capture a hint of that old-world charm while delivering on a modern health-conscious promise. It’s a little bit of grandma’s love, reinvented.
Recipe Overview
- Prep Time: 25 minutes
- Cook Time: 3 hours
- Total Time: 3 hours 25 minutes
- Servings: 12 slices
- Yield: 1 loaf
- Dietary Type: Low Carb
Ingredients
- 4 teaspoons bread machine yeast
- 1/2 teaspoon sugar (the yeast will consume this)
- 1 1/4 cups water (90-100 F, lukewarm)
- 3 tablespoons olive oil
- 3/4 teaspoon baking powder
- 1 teaspoon salt
- 1 tablespoon Splenda sugar substitute
- 1 cup vital wheat gluten flour
- 1/4 cup oat flour
- 3/4 cup soy flour
- 1/4 cup flax seed
- 1/4 cup wheat bran
Optional Additions:
- 2 tablespoons sunflower seeds
- 2 tablespoons flax seeds
- 2 tablespoons sesame seeds
Optional Rye Flavorings:
- 2 tablespoons caraway seeds
- 1 teaspoon instant coffee
- 1 teaspoon cocoa
- 1/2 cup dark rye flour
Equipment Needed
- Bread machine
- Measuring cups and spoons
- Mixing bowl
Instructions
-
Begin by adding the water, olive oil, and sugar to the bread machine pan. It’s important to use lukewarm water, about 90-100°F, as this temperature is ideal for activating the yeast.
-
In a separate mixing bowl, combine all the dry ingredients (excluding the bread machine yeast and baking powder), including vital wheat gluten flour, oat flour, soy flour, flax seed, wheat bran, salt, and Splenda. Also include any optional seeds or rye flavorings you desire at this point. Mix well to ensure everything is evenly distributed. This step is critical for achieving a consistent texture throughout the bread.
-
Remove approximately 1/4 cup of the dry ingredient mixture from the bowl and set it aside.
-
Pour the remaining dry ingredients from the bowl into the bread machine pan, on top of the wet ingredients.
-
In the small bowl containing the reserved 1/4 cup of dry ingredients, add the bread machine yeast and baking powder. Mix thoroughly. This step isolates the yeast and baking powder, ensuring they activate correctly in the next step.
-
Carefully pour the yeast and baking powder mixture into the bread machine pan, on top of the other ingredients.
-
Set your bread machine to the three-hour bake cycle. The specific name for this cycle may vary depending on your bread machine model, so consult your user manual.
-
After 55 minutes of baking, gently lift the dough out of the bread machine. Be cautious, as the pan will be hot.
-
Carefully remove the paddle from the bottom of the bread. This step prevents a large hole from forming in the bottom of your bread during the remainder of the baking process.
-
Gently return the dough to the bread machine pan.
-
Allow the baking cycle to continue until it is complete.
-
Once the bread is finished baking, carefully remove it from the bread machine and let it cool completely before slicing. Cooling the bread thoroughly is crucial for proper slicing and texture.
-
After cooling, place the bread in a ziplock bag and store it in the refrigerator. This helps maintain its freshness and improves slicing.
Expert Tips & Tricks
-
Yeast Activation: Ensure your water is at the correct temperature (90-100°F) to properly activate the yeast. Too hot, and you’ll kill the yeast; too cold, and it won’t activate.
-
Kneading Assistance: If you find the dough is too dry or not coming together properly, add a tablespoon of water at a time until it forms a cohesive ball. Conversely, if it’s too wet, add a tablespoon of vital wheat gluten.
-
Even Baking: To ensure even baking, especially if your bread machine tends to bake unevenly, rotate the bread 180 degrees halfway through the baking cycle after you remove the paddle.
-
Flavor Boost: For a richer flavor, try using toasted flax seeds or adding a tablespoon of unsweetened cocoa powder for a chocolatey hint (if omitting the Rye flavorings).
-
Check for Doneness: If you are unsure if the bread is fully cooked, use a food thermometer. It should register around 200°F (93°C) in the center. If it’s not there, continue baking in 10-minute intervals, checking each time.
Serving & Storage Suggestions
This low-carb bread is delicious served toasted with a generous smear of butter or cream cheese. It also makes excellent sandwiches, providing a satisfying and filling base for your favorite ingredients.
For storage, keep the bread in a ziplock bag in the refrigerator. It will last for up to a week. You can also freeze slices for longer storage (up to 2 months). When freezing, wrap each slice individually in plastic wrap before placing them in a freezer bag to prevent freezer burn. To reheat, toast the frozen slices directly from the freezer.
Nutritional Information
(Note: These values are estimates and may vary based on specific ingredients and portion sizes)
| Nutrient | Amount per Serving | % Daily Value |
|---|---|---|
| Calories | 126 kcal | – |
| Total Fat | 6.4 g | 9% |
| Saturated Fat | 0.8 g | 4% |
| Cholesterol | 0 mg | 0% |
| Sodium | 222.9 mg | 9% |
| Total Carbohydrate | 7.6 g | 2% |
| Dietary Fiber | 2.1 g | 8% |
| Sugars | 0.5 g | – |
| Protein | 11.2 g | 22% |
Variations & Substitutions
-
Dairy-Free: While this recipe doesn’t inherently contain dairy, ensure your Splenda sugar substitute is dairy-free if necessary. You can also substitute the olive oil with coconut oil for a different flavor profile.
-
Nut-Free: Soy flour can sometimes be problematic for those with nut allergies due to cross-contamination in processing facilities. Opt for a chickpea flour as a substitution, but be prepared for a slightly different texture.
-
Seed Sensations: Play with different seed combinations. Pumpkin seeds, chia seeds, or even hemp seeds can be added for extra nutrients and texture.
-
Sweet Bread: For a sweeter bread, add a teaspoon of vanilla extract and increase the Splenda to two tablespoons.
FAQs (Frequently Asked Questions)
Q: Why do I need to remove the paddle from the bread machine?
A: Removing the paddle helps to prevent a large hole from forming in the bottom of the bread during baking. This gives you nicer, more even slices.
Q: Can I bake this bread in a regular oven if I don’t have a bread machine?
A: Yes, but you’ll need to knead the dough by hand or with a stand mixer and adjust the baking time and temperature. A good starting point would be baking at 350°F (175°C) for 30-40 minutes, or until golden brown.
Q: How do I know if the bread is fully baked?
A: The internal temperature should reach approximately 200°F (93°C). You can also insert a toothpick; if it comes out clean, the bread is done.
Q: Can I use a different type of sweetener?
A: Yes, but keep in mind that different sweeteners may affect the texture and sweetness of the bread. Erythritol or monk fruit sweetener are good low-carb alternatives.
Q: Why is the bread stored in the refrigerator?
A: Storing the bread in the refrigerator helps to preserve its freshness and improve its slicing ability, particularly due to the high protein content. It tends to get a bit softer at room temperature.
Final Thoughts
This low-carb bread is more than just a recipe; it’s a testament to the fact that you can enjoy the simple pleasure of a slice of bread without compromising your health goals. Don’t be afraid to experiment with different flavors and additions to create a loaf that perfectly suits your taste. I encourage you to give this recipe a try and share your creations and feedback. Imagine a warm slice, perhaps alongside a hearty soup or a light salad. Happy baking!