
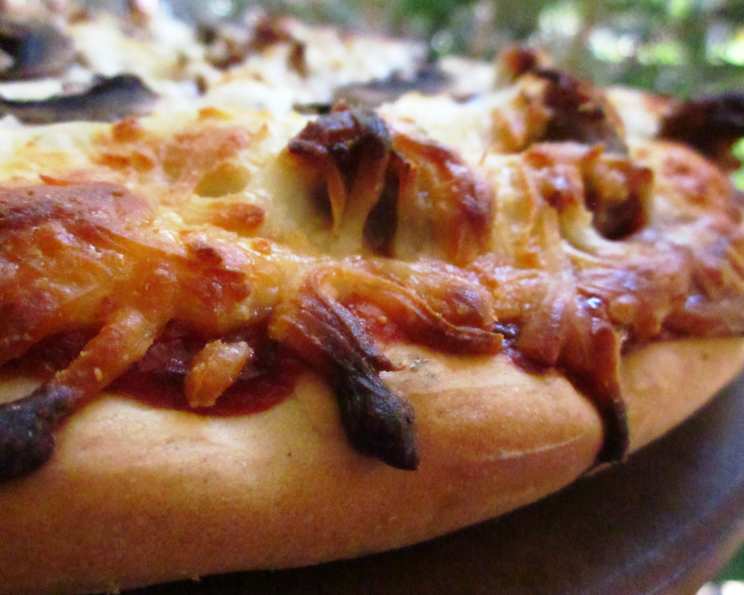
World’s Best Pizza Crust: A Culinary Love Story
The aroma of baking pizza crust always takes me back to my grandmother’s kitchen. She had this incredible knack for making the simplest things taste extraordinary, and her pizza crust was no exception. The scent of yeast mingling with warm flour, the gentle bubbling of the dough as it proofed – it was pure magic. I remember impatiently waiting for the golden-brown crust to emerge from the oven, eager to sink my teeth into its chewy, slightly crisp perfection, topped with her simple yet delicious homemade sauce. This recipe is my attempt to recreate that nostalgic flavor and texture, a tribute to her culinary wisdom.
Recipe Overview
- Prep Time: 20 minutes
- Cook Time: 20-25 minutes
- Total Time: 1 hour (includes rising time)
- Servings: 8
- Yield: 1 pizza
- Dietary Type: Vegetarian
Ingredients
- 1 (1/2 tablespoon) package yeast
- 1 teaspoon sugar
- 1 cup warm water (about 105-115°F)
- 3 cups flour, plus more for dusting
- 1/2 teaspoon salt
- 2 tablespoons oil (olive oil recommended)
Equipment Needed
- Large mixing bowl
- Measuring cups and spoons
- Greased baking sheet or pizza stone
- Clean kitchen towel
- Oven
Instructions
-
Activate the yeast: In a large mixing bowl, dissolve 1 (1/2 tablespoon) package of yeast and 1 teaspoon of sugar in 1 cup of warm water. Ensure the water isn’t too hot, as this can kill the yeast. Let it stand for 5-10 minutes, or until foamy. This indicates that the yeast is active and ready to use.
-
Incorporate the flour: Once the yeast mixture is foamy, beat in approximately 1 1/2 cups of flour into the yeast mixture. Mix until just combined. Don’t overmix at this stage.
-
Add salt, oil, and remaining flour: Add 1/2 teaspoon of salt and 2 tablespoons of oil to the mixture. Gradually add the remaining 1 1/2 cups of flour, mixing until a dough forms. You may need to add a little more flour, a tablespoon at a time, if the dough is too sticky and difficult to handle. The goal is to create a smooth, elastic dough that pulls away from the sides of the bowl.
-
Knead the dough: Turn the dough out onto a lightly floured surface. Knead for 5-7 minutes, or until the dough is smooth and elastic. Kneading develops the gluten, which gives the pizza crust its chewy texture.
-
First rise: Lightly oil a large bowl. Place the kneaded dough in the bowl, turning to coat it with the oil. Cover the bowl with a clean kitchen towel and let it rise in a warm place for about 30-60 minutes, or until doubled in size. This allows the yeast to work its magic, creating air pockets that give the crust its light and airy texture.
-
Prepare the baking sheet: While the dough is rising, preheat your oven to 450°F (232°C). Grease a baking sheet or pizza stone with oil or cooking spray.
-
Shape the dough: Once the dough has doubled in size, punch it down to release the air. Place the dough on the prepared baking sheet. Using your fingers, gently stretch and shape the dough into a circle or rectangle, depending on the shape of your baking sheet.
-
Add toppings: Add your favorite pizza sauce, cheese, and toppings to the crust. Don’t overload the crust with too many toppings, as this can make it soggy.
-
Bake the pizza: Bake in the preheated oven for 20-25 minutes, or until the crust is golden brown and the cheese is melted and bubbly. Keep a close eye on the pizza during the last few minutes of baking to prevent the crust from burning.
-
Cool and serve: Remove the pizza from the oven and let it cool for a few minutes before slicing and serving.
Expert Tips & Tricks
- Yeast Activation: Always check the expiration date on your yeast. If you’re unsure if your yeast is still active, test it by adding a teaspoon of sugar to 1/4 cup of warm water and then sprinkle in 1 teaspoon of yeast. If it doesn’t foam up within 5-10 minutes, your yeast is no good.
- Dough Consistency: The amount of flour needed may vary depending on the humidity and the type of flour you use. Add flour gradually until the dough is smooth and elastic but not sticky.
- Crispy Crust: For an extra crispy crust, try placing a pizza stone in your oven while it preheats. The hot stone will help to cook the bottom of the crust evenly and quickly.
- Flavor Boost: Brush the edges of the crust with garlic-infused olive oil before baking for added flavor.
- Make Ahead: You can make the dough ahead of time and store it in the refrigerator for up to 24 hours. Just punch it down before shaping.
Serving & Storage Suggestions
Serve the pizza immediately while it’s hot and the cheese is melted and bubbly. Leftover pizza can be stored in an airtight container in the refrigerator for up to 3-4 days. To reheat, you can use a microwave, oven, or skillet. For the best results, reheat the pizza in a preheated oven at 350°F (175°C) for about 10-15 minutes, or until heated through. You can also freeze the leftover pizza for up to 2-3 months. Wrap the slices individually in plastic wrap and then place them in a freezer bag. To reheat frozen pizza, bake it in a preheated oven at 375°F (190°C) for about 15-20 minutes, or until heated through.
Nutritional Information
| Nutrient | Amount per Serving | % Daily Value |
|---|---|---|
| Calories | 205.2 kcal | – |
| Calories from Fat | 35 g | 17 % |
| Total Fat | 3.9 g | 6 % |
| Saturated Fat | 0.5 g | 2 % |
| Cholesterol | 0 mg | 0 % |
| Sodium | 147.6 mg | 6 % |
| Total Carbohydrate | 36.6 g | 12 % |
| Dietary Fiber | 1.5 g | 5 % |
| Sugars | 0.7 g | 2 % |
| Protein | 5.2 g | 10 % |
Note: Nutritional information is an estimate and may vary based on specific ingredients and portion sizes.
Variations & Substitutions
- Gluten-Free Crust: Substitute the all-purpose flour with a gluten-free pizza crust blend. You may need to adjust the amount of liquid to achieve the right consistency.
- Whole Wheat Crust: Replace half of the all-purpose flour with whole wheat flour for a nuttier flavor and added fiber.
- Dairy-Free Pizza: Use dairy-free cheese alternatives such as mozzarella shreds made from cashews or other plant-based sources.
- Herb Infused Crust: Add 1-2 tablespoons of dried herbs such as oregano, basil, or rosemary to the dough for an aromatic twist.
- Spicy Crust: Add a pinch of red pepper flakes to the dough for a hint of spice.
FAQs (Frequently Asked Questions)
Q: Can I use a stand mixer to make the dough?
A: Yes, you can definitely use a stand mixer with a dough hook attachment. Just follow the same steps as described above, mixing until the dough comes together and is smooth and elastic.
Q: How do I prevent the pizza crust from becoming soggy?
A: Avoid overloading the crust with too many toppings, and use a pizza stone or preheated baking sheet to ensure even cooking. You can also par-bake the crust for a few minutes before adding the toppings.
Q: Can I freeze the pizza dough for later use?
A: Absolutely! After the first rise, punch down the dough, wrap it tightly in plastic wrap, and freeze it for up to 2-3 months. Thaw it in the refrigerator overnight before using.
Q: What is the best way to reheat leftover pizza?
A: The best way to reheat leftover pizza is in a preheated oven at 350°F (175°C) for about 10-15 minutes, or until heated through. This will help to restore the crust’s crispiness.
Q: Can I add different types of flour to the crust?
A: Yes, you can experiment with different types of flour such as semolina, rye, or spelt flour. Just be sure to adjust the amount of liquid accordingly to achieve the right dough consistency.
Final Thoughts
Making pizza crust from scratch might seem intimidating, but I promise you, it’s incredibly rewarding. The taste and texture of homemade crust far surpass anything you can buy in a store. So, gather your ingredients, put on some music, and get ready to create your own pizza masterpiece. And don’t be afraid to experiment with different toppings and flavors to create your own signature pizza. I encourage you to try this recipe and share your creations with family and friends. Serve with a crisp green salad and a glass of your favorite wine for a complete and satisfying meal. Happy cooking!