
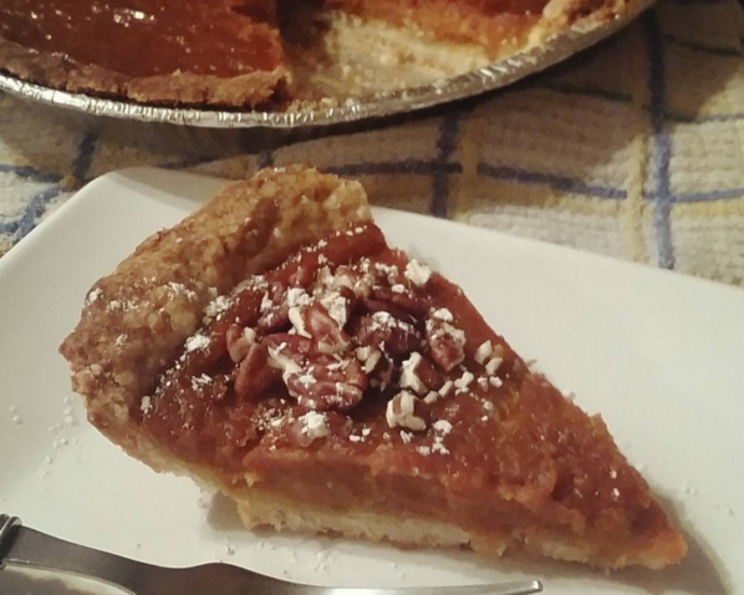
World’s Easiest Pie Crust – Vegan
I remember my first attempt at a traditional pie crust. It was a sticky, buttery disaster that stubbornly refused to roll out properly. Dough sticking to the counter, butter melting before my eyes… the whole ordeal nearly put me off baking pies forever! Thankfully, I stumbled upon this incredibly simple vegan recipe. It’s so foolproof, it’s practically magic, and it opened up a whole new world of pie-baking joy, free from stress and animal products.
Recipe Overview
- Prep Time: 5 minutes
- Cook Time: 10-12 minutes (for pre-baking)
- Total Time: 15-17 minutes
- Servings: 8
- Yield: 1 pie crust
- Dietary Type: Vegan
Ingredients
- 1 ½ cups flour (can be white or whole wheat or a combo of both)
- ½ teaspoon salt
- 2 tablespoons sugar (vegan is best)
- ½ cup oil
- 2 tablespoons orange juice (or vegan soymilk)
Equipment Needed
- Large bowl
- Fork
- 9-inch pie pan
- Oven
Instructions
-
Preheat your oven to 425°F (220°C) if you plan on pre-baking the crust. Pre-baking is optional, but recommended for pies with very wet fillings to avoid a soggy bottom crust.
-
In a large bowl, combine all the dry ingredients: flour, salt, and sugar. Whisk them together briefly with a fork to ensure they are evenly distributed. This step is crucial for achieving a consistent texture.
-
Add the wet ingredients: oil and orange juice (or soymilk) to the bowl.
-
Using the same fork, mix the wet and dry ingredients together until just combined. The mixture will appear crumbly at first, but as you continue to mix, it will start to come together into a shaggy dough. Don’t overmix! A few streaks of flour are perfectly fine. Overmixing can develop the gluten in the flour, leading to a tougher crust.
-
Transfer the dough to a 9-inch pie pan.
-
Using your fingertips, gently press the dough evenly across the bottom and up the sides of the pan. Work your way around the pan, patching up any thin spots. You can also use the bottom of a measuring cup to help smooth out the crust and create a uniform thickness.
-
If you’re pre-baking the crust, prick the bottom of the crust several times with a fork. This will prevent it from puffing up during baking.
-
Place the pie pan in the preheated oven and bake for 10-12 minutes, or until the crust is lightly golden brown. Keep a close eye on it, as baking times can vary depending on your oven.
-
Remove the pre-baked crust from the oven and let it cool completely before adding your filling. If you aren’t pre-baking the crust, simply add your filling and bake according to your pie filling’s recipe instructions.
Expert Tips & Tricks
- Flour Power: Using a combination of white and whole wheat flour adds a lovely depth of flavor and a slightly more rustic texture to the crust. For a lighter crust, stick to all-purpose flour.
- Oil Choice: While any neutral-flavored oil works well in this recipe, I find that using light olive oil adds a subtle richness without being overpowering. Avoid strong-flavored oils like extra virgin olive oil, as they can alter the taste of the crust.
- Sweetness Level: Adjust the amount of sugar to your liking. If you prefer a less sweet crust, you can reduce the sugar to 1 tablespoon.
- Dough Consistency: If your dough seems too dry, add a teaspoon of water or orange juice at a time until it comes together. If it’s too wet, add a tablespoon of flour at a time until it reaches the desired consistency.
- Pre-Baking Perfection: To prevent the crust from shrinking during pre-baking, you can weigh it down with pie weights or dried beans. Simply line the crust with parchment paper and fill it with the weights before baking. Remove the weights during the last few minutes of baking to allow the crust to brown evenly.
- Blind Baking Without Weights: No pie weights? No problem! Just dock the crust well with a fork to discourage puffing and check it frequently during baking, pressing down any puffed-up areas with the back of a spoon.
- Make Ahead: The unbaked pie crust can be made a day ahead of time and stored in the refrigerator. Wrap it tightly in plastic wrap to prevent it from drying out. You can also freeze the unbaked crust for up to 2 months. Thaw it overnight in the refrigerator before using.
Serving & Storage Suggestions
This pie crust is incredibly versatile and can be used for a wide variety of sweet and savory pies. Serve your pie chilled, at room temperature, or warm, depending on the filling. Leftover pie can be stored in the refrigerator for up to 3 days. Cover it loosely with plastic wrap or foil to prevent it from drying out. To reheat, warm individual slices in the microwave or oven. For longer storage, freeze the leftover pie for up to 2 months. Wrap it tightly in plastic wrap and then in foil to prevent freezer burn.
Nutritional Information
| Nutrient | Amount per Serving | % Daily Value |
|---|---|---|
| Calories | 220 kcal | 11% |
| Total Fat | 14g | 22% |
| Saturated Fat | 2g | 10% |
| Cholesterol | 0mg | 0% |
| Sodium | 146mg | 6% |
| Total Carbohydrate | 21g | 7% |
| Dietary Fiber | 1g | 4% |
| Sugars | 4g | 8% |
| Protein | 3g | 6% |
Note: Nutritional information is an estimate and may vary based on specific ingredients and portion sizes.
Variations & Substitutions
- Gluten-Free Crust: Use a gluten-free flour blend designed for baking, such as one containing rice flour, tapioca starch, and potato starch. You may need to add a bit more liquid to get the dough to come together.
- Different Juices: While orange juice adds a subtle citrusy flavor, you can substitute it with apple juice, lemon juice, or even water.
- Nutty Crust: Add ¼ cup of finely ground nuts, such as almonds or walnuts, to the flour mixture for a nutty flavor and texture.
- Spiced Crust: Add a pinch of cinnamon, nutmeg, or ginger to the flour mixture for a warm, spiced crust.
- Herb Crust: For savory pies, add a teaspoon of dried herbs, such as thyme or rosemary, to the flour mixture.
- Chocolate Crust: Add 2 tablespoons of unsweetened cocoa powder to the flour mixture for a chocolatey crust.
FAQs (Frequently Asked Questions)
Q: Can I use this crust for a no-bake pie?
A: Yes, you can! Just pre-bake the crust as directed in the recipe and let it cool completely before adding your no-bake filling.
Q: What kind of oil is best for this crust?
A: A neutral-flavored oil like canola oil, vegetable oil, or light olive oil works best. Avoid strong-flavored oils like extra virgin olive oil, as they can overpower the taste of the crust.
Q: My crust is cracking when I press it into the pan. What am I doing wrong?
A: This usually means the dough is too dry. Try adding a teaspoon of water or orange juice at a time until the dough becomes more pliable.
Q: Can I freeze this pie crust?
A: Yes! You can freeze the unbaked crust for up to 2 months. Wrap it tightly in plastic wrap and then in foil to prevent freezer burn. Thaw it overnight in the refrigerator before using.
Q: Why is my crust soggy after baking?
A: A soggy crust can be caused by a few things: using a filling that is too wet, not pre-baking the crust when necessary, or not baking the pie long enough. Make sure to pre-bake the crust for pies with very wet fillings, and ensure that the filling is properly thickened before pouring it into the crust.
Final Thoughts
This vegan pie crust recipe is a game-changer for anyone who wants to enjoy delicious pies without the fuss and the animal products. Its simplicity and reliability make it perfect for beginner bakers and seasoned pros alike. So, gather your ingredients, preheat your oven, and get ready to create a pie that will impress your friends and family. Don’t be afraid to experiment with different fillings and variations to create your signature pie. And most importantly, have fun! Pair it with a warm cup of apple cider for the perfect autumn treat. I can’t wait to hear about your pie-baking adventures!