
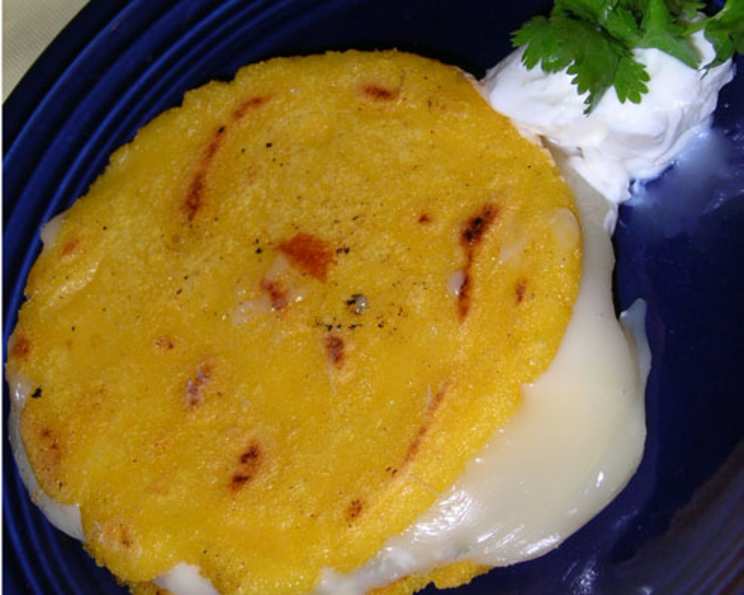
WW 1 Point Arepas: Your Guilt-Free Tortilla Alternative
My grandmother, a woman whose kitchen was a constant whirlwind of delicious scents and comforting sounds, always had a secret weapon: arepas. Not just any arepas, but tiny, perfectly formed corn cakes that she’d press and griddle until they were golden and crisp. I remember being mesmerized as a child, watching her hands move with practiced ease, creating these simple yet satisfying treats. They were a staple, a blank canvas for whatever flavors she fancied, from savory black beans to sweet, melting cheese. Now, I’ve adapted a version that honors her tradition while aligning with my own healthier lifestyle— these WW 1-point arepas.
Recipe Overview:
- Prep Time: 10 minutes
- Cook Time: 8 minutes
- Total Time: 18 minutes
- Servings: 12
- Dietary Type: Gluten-Free
Ingredients:
- 2 1⁄2 cups warm water
- 2 cups arepa flour (masarepa)
- 1 pinch salt
- 1 teaspoon olive oil, divided
Equipment Needed:
- Mixing bowl
- Large nonstick skillet
- Heated plate
- Zip-lock freezer bag
Instructions:
- In a mixing bowl, pour in the warm water.
- Add the arepa flour (masarepa) and salt to the water.
- Stir continuously until a soft dough forms.
- Gently knead the dough until it feels smooth. This may take a couple of minutes.
- Tear off pieces of the dough, about the size of a ping-pong ball.
- Shape each piece into a 3-inch patty, approximately 1/2 inch thick. Aim for a uniform thickness to ensure even cooking.
- Heat 1/2 teaspoon of the olive oil in a large nonstick skillet over medium heat.
- Add 6 arepas to the skillet, ensuring they aren’t overcrowded.
- Cook the arepas, turning once, until they are golden and crusty on the outside, about 3-4 minutes per side. Watch carefully to prevent burning.
- Transfer the cooked arepas to a heated plate to keep them warm.
- Repeat steps 7-9 with the remaining olive oil and arepas.
- Serve immediately and enjoy!
- For storage, place leftover arepas in a zip-lock freezer bag in the refrigerator for up to 3 days, or freeze for up to 1 month.
Expert Tips & Tricks:
- Hydration is Key: The amount of water needed may vary slightly depending on the brand of masarepa you use. Add water gradually until the dough comes together but isn’t too sticky.
- Don’t Overwork the Dough: Over-kneading can result in tough arepas. Knead just until the dough is smooth and pliable.
- Perfecting the Patty: Use your palms to flatten the dough into even patties. This ensures even cooking and prevents cracking.
- Skillet Temperature: Maintaining a consistent medium heat is crucial. If the skillet is too hot, the arepas will burn on the outside before they cook through. If it’s too cool, they will become hard and dry.
- Freezing for Convenience: Freezing arepas is a great way to have a quick and healthy option on hand. Flash freeze them individually on a baking sheet before transferring them to a freezer bag to prevent sticking.
Serving & Storage Suggestions:
These arepas are incredibly versatile! Enjoy them plain as a simple side dish or use them as a healthier alternative to tortillas for tacos and sandwiches. They are delicious filled with:
- Shredded chicken or beef
- Black beans and salsa
- Avocado and a fried egg
- Grilled vegetables
Leftover arepas can be stored in an airtight container in the refrigerator for up to 3 days or frozen for up to 1 month.
To reheat leftovers:
- From the refrigerator: Wrap them in foil, place on a baking sheet, and heat at 350°F (175°C) until heated through (about 10 minutes). Remove the foil and bake for 5 more minutes to crisp the exterior.
- From frozen: Thaw them in the refrigerator overnight for best results. Then, reheat as described above. You can also reheat them directly from frozen, but it may take longer.
Nutritional Information:
| Nutrient | Amount per Serving |
|---|---|
| Calories | 3.3 kcal |
| Calories from Fat | 3 g |
| Total Fat | 0.4 g |
| Saturated Fat | 0.1 g |
| Cholesterol | 0 mg |
| Sodium | 13.9 mg |
| Total Carbohydrate | 0 g |
| Dietary Fiber | 0 g |
| Sugars | 0 g |
| Protein | 0 g |
Variations & Substitutions:
- Cheese Arepas: As mentioned in the original recipe, try making arepas with warmed fat-free milk instead of water for a richer flavor. You can also knead in 1/2 cup of shredded fat-free mozzarella cheese for added flavor and creaminess. This will add 1/2 point to the Weight Watchers points.
- Sweet Arepas: For a sweet twist, add a tablespoon of brown sugar or honey to the dough. These are delicious served with a dollop of yogurt and fresh fruit.
- Herb-Infused Arepas: Add fresh herbs like cilantro, parsley, or chives to the dough for a boost of flavor.
- Spicy Arepas: Incorporate a pinch of chili powder or a finely chopped jalapeño to the dough for a little kick.
- Vegan Arepas: Ensure you are using plant-based oil and fillings.
FAQs (Frequently Asked Questions):
Q: What is masarepa?
A: Masarepa is a pre-cooked corn flour used to make arepas, empanadas, and other Latin American dishes. It is different from regular cornmeal and masa harina.
Q: Can I use regular cornmeal instead of masarepa?
A: No, regular cornmeal will not work in this recipe. Masarepa is pre-cooked and has a finer texture, which is essential for creating the right consistency.
Q: Why are my arepas cracking?
A: Cracking can occur if the dough is too dry or if the skillet is too hot. Try adding a little more water to the dough or lowering the heat.
Q: Can I bake these instead of cooking them in a skillet?
A: Yes, you can bake them. Preheat your oven to 375°F (190°C). Place the arepas on a baking sheet lined with parchment paper and bake for 20-25 minutes, or until golden brown and cooked through.
Q: How do I keep the arepas warm while cooking the rest?
A: Place the cooked arepas on a heated plate in a warm oven (around 200°F or 95°C) to keep them warm until serving.
Final Thoughts:
These WW 1 Point Arepas are a fantastic way to enjoy a classic Latin American staple while staying on track with your health goals. They’re simple to make, incredibly versatile, and offer a blank canvas for countless flavor combinations. I encourage you to give this recipe a try, experiment with different fillings, and share your creations with friends and family. And please, let me know how it turns out. Enjoy!