
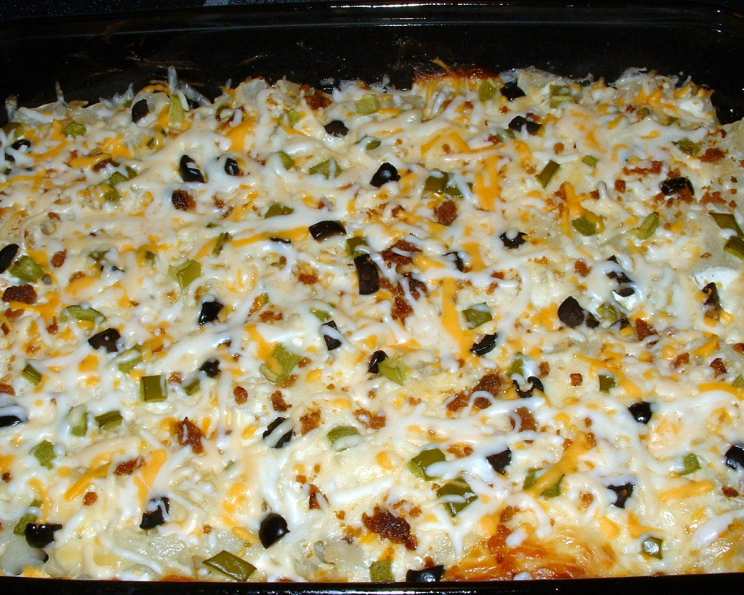
Ww 3 Points – Impossibly Easy Breakfast Casserole
I’ll never forget the first time I made a breakfast casserole. It was a chilly autumn morning, and my family was coming over for brunch. I wanted something hearty and satisfying, but also relatively hands-off so I could actually enjoy their company. The resulting casserole, bubbly and golden brown, was devoured in minutes. Since then, I’ve experimented with countless variations, but this particular one holds a special place because it’s both incredibly easy and surprisingly light – perfect for starting the day without any guilt. This recipe is a testament to how delicious and satisfying healthy eating can be.
Recipe Overview
- Prep Time: 15 minutes
- Cook Time: 40 minutes
- Total Time: 55 minutes
- Servings: 12
- Yield: 1 9×13 inch casserole
- Dietary Type: Weight Watchers friendly
Ingredients
- 2 cups cooked ham, diced
- 1 small onion, chopped
- 1 small green pepper, chopped
- 3 cups Ore-Ida Country Style Hash Browns, frozen
- 2 cups Kraft Free Shredded Cheddar Cheese, divided
- 1 cup Bisquick Reduced-Fat Baking Mix
- 2 cups skim milk
- 1 cup fat-free egg substitute
- Salt and pepper to taste
- Cooking spray
Equipment Needed
- Non-stick skillet
- 9×13 inch baking dish
- Large mixing bowl
- Whisk
- Measuring cups and spoons
Instructions
- Preheat your oven to 400°F (200°C). Make sure the rack is in the center position for even baking.
- Prepare the vegetables: Spray a non-stick skillet with cooking spray. Sauté the chopped onions and green pepper over medium heat until they begin to soften, about 5-7 minutes.
- Add the diced ham to the skillet about halfway through cooking the vegetables. Sauté for another 3-5 minutes, or until the ham is heated through. Stir occasionally to prevent sticking.
- Prepare the base: In a 9×13 inch baking dish, pour in the frozen hash browns. Spread them out evenly to cover the bottom of the dish.
- Season the hash browns: Sprinkle the hash browns with salt and pepper, or any other seasonings you like. Garlic powder, onion powder, or paprika would also work well.
- Combine the vegetables and ham with the hash browns: Mix in the sautéed vegetables and ham with the hash browns in the baking dish, distributing them evenly.
- Add cheese: Sprinkle 1 cup of the Kraft Free Shredded Cheddar Cheese over the ham, hash brown, and vegetable mixture.
- Prepare the egg mixture: In a large bowl, combine the skim milk, Bisquick Reduced-Fat Baking Mix, and fat-free egg substitute. Whisk together until well combined and smooth. Be sure to get rid of any lumps of Bisquick.
- Pour the egg mixture: Pour the milk and egg mixture evenly over the top of the ham, hash brown, and cheese mixture in the baking dish.
- Bake the casserole: Bake uncovered for 40 minutes, or until a knife inserted into the center of the casserole comes out clean. The top should be golden brown and the edges set.
- Add the remaining cheese: Sprinkle the remaining 1 cup of Kraft Free Shredded Cheddar Cheese over the top of the casserole.
- Bake until cheese is melted: Return the casserole to the oven and bake for a few more minutes, until the cheese is melted and slightly bubbly. This should only take about 2-3 minutes.
- Rest: Remove the casserole from the oven and let it stand for 5 minutes before serving. This allows the casserole to set slightly, making it easier to cut and serve.
- Portion and serve: Cut into 12 equal servings.
Expert Tips & Tricks
- Prevent soggy casserole: Ensure the sautéed vegetables are not overly wet before adding them to the casserole. Excess moisture can make the casserole soggy. Drain off any excess liquid from the skillet before combining.
- Customize seasonings: Feel free to experiment with different seasonings. Italian seasoning, red pepper flakes, or a dash of hot sauce can add a flavorful kick.
- Make-ahead option: Assemble the casserole the night before, cover it tightly with plastic wrap, and refrigerate. In the morning, bake as directed, adding about 10-15 minutes to the cooking time.
- Even browning: If the top of the casserole is browning too quickly, tent it loosely with aluminum foil during the last 15 minutes of baking.
- Check for doneness: The casserole is done when a knife inserted into the center comes out clean. If the knife comes out with wet egg mixture, continue baking for a few more minutes.
- Vary your veggies: Feel free to substitute other vegetables for the onion and green pepper. Mushrooms, bell peppers of different colors, or spinach would all be great additions.
Serving & Storage Suggestions
Serve the breakfast casserole warm, straight from the oven. It pairs well with a side of fresh fruit, a dollop of plain Greek yogurt, or a sprinkle of fresh herbs.
- Storage: Store leftover casserole in an airtight container in the refrigerator for up to 3-4 days.
- Reheating: Reheat individual portions in the microwave for 1-2 minutes, or until heated through. You can also reheat the entire casserole in the oven at 350°F (175°C) for about 15-20 minutes, or until warmed through.
- Freezing: For longer storage, the casserole can be frozen. Cut the cooled casserole into individual portions, wrap each portion tightly in plastic wrap, and then place them in a freezer bag. Freeze for up to 2 months. Thaw overnight in the refrigerator before reheating.
Nutritional Information
| Nutrient | Amount per Serving | % Daily Value |
|---|---|---|
| Calories | 278.7 kcal | N/A |
| Calories from Fat | N/A | N/A |
| Total Fat | 15.9 g | 24% |
| Saturated Fat | 6.2 g | 30% |
| Cholesterol | 42 mg | 13% |
| Sodium | 325.4 mg | 13% |
| Total Carbohydrate | 17.2 g | 5% |
| Dietary Fiber | 1.4 g | 5% |
| Sugars | 1.2 g | 4% |
| Protein | 16.1 g | 32% |
Note: Nutritional information is an estimate and may vary based on specific ingredients and portion sizes.
Variations & Substitutions
- Vegetarian Option: Omit the ham and add more vegetables, such as mushrooms, zucchini, or spinach. Consider using a plant-based sausage substitute for a similar savory flavor.
- Gluten-Free: Ensure that the Bisquick Reduced-Fat Baking Mix is certified gluten-free, or substitute with a gluten-free baking mix.
- Dairy-Free: Substitute the skim milk with unsweetened almond milk or another non-dairy milk alternative. Use a dairy-free shredded cheese substitute.
- Spicy Kick: Add a pinch of red pepper flakes or a dash of hot sauce to the egg mixture for a spicy kick.
- Different Cheese: Experiment with different types of cheese, such as mozzarella, Monterey Jack, or pepper jack.
- Seasonal Vegetables: Use seasonal vegetables for a different flavor profile. Asparagus in the spring, corn in the summer, or squash in the fall would all be delicious.
FAQs (Frequently Asked Questions)
Q: Can I use regular Bisquick instead of the reduced-fat version?
A: Yes, you can, but keep in mind that it will slightly increase the fat content and WW points per serving.
Q: Can I make this casserole ahead of time?
A: Absolutely! Assemble the casserole the night before, cover it tightly, and refrigerate. Add a few extra minutes to the baking time.
Q: What if I don’t have egg substitute? Can I use real eggs?
A: Yes, you can substitute the egg substitute with 4 large eggs, whisked. This will alter the nutritional information slightly.
Q: How do I prevent the hash browns from being soggy?
A: Make sure the hash browns are spread in an even layer and aren’t overcrowded in the dish. Also, ensure the vegetables aren’t too wet when added.
Q: Can I freeze leftovers?
A: Yes, you can freeze individual portions for up to 2 months. Thaw overnight in the refrigerator before reheating.
Final Thoughts
This Impossibly Easy Breakfast Casserole is more than just a recipe; it’s a blank canvas for your culinary creativity. Don’t be afraid to experiment with different ingredients, seasonings, and variations to create a casserole that perfectly suits your tastes and dietary needs. I hope this becomes a go-to recipe for your weekend brunches or quick weeknight dinners. Please share your creations and feedback – I’m eager to hear how you’ve made this recipe your own!