
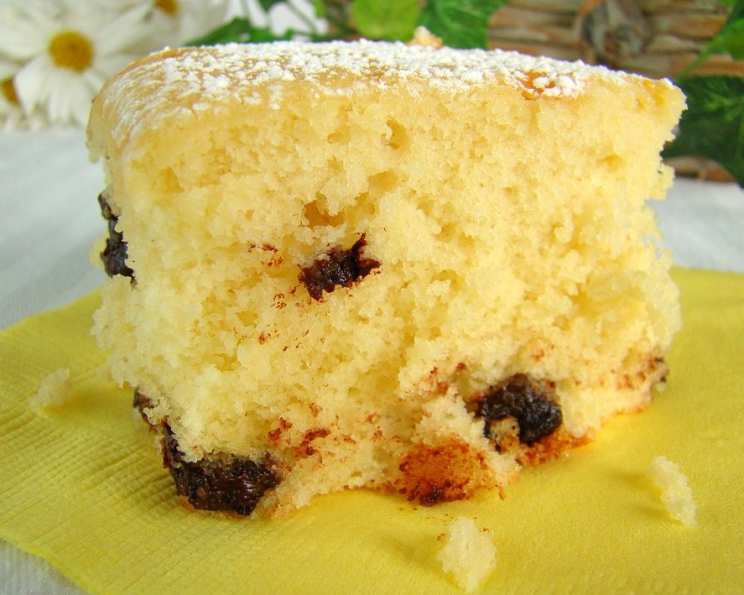
Yellow Cake Light: A Classic Reimagined
My grandmother, bless her heart, always made the most incredible yellow cake. It was a staple at every family gathering – birthdays, holidays, even just a random Sunday afternoon. The aroma alone was enough to transport me back to her cozy kitchen, filled with laughter and love. While her version was undeniably delicious, it was also incredibly rich. This recipe is my attempt to capture that same comforting flavor, but with a lighter touch, so we can all indulge a little more often without the guilt.
Recipe Overview
- Prep Time: 20 minutes
- Cook Time: 30-35 minutes
- Total Time: 50-55 minutes
- Servings: 18
- Yield: 1 (2-layer) cake
- Dietary Type: Vegetarian
Ingredients
- 1 1⁄3 cups sugar
- 1⁄2 cup butter, softened
- 1 tablespoon vanilla extract
- 3 large eggs
- 2 1⁄4 cups unbleached white flour
- 2 1⁄4 teaspoons baking powder
- 1⁄2 teaspoon sea salt
- 1 1⁄4 cups nonfat milk
- Frosting (of your choice)
Equipment Needed
- 2 (9-inch) round cake pans
- Electric mixer
- Mixing bowls
- Wire racks
- Measuring cups and spoons
- Wooden pick or toothpick
Instructions
-
Preheat your oven to 350°F (175°C). It’s crucial to have the oven at the correct temperature for even baking.
-
Prepare your cake pans. Spray the bottoms only of 2 (9-inch) round cake pans with cooking spray. Then, dust the insides with flour, tapping out any excess. This prevents the cake from sticking and ensures easy removal. Set the prepared pans aside.
-
In a large mixing bowl, cream together the sugar, softened butter, and vanilla extract using an electric mixer at medium speed. Beat until the mixture is very well blended and light in color, about 5 minutes. This process incorporates air into the batter, contributing to a light and fluffy cake.
-
Add the eggs one at a time, beating well after each addition. Make sure each egg is fully incorporated before adding the next. This helps create a stable emulsion, which is essential for a good cake texture.
-
In a separate mixing bowl (a large glass mixing cup works well), whisk together the flour, baking powder, and salt. This ensures the leavening agent (baking powder) and salt are evenly distributed throughout the flour, resulting in a consistent rise and flavor.
-
Gradually add the dry ingredients (flour mixture) to the wet ingredients (sugar mixture) alternately with the nonfat milk, beginning and ending with the flour mixture. Mix until just combined. Be careful not to overmix the batter, as this can develop the gluten in the flour and result in a tough cake. A few streaks of flour are okay at this point.
-
Divide the thick cake batter evenly into the 2 prepared cake pans, spreading the batter as evenly as possible using a spatula.
-
Sharply tap the pans on the counter a few times to disburse any air bubbles that may be trapped in the batter. This will help create a smoother cake surface.
-
Place the cake pans in the preheated 350°F (175°C) oven and bake for 30-35 minutes, or until a wooden pick or toothpick inserted into the center of each cake comes out clean. The baking time may vary depending on your oven, so start checking for doneness around 30 minutes.
-
Once baked, remove the cakes from the oven and let them cool in the pans on wire racks for 10 minutes. This allows the cakes to firm up slightly, making them easier to remove from the pans without breaking.
-
After 10 minutes, carefully invert the cakes onto the wire racks and let them cool completely before frosting. Make sure the cakes are completely cool before frosting to prevent the frosting from melting.
-
Once the cakes are cool, place one cake layer on a serving plate or cake stand. Frost with about 1/2 cup of your favorite frosting.
-
Top with the remaining cake layer and frost the sides and top of the cake with the remaining frosting. Decorate as desired.
Expert Tips & Tricks
-
Room Temperature Ingredients: Make sure your butter and eggs are at room temperature before starting the recipe. This helps them emulsify properly, creating a smoother batter and a more tender cake.
-
Measuring Flour: When measuring flour, spoon it into the measuring cup and level it off with a knife. Avoid scooping the flour directly from the bag, as this can compact it and result in too much flour in the recipe, leading to a dry cake.
-
Don’t Overmix: As mentioned earlier, avoid overmixing the batter once you add the flour. Overmixing develops the gluten in the flour, which can make the cake tough. Mix until just combined.
-
Even Baking: To ensure even baking, rotate the cake pans halfway through the baking time. This helps prevent one side of the cake from browning more than the other.
-
Moist Cake: For an extra moist cake, brush the cooled cake layers with a simple syrup before frosting. You can make a simple syrup by boiling equal parts water and sugar until the sugar is dissolved.
Serving & Storage Suggestions
Serve the Yellow Cake Light at room temperature. It’s delicious on its own or with a scoop of vanilla ice cream or a dollop of whipped cream.
To store leftover cake, wrap it tightly in plastic wrap or store it in an airtight container at room temperature for up to 3 days. For longer storage, you can refrigerate the cake for up to a week. Let it come to room temperature before serving.
You can also freeze the cake for up to 2-3 months. Wrap the cake tightly in plastic wrap and then in foil, or store it in a freezer-safe container. Thaw the cake in the refrigerator overnight before serving.
Nutritional Information
| Nutrient | Amount per Serving | % Daily Value |
|---|---|---|
| Calories | 180 kcal | N/A |
| Calories from Fat | 55 g | 31% |
| Total Fat | 6.1 g | 9% |
| Saturated Fat | 3.5 g | 17% |
| Cholesterol | 49.1 mg | 16% |
| Sodium | 167.2 mg | 6% |
| Total Carbohydrate | 27.9 g | 9% |
| Dietary Fiber | 0.4 g | 1% |
| Sugars | 15.9 g | 63% |
| Protein | 3.3 g | 6% |
Note: Nutritional information is an estimate and may vary based on specific ingredients and serving sizes.
Variations & Substitutions
-
Gluten-Free: Substitute the unbleached white flour with a gluten-free all-purpose flour blend. You may need to add a binder like xanthan gum to help with the structure of the cake.
-
Dairy-Free: Substitute the butter with a dairy-free butter alternative. Use a plant-based milk (almond, soy, or oat milk) instead of nonfat milk.
-
Flavor Variations: Add a teaspoon of lemon zest to the batter for a lemon-flavored cake. Or, add a teaspoon of almond extract instead of vanilla extract for an almond-flavored cake.
-
Frosting: The possibilities are endless! Try a classic vanilla buttercream, a chocolate frosting, or a cream cheese frosting.
FAQs (Frequently Asked Questions)
Q: Why is it important to spray only the bottoms of the cake pans?
A: Spraying only the bottoms allows the cake to grip the sides of the pan as it rises, preventing it from doming too much in the center. It contributes to a more level cake.
Q: Can I use salted butter instead of unsalted butter?
A: Yes, you can, but you should reduce the amount of sea salt in the recipe by about 1/4 teaspoon to compensate.
Q: What can I do if my cake is browning too quickly?
A: If your cake is browning too quickly, tent it loosely with aluminum foil to protect the top from direct heat.
Q: How do I know when the cake is done?
A: The cake is done when a wooden pick or toothpick inserted into the center comes out clean. The top of the cake should also be lightly golden brown and spring back slightly when touched.
Q: Can I make this cake ahead of time?
A: Yes, you can bake the cake layers ahead of time and store them tightly wrapped in the refrigerator for up to 2 days or in the freezer for up to 2 months. Frost the cake just before serving.
Final Thoughts
This Yellow Cake Light recipe is a delightful twist on a beloved classic. It’s perfect for any occasion, whether you’re celebrating a special event or simply craving a sweet treat. Don’t hesitate to personalize it with your favorite frosting and decorations. I encourage you to give this recipe a try and share your baking adventures with friends and family. Enjoy the process and the delicious results! Maybe pair this cake with a scoop of homemade ice cream or a glass of cold milk for the ultimate comfort food experience. Happy baking!