
Golden Sunshine: Mastering the Art of Yellow Coconut Rice
My grandmother, a woman whose culinary wisdom was surpassed only by her generous heart, often made yellow rice for special occasions. I can still picture her, a whirlwind of vibrant fabrics and infectious laughter, stirring the pot with a wooden spoon, the aroma of coconut and turmeric filling the air. It wasn’t just rice; it was a symbol of celebration, a comforting embrace on a plate. It was a simple dish, but the love she poured into it made it extraordinary, and this recipe attempts to recapture some of that magic.
Recipe Overview
- Prep Time: 30 minutes
- Cook Time: 15 minutes
- Total Time: 45 minutes
- Servings: 4
- Yield: About 4 cups
- Dietary Type: Gluten-Free
Ingredients
- 1 ¾ cups long-grain white rice
- 1 ¼ cups water
- 400 ml coconut cream
- ½ teaspoon salt
- 1 teaspoon sugar
- ½ teaspoon ground turmeric
- 1 pinch saffron threads
Equipment Needed
- Large bowl
- Strainer
- Large heavy-based saucepan with lid
Instructions
-
Begin by soaking the long-grain white rice in a large bowl of cold water for 30 minutes. This crucial step helps to remove excess starch, resulting in a fluffier, less sticky final product.
-
After soaking, pour the rice into a strainer and rinse thoroughly under cold running water. Continue rinsing until the water runs clear, indicating that most of the surface starch has been removed.
-
Transfer the rinsed rice to a large, heavy-based saucepan. This type of pan will distribute heat evenly, preventing scorching.
-
Add the remaining ingredients to the saucepan: water, coconut cream, salt, sugar, ground turmeric, and saffron threads. The turmeric gives the rice its vibrant yellow hue, while the saffron adds a subtle, floral aroma and flavor.
-
Cover the saucepan with a tight-fitting lid. Bring the mixture to a boil over medium-high heat, stirring occasionally to prevent the rice from sticking to the bottom.
-
Once boiling, immediately reduce the heat to the lowest possible setting to maintain a gentle simmer. Keep the saucepan covered and simmer for approximately 15 minutes, or until the rice is tender and all the liquid has been absorbed. Resist the urge to lift the lid frequently, as this will release steam and prolong the cooking time.
-
After 15 minutes, check the rice for doneness. If the rice is still slightly firm and there is still liquid in the pan, cover and continue to simmer for a few more minutes, checking every couple of minutes until the liquid is absorbed and the rice is tender.
-
Remove the saucepan from the heat and keep it covered. Allow the rice to stand, undisturbed, for 5 to 10 minutes before serving. This resting period allows the steam to redistribute, resulting in perfectly cooked, fluffy rice.
-
Before serving, gently fluff the rice with a fork to separate the grains. Avoid over-stirring, as this can make the rice mushy.
Expert Tips & Tricks
-
Saffron Infusion: For a more intense saffron flavor, steep the saffron threads in a small amount of warm water for about 30 minutes before adding them to the rice. This will release their color and aroma more effectively.
-
Coconut Cream Quality: The quality of the coconut cream can significantly impact the final flavor of the rice. Opt for a full-fat coconut cream for the richest, most decadent results. Avoid using coconut milk beverage, as it is too thin and will not provide the desired creaminess.
-
Turmeric Power: Turmeric not only adds color but also boasts anti-inflammatory properties. However, be mindful of the quantity, as too much can impart a slightly bitter taste.
-
Preventing Sticking: If you’re concerned about the rice sticking to the bottom of the pan, consider using a non-stick saucepan or adding a teaspoon of coconut oil along with the other ingredients.
-
Rice Variety: While long-grain white rice is recommended, you can experiment with other types of rice, such as basmati or jasmine. Adjust the cooking time and liquid ratio accordingly. Basmati rice generally requires less liquid.
-
Make-Ahead Tip: The yellow coconut rice can be prepared ahead of time. Once cooked, allow it to cool completely, then store it in an airtight container in the refrigerator for up to 3 days. Reheat gently in a saucepan with a splash of water or coconut milk, or in the microwave.
Serving & Storage Suggestions
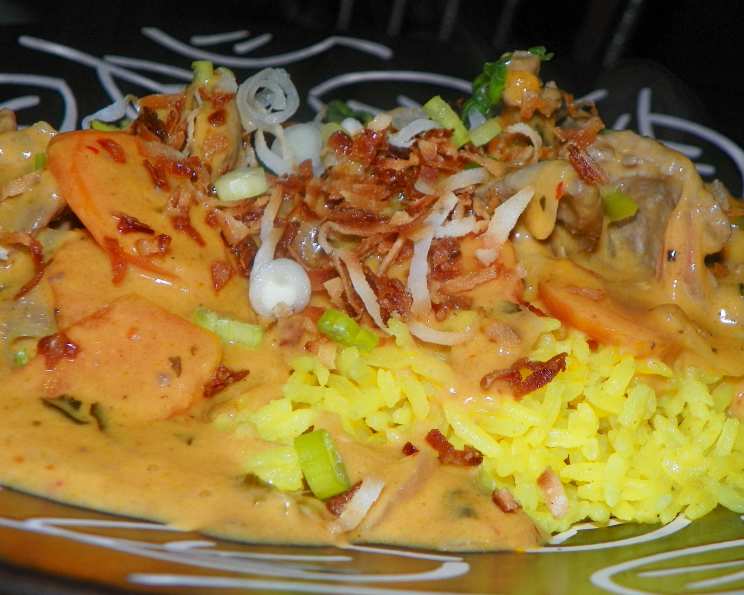
Serve the Yellow Coconut Rice as a flavorful and aromatic side dish to complement a variety of cuisines. It pairs beautifully with curries, grilled meats, seafood, or vegetable dishes. Garnish with fresh cilantro, chopped green onions, or toasted coconut flakes for added visual appeal and flavor.
For storage, allow the leftover rice to cool completely before transferring it to an airtight container. It can be stored in the refrigerator for up to 3 days. To reheat, add a tablespoon or two of water or coconut milk to the rice, cover, and microwave until heated through, stirring occasionally. You can also reheat it in a saucepan over low heat, stirring frequently. Freezing is not recommended, as the rice texture may become altered upon thawing.
Nutritional Information
| Nutrient | Amount per Serving | % Daily Value |
|---|---|---|
| Calories | 360 kcal | 18% |
| Total Fat | 16g | 25% |
| Saturated Fat | 15g | 75% |
| Cholesterol | 0mg | 0% |
| Sodium | 250mg | 10% |
| Total Carbohydrate | 50g | 17% |
| Dietary Fiber | 1g | 4% |
| Sugars | 3g | 6% |
| Protein | 5g | 10% |
Nutritional information is an estimate and may vary based on specific ingredients and portion sizes.
Variations & Substitutions
-
Vegan Upgrade: Ensure your sugar is vegan. While most granulated sugar is processed without bone char, some brands may use it.
-
Spice It Up: Add a pinch of red pepper flakes or a finely chopped chili pepper to the rice while cooking for a subtle kick of heat.
-
Herbal Infusion: Infuse the rice with fresh herbs such as lemongrass, pandan leaves, or kaffir lime leaves for an even more fragrant and complex flavor profile. Simply add the herbs to the saucepan along with the other ingredients and remove them before serving.
-
Vegetable Boost: Add finely diced vegetables such as carrots, peas, or bell peppers to the rice for added nutrition and color.
-
Different Oil: Although the creaminess of the dish comes from coconut cream, you could also use a teaspoon of coconut oil if you prefer.
FAQs (Frequently Asked Questions)
Q: Why do I need to soak the rice?
A: Soaking the rice removes excess starch, which results in a fluffier, less sticky texture after cooking. It also helps the rice cook more evenly.
Q: Can I use regular coconut milk instead of coconut cream?
A: While you can use regular coconut milk, the rice will not be as rich and creamy. Coconut cream has a higher fat content, which contributes to the desired texture.
Q: What if my rice is still hard after 15 minutes of simmering?
A: If the rice is still hard, add a little more water (about ¼ cup) to the saucepan, cover, and continue simmering until the rice is tender.
Q: Can I use brown rice instead of white rice?
A: Yes, you can use brown rice, but you will need to adjust the cooking time and liquid ratio. Brown rice typically requires more liquid and a longer cooking time than white rice. Check the package instructions for specific recommendations.
Q: How do I prevent the rice from sticking to the bottom of the pan?
A: Using a heavy-based saucepan and stirring occasionally can help prevent sticking. You can also add a teaspoon of coconut oil to the rice before cooking.
Final Thoughts
This Yellow Coconut Rice recipe is more than just a method of cooking rice; it’s an invitation to create a vibrant, flavorful dish that evokes memories of warmth and comfort. Don’t be afraid to experiment with variations and substitutions to make it your own. Whether you’re serving it as a side dish to a curry or enjoying it on its own, this rice is sure to impress. I encourage you to try this recipe and share your creations. Perhaps you’ll find yourself transported to a place of culinary nostalgia, just as I am when I make it. Pair it with some grilled shrimp or a spicy peanut sauce for a truly unforgettable meal.