
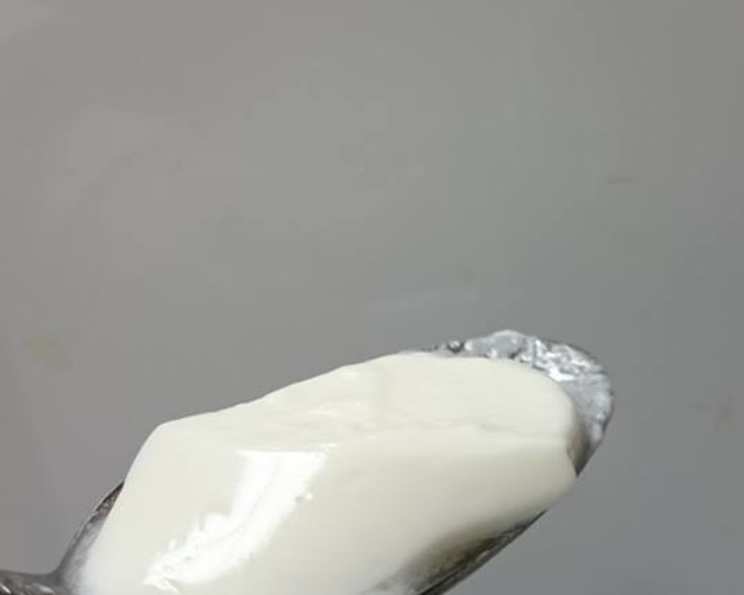
The Easiest Homemade Yogurt: A Pressure Cooker Miracle
I still remember the first time my grandmother showed me how to make yogurt. We stood in her sun-drenched kitchen, the air thick with the scent of warm milk and something almost… magical. She patiently explained the process, her hands moving with the practiced grace of someone who had done it countless times. While her method was a labor of love, requiring careful temperature monitoring and a watchful eye, I’ve discovered a way to achieve the same creamy, tangy perfection with a fraction of the effort, thanks to the electric pressure cooker! This recipe brings that cherished memory into the modern age, making delicious, homemade yogurt accessible to everyone.
Recipe Overview
- Prep Time: 5 minutes
- Cook Time: 1 minute
- Inactive Time: 8 hours 30 minutes (cooling and yogurt culturing)
- Total Time: 8 hours 36 minutes
- Servings: 16
- Yields: 16 1/2 cup servings
- Dietary Type: Vegetarian, Gluten-Free
Ingredients
- ½ gallon whole milk
- 4 teaspoons yogurt starter (I used Yoplait)
- 1 cup water
Equipment Needed
- Electric Pressure Cooker (Instant Pot)
- Wire grate (if your Instant Pot didn’t come with one, you can use a trivet)
- 4 pint-sized jars with lids
Instructions
-
Begin by pouring 1 cup of water into the bottom of your Instant Pot. This will prevent the jars from scorching during the initial heating process.
-
Carefully place the wire grate inside the Instant Pot. This will elevate the jars and ensure even heat distribution.
-
Arrange four pint-sized jars filled with whole milk on the wire grate inside the pot. Leave the jars uncovered during the heating process.
-
Close and lock the lid of your Instant Pot. Ensure the steam release valve is in the sealing position.
-
Press the “Steam” button on your Instant Pot. The default time is usually set to 10 minutes. Reduce this time to 1 minute by pressing the “-” (minus) button. The goal here is to heat the milk without scorching it.
-
Allow the Instant Pot to run through this 1-minute steaming cycle. It will take approximately 15 minutes for the pot to come to pressure and complete the cycle.
-
As soon as the Instant Pot beeps, signaling the end of the steaming cycle, immediately unplug it. Leaving it plugged in will keep the milk warm and potentially lead to over-heating.
-
Allow the pressure to release naturally. This may take approximately 15 minutes. Do not attempt to manually vent the pressure, as this could cause the hot milk to boil over and make a mess. Wait until the Instant Pot lid unlocks on its own.
-
Carefully open the lid and allow the milk to cool down to a pleasant “bathtub” temperature. This is crucial for the yogurt cultures to thrive. You should be able to comfortably hold your finger in the milk for a few seconds. This usually takes about an hour.
-
As the milk cools, a thin film may develop on the surface. Use a spoon to skim off any film that has formed. This will result in a smoother final yogurt product.
-
Once the milk has cooled sufficiently, it’s time to add the yogurt starter. Add about a teaspoon of yogurt starter to each jar. While plain yogurt is the ideal starter, in a pinch, you can use vanilla yogurt (like Yoplait). Just remember that the flavor will influence your final product. Once you’ve made a batch of plain yogurt, you can reserve some to use as a starter for future batches.
-
Gently stir the starter into the milk in each jar to ensure it’s evenly distributed.
-
Replace the jars back in the Instant Pot, keeping the cup of water in the bottom.
-
Close the lid of the Instant Pot. This time, you do not need to lock it.
-
Press the “Yogurt” button on your Instant Pot. Allow the yogurt to incubate for 8 hours. This is the optimal time for the yogurt cultures to multiply and thicken the milk.
-
After 8 hours, carefully remove the jars from the Instant Pot. Secure the lids on the jars.
-
Place the capped jars of yogurt in the refrigerator to chill for at least 4 hours, or preferably overnight. Chilling will further thicken the yogurt and enhance its flavor.
-
If, after chilling, your yogurt is still too runny for your liking, you can add a heaping teaspoon of powdered milk to the warm milk at the same time you add the starter in future batches. The powdered milk will add extra solids and help to thicken the yogurt.
Expert Tips & Tricks
- Sterilize the jars: For the best results and to prevent unwanted bacteria growth, sterilize the jars before filling them with milk. You can do this by boiling them for 10 minutes or running them through a dishwasher cycle with a sanitizing option.
- Milk Selection: Whole milk yields the thickest and creamiest yogurt, but you can also use 2% milk for a slightly lighter version. Avoid using skim milk, as it may not thicken properly.
- Starter Consistency: Don’t overdo the starter. Too much starter can result in a sour yogurt. Stick to the recommended amount of 1 teaspoon per jar.
- Temperature Control: The most critical aspect of yogurt making is maintaining the correct temperature for the cultures to thrive. The Instant Pot makes this process incredibly easy, but it’s still important to ensure the milk has cooled adequately before adding the starter.
- Flavor Infusions: For more creative flavors, consider adding a teaspoon of vanilla extract or a tablespoon of your favorite fruit preserve after incubation but before chilling.
Serving & Storage Suggestions
Serve your homemade yogurt chilled as a healthy breakfast, a refreshing snack, or a versatile ingredient in both sweet and savory dishes. Top it with fresh fruit, granola, honey, or nuts for a delicious parfait. Use it as a base for smoothies, dips, or sauces.
Store the yogurt in the refrigerator for up to 2 weeks. Ensure the lids are tightly sealed to prevent contamination and maintain freshness. Freezing is not recommended as it can alter the texture of the yogurt.
Nutritional Information
| Nutrient | Amount per Serving | % Daily Value |
|---|---|---|
| Calories | 74.4 kcal | N/A |
| Calories from Fat | N/A | N/A |
| Total Fat | 4 g | 6% |
| Saturated Fat | 2.3 g | 11% |
| Cholesterol | 12.2 mg | 4% |
| Sodium | 52.9 mg | 2% |
| Total Carbohydrate | 5.9 g | 1% |
| Dietary Fiber | 0 g | 0% |
| Sugars | 6.2 g | N/A |
| Protein | 3.8 g | 7% |
Variations & Substitutions
- Dairy-Free Yogurt: While this recipe calls for whole milk, you can experiment with non-dairy alternatives like almond milk, soy milk, or coconut milk. Keep in mind that the texture and flavor will vary depending on the type of milk used. You may also need to add a thickening agent like tapioca starch to achieve a similar consistency to traditional yogurt.
- Flavored Yogurt: Add a tablespoon of your favorite jam, fruit puree, or honey to each jar after the incubation period but before chilling. This will create delicious flavored yogurt without any artificial additives.
- Greek Yogurt: To make Greek yogurt, strain the finished yogurt through a cheesecloth-lined sieve for several hours. This will remove excess whey and result in a thicker, tangier yogurt.
- Honey Sweetened Yogurt: Substitute the starter yogurt for two tablespoons of raw honey. The honey will need to be stirred well into the jars after the Instant Pot finishes the initial 1-minute steam. Do not sweeten with artificial sweeteners, as these will not activate into yogurt the same way natural starters or honey will.
FAQs (Frequently Asked Questions)
Q: Can I use ultra-pasteurized milk for this recipe?
A: Yes, you can use ultra-pasteurized milk, but the yogurt may not be as thick as when using regular pasteurized milk.
Q: What if my yogurt doesn’t thicken after 8 hours?
A: If your yogurt is still runny, you can let it incubate for a few more hours. Make sure your starter is fresh and active. In the future, adding a heaping teaspoon of dry milk powder to the milk before incubation can help thicken the yogurt.
Q: Can I use yogurt from a previous batch as a starter?
A: Yes, you can use yogurt from a previous batch as a starter. Just make sure it’s plain yogurt and that it’s still fresh. After using it for 5-7 times, you should switch to a fresh starter for the best results.
Q: How do I prevent the Instant Pot from overheating the milk?
A: The 1-minute steam cycle is designed to heat the milk without scorching it. Unplugging the Instant Pot immediately after the cycle is complete prevents further heating.
Q: Is it necessary to use jars? Can I make the yogurt directly in the Instant Pot inner pot?
A: While using jars is convenient for portioning and storage, you can make the yogurt directly in the Instant Pot inner pot. However, ensure the pot is thoroughly clean and free of any residue that could affect the yogurt’s flavor or texture.
Final Thoughts
Making homemade yogurt in your pressure cooker is not only incredibly easy but also a rewarding culinary experience. The creamy, tangy flavor is far superior to store-bought varieties, and you have complete control over the ingredients. Don’t be intimidated—this recipe is practically foolproof! Embrace the simplicity, savor the freshness, and share your delicious homemade yogurt with friends and family. I hope this becomes a staple in your kitchen, and I can’t wait to hear how you make it your own.