
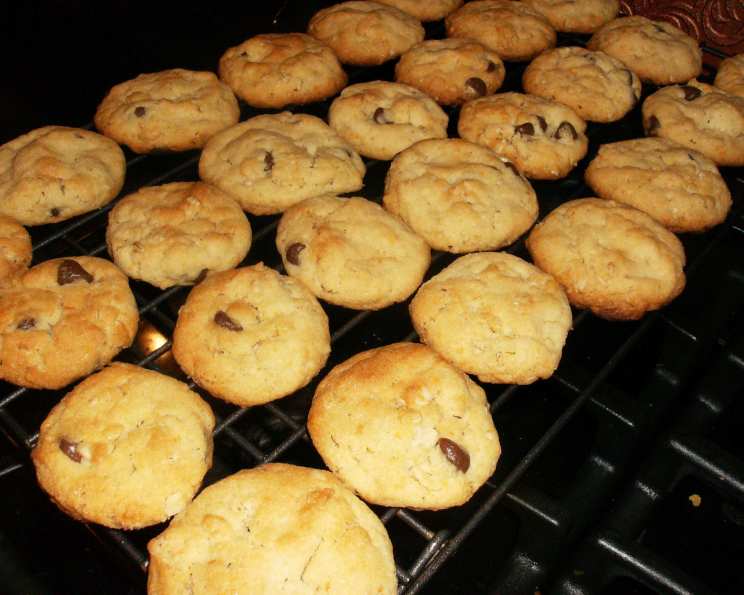
Yummy Cookies: A Recipe Passed Down With Love
There’s something magical about a cookie, isn’t there? But these aren’t just any cookies; these are my Yummy Cookies. Every time I bake a batch, I’m transported back to my first Christmas with my husband’s family. His mother, a woman known for her warmth and incredible baking skills, gifted me this recipe. It wasn’t just a piece of paper; it was a welcome into the family, a sweet initiation marked with the promise of shared laughter and delicious memories. I cherish this recipe not just for the delightful cookies it produces, but for the love and connection it represents.
Recipe Overview
- Prep Time: 20 minutes
- Cook Time: 12 minutes
- Total Time: 32 minutes
- Yields: 4 dozen
- Serves: 48
- Dietary Type: Not specified; contains common allergens
Ingredients
- 1 cup butter, softened
- 1 cup white sugar
- 1 cup brown sugar
- 1 cup oil
- 1 egg
- 1 teaspoon vanilla
- 3 1/2 cups flour
- 1 teaspoon baking soda
- 1 teaspoon salt
- 1 teaspoon cream of tartar
- 1 cup oatmeal
- 1 cup Rice Krispies
- 1 cup coconut
- 1 cup chocolate chips
Equipment Needed
- Mixing bowl
- Electric mixer
- Measuring cups and spoons
- Baking sheets
- Parchment paper (optional)
- Cooling rack
Instructions
-
Preheat your oven to 375°F (190°C). Preparing the oven ahead of time ensures even baking.
-
In a large mixing bowl, cream together the softened butter, white sugar, and brown sugar using an electric mixer. Creaming properly is key to achieving a light and airy texture. Continue mixing until the mixture is light and fluffy.
-
Add the oil, egg, and vanilla to the creamed mixture. Mix well until all ingredients are thoroughly combined. Be careful not to overmix at this stage.
-
In a separate bowl, whisk together the flour, baking soda, salt, and cream of tartar. Whisking these dry ingredients ensures they are evenly distributed throughout the dough.
-
Gradually add the dry ingredients to the wet ingredients, mixing until just combined. Avoid overmixing, as this can lead to tough cookies.
-
By hand, gently fold in the oatmeal, Rice Krispies, coconut, and chocolate chips. Distribute these ingredients evenly throughout the dough.
-
Drop rounded tablespoons of dough onto ungreased baking sheets. For easy cleanup and to prevent sticking, you can line your baking sheets with parchment paper.
-
Bake in the preheated oven for 12 minutes, or until the edges are golden brown. Keep a close eye on the cookies as baking times may vary depending on your oven.
-
Remove the baking sheets from the oven and let the cookies cool on the sheets for a few minutes before transferring them to a cooling rack to cool completely. This prevents the cookies from breaking apart while still warm.
Expert Tips & Tricks
- Softened Butter is Key: Make sure your butter is truly softened, not melted. It should be soft enough that your finger leaves an imprint easily, but not greasy. This is essential for proper creaming.
- Chill the Dough (Optional): If you have time, chilling the dough for 30 minutes to an hour before baking can help prevent the cookies from spreading too thin.
- Vary the Chocolate: Experiment with different types of chocolate chips – dark chocolate, milk chocolate, or even chunks for a richer flavor.
- Don’t Overbake: Slightly underbaked cookies are better than overbaked ones! They will continue to set up as they cool.
- Even Baking: Rotate the baking sheets halfway through the baking time to ensure even browning.
- Make Ahead: The dough can be made ahead of time and stored in the refrigerator for up to 3 days, or frozen for up to 2 months. Let it thaw completely before baking.
Serving & Storage Suggestions
These cookies are perfect served warm with a glass of cold milk or a cup of hot coffee. They also make a wonderful addition to a dessert platter or a thoughtful homemade gift.
Store the cooled cookies in an airtight container at room temperature for up to 3 days. For longer storage, freeze the cookies in a freezer-safe container for up to 2 months. To thaw, simply leave them at room temperature for a few hours. You can also warm them slightly in the oven or microwave before serving.
Nutritional Information
| Nutrient | Amount per Serving | % Daily Value |
|---|---|---|
| Calories | 179.8 kcal | N/A |
| Calories from Fat | N/A | N/A |
| Total Fat | 10.9 g | 16% |
| Saturated Fat | 4.7 g | 23% |
| Cholesterol | 14 mg | 4% |
| Sodium | 115.9 mg | 4% |
| Total Carbohydrate | 20 g | 6% |
| Dietary Fiber | 0.9 g | 3% |
| Sugars | 10.8 g | N/A |
| Protein | 1.6 g | 3% |
Note: Nutritional information is an estimate and may vary based on specific ingredients and serving sizes.
Variations & Substitutions
- Nutty Delight: Add 1/2 cup of chopped walnuts or pecans for a nutty crunch.
- Spice it Up: Incorporate 1/2 teaspoon of ground cinnamon or nutmeg for a warm, spiced flavor.
- Citrus Zest: Add the zest of one orange or lemon for a bright, citrusy note.
- Gluten-Free: Substitute the all-purpose flour with a gluten-free blend.
- Vegan Option: Replace the butter with vegan butter and the egg with a flax egg (1 tablespoon of ground flaxseed mixed with 3 tablespoons of water).
- Less Sugar: Reduce the white sugar by 1/4 cup for a slightly less sweet cookie.
- Dried Fruit: Substitute chocolate chips with dried cranberries or raisins.
FAQs (Frequently Asked Questions)
Q: Why are my cookies spreading too thin?
A: This can happen if your butter is too soft or melted, or if your oven temperature is too low. Chilling the dough before baking can also help.
Q: Can I use a different type of oil?
A: Yes, you can substitute the oil with any neutral-flavored oil, such as canola oil or vegetable oil.
Q: My cookies are burning on the bottom. What should I do?
A: Try moving the oven rack to a higher position or using a double layer of baking sheets.
Q: How do I know when the cookies are done?
A: The cookies are done when the edges are golden brown and the centers are set. They will continue to firm up as they cool.
Q: Can I freeze the baked cookies?
A: Yes, you can freeze the baked cookies in an airtight container for up to 2 months.
Final Thoughts
I truly hope you try this recipe for Yummy Cookies. It’s more than just a list of ingredients and instructions; it’s a little piece of my heart, passed down with love. Whether you bake them for a special occasion or just a cozy night in, I’m confident they will bring a smile to your face. And who knows, maybe these cookies will become a cherished tradition in your own family too! Don’t hesitate to experiment with variations and make them your own. I’d love to hear your feedback and see your creations – happy baking!