
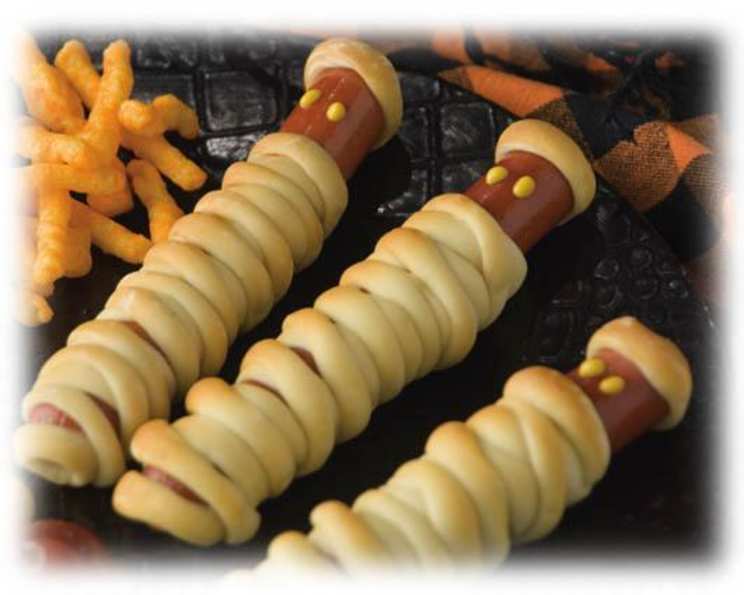
Yummy Mummy Pizza: A Spooktacularly Delicious Treat
The aroma of baking bread and melting cheese always takes me back to my childhood Halloweens. My mom, a master of themed snacks, would transform our kitchen into a culinary haunted house. One year, she surprised us with “Mummy Pizzas,” and the sheer delight on my younger brother’s face as he devoured his slice, declaring it the “best mummy ever,” remains a cherished memory. This recipe, inspired by those magical moments, is a simple yet incredibly fun way to bring a little spooky joy to your own Halloween celebrations.
Recipe Overview
- Prep Time: 30 minutes
- Cook Time: 25-30 minutes
- Total Time: 55-60 minutes
- Servings: 6
- Yield: 1 mummy pizza
- Dietary Type: Vegetarian (easily adaptable to vegan – see variations)
Ingredients
- 1 loaf Rhodes frozen bread dough, thawed but still cold
- Grated cheese (mozzarella, cheddar, or a blend)
- Pizza sauce
- Pizza toppings (pepperoni, olives, mushrooms, peppers, etc.)
- 1 egg, beaten (or plant-based milk for vegan version)
Equipment Needed
- Baking sheet
- Pizza cutter or knife
- Pastry brush (optional)
Instructions
- Preheat your oven to 350°F (175°C).
- On a lightly floured surface, roll out the thawed Rhodes bread dough into a tall, rounded pyramid shape. This will form the base of your mummy. The dough should be cold for easier handling.
- Using a pizza cutter or sharp knife, cut slits all around the outside edge of the pyramid. These slits will become the mummy’s wrappings. Make sure the slits are deep enough to create distinct strips, but not so deep that they detach entirely from the base.
- Carefully transfer the prepared dough pyramid to a baking sheet.
- Layer the grated cheese, pizza sauce, and your chosen pizza toppings in the middle of the pyramid, leaving a small space at the top uncovered to form the mummy’s head. Don’t overload the toppings, as this will make it harder to weave the strips later.
- At the wide end of the pyramid (the top of the mummy), lift up the large triangle of dough and tuck the edges behind, before rounding them to form the mummy’s head. Pinch the dough together gently to secure the shape.
- Now comes the fun part: weaving the cut strips to create the mummy’s wrappings. Take one strip at a time and carefully weave it over the toppings, covering the ends with the last strip to help hold them in place. You can alternate the direction of the strips to create a more textured, realistic look. Gently stretch the strips if needed to cover the fillings, but be careful not to tear the dough.
- At the narrow bottom of the pyramid, fold the two slits in the middle and roll the whole piece up, tucking it under the last woven strip. This will create the base of the mummy and prevent the toppings from spilling out.
- Press the folded-up dough down firmly to keep it from coming unrolled during baking.
- Use a pizza cutter or knife to clip the rolled bottom in half and pull it slightly apart to form the feet. This adds a charmingly spooky touch to the mummy.
- In a small bowl, beat the egg. This will be used to give the mummy a golden-brown, slightly glossy finish. For a vegan option, use plant-based milk (such as soy, almond, or oat milk) instead.
- Using a pastry brush (or your fingers), brush the mummy with the beaten egg (or plant-based milk). Ensure you cover all the dough, including the woven strips and the head.
- Let the mummy rise for 15-30 minutes in a warm place. This will allow the dough to puff up slightly, creating a lighter, airier texture.
- Bake at 350°F (175°C) for 25-30 minutes, or until the mummy is golden brown and the cheese is melted and bubbly. The exact baking time may vary depending on your oven, so keep a close eye on it. If the top starts to brown too quickly, you can loosely cover it with foil.
- Once baked, remove the mummy pizza from the oven and let it cool slightly on the baking sheet before slicing and serving.
Expert Tips & Tricks
- Thawing the dough: Ensure the dough is properly thawed but still cold. This makes it easier to work with and prevents it from becoming too sticky.
- Preventing soggy crust: To avoid a soggy crust, pre-bake the dough for 5-7 minutes before adding the toppings. This helps to create a barrier against the moisture from the sauce and toppings.
- Cheese placement: Place a layer of cheese directly on the dough before adding the sauce. This also acts as a barrier against moisture.
- Creating eye sockets: Before baking, use a toothpick or skewer to create small indentations for the eyes. After baking, fill these indentations with black olives or small pieces of black pepper.
- Gluten-free option: Use a gluten-free pizza dough in place of the Rhodes bread dough. You may need to adjust the baking time accordingly.
Serving & Storage Suggestions
Serve the Yummy Mummy pizza warm, straight from the oven. It’s best enjoyed fresh, but leftovers can be stored in an airtight container in the refrigerator for up to 3 days. Reheat in the oven or microwave until warmed through. To freeze leftovers, wrap individual slices tightly in plastic wrap and then place them in a freezer bag. They can be frozen for up to 2 months. Reheat from frozen in the oven for best results. This pizza is a fantastic centerpiece for a Halloween party and pairs well with a side salad or other spooky snacks.
Nutritional Information
| Nutrient | Amount per Serving | % Daily Value |
|---|---|---|
| Calories | 320 kcal | 16% |
| Total Fat | 12g | 18% |
| Saturated Fat | 6g | 30% |
| Cholesterol | 40mg | 13% |
| Sodium | 700mg | 30% |
| Total Carbohydrate | 40g | 13% |
| Dietary Fiber | 2g | 8% |
| Sugars | 5g | – |
| Protein | 14g | 28% |
Note: Nutritional information is an estimate and may vary based on specific ingredients used.
Variations & Substitutions
- Vegan Yummy Mummy: Substitute the egg wash with plant-based milk (soy, almond, or oat) and use vegan cheese and toppings.
- Spicy Mummy: Add a pinch of red pepper flakes to the sauce or include jalapeños among the toppings for a fiery kick.
- Mediterranean Mummy: Use feta cheese, olives, sun-dried tomatoes, and artichoke hearts for a Mediterranean-inspired twist.
- Personal Mummy Pizzas: Instead of making one large mummy, divide the dough into smaller portions and create individual mummy pizzas.
- Sweet Mummy: Swap the pizza sauce for Nutella or chocolate spread, and top with marshmallows and chocolate chips for a dessert pizza mummy.
FAQs (Frequently Asked Questions)
Q: Can I use pre-made pizza dough instead of frozen bread dough?
A: Yes, you can absolutely use pre-made pizza dough. Just make sure to adjust the rolling and baking times accordingly.
Q: What if my dough is too sticky to work with?
A: If your dough is too sticky, try adding a little more flour to your work surface and to your hands. You can also chill the dough for a few minutes to make it easier to handle.
Q: Can I prepare the mummy pizza ahead of time?
A: You can prepare the mummy pizza up to the point of baking and then refrigerate it for a few hours before baking. Just be sure to add a few minutes to the baking time to ensure the dough is fully cooked.
Q: How do I prevent the cheese from burning?
A: If the cheese starts to brown too quickly, you can loosely cover the mummy pizza with foil during the last few minutes of baking.
Q: What kind of toppings work best for this recipe?
A: Any pizza toppings you enjoy will work well. Popular choices include pepperoni, olives, mushrooms, peppers, and onions. Just be sure not to overload the toppings, as this will make it harder to weave the dough strips.
Final Thoughts
This Yummy Mummy Pizza is more than just a recipe; it’s a chance to create lasting memories with loved ones. The simple steps and fun weaving process make it a perfect activity for kids and adults alike. So, gather your ingredients, preheat your oven, and prepare to unleash your inner artist. Don’t be afraid to get creative with your toppings and customize the recipe to your liking. And most importantly, have fun! Share your spooky creations with us – we can’t wait to see your monstrously delicious masterpieces!