
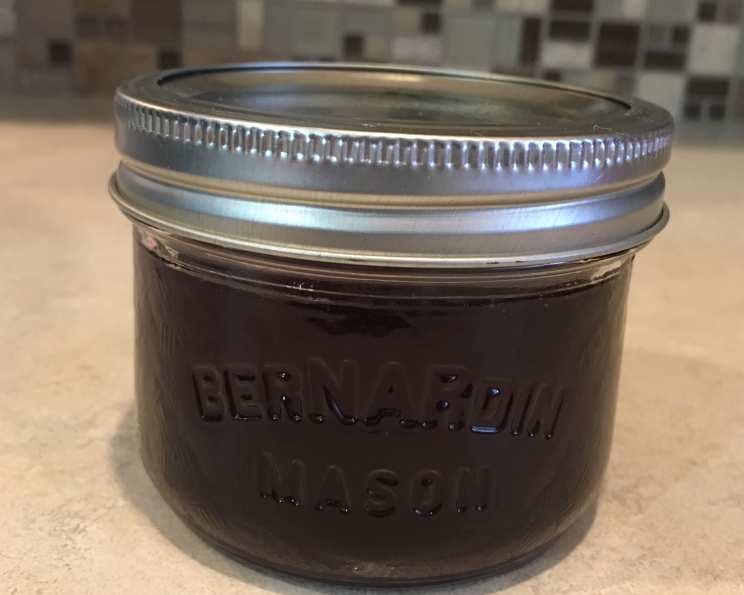
Yummy Spiced Plum Jelly: A Taste of Autumn
The memory of my grandmother’s pantry, lined with jars of jewel-toned jellies and jams, is forever etched in my mind. Among them, the plum jelly always stood out, a deep ruby red that shimmered in the sunlight. It wasn’t just the color, but the aroma – a heady mix of sweet fruit and warm spices that promised cozy afternoons and comforting treats. Sadly, her recipe went missing over the years, so I set out to recreate that flavor myself, and this spiced plum jelly is the result – a perfect blend of nostalgia and my own culinary twist.
Recipe Overview
- Prep Time: 20 minutes
- Cook Time: 45 minutes
- Total Time: 1 hour 5 minutes
- Yields: Approximately 9 half-pint jars
- Dietary Type: Vegan, Gluten-Free, Dairy-Free
Ingredients
- 4 cups plum juice (from about 4 pounds of large plums)
- 2 cups water (1/2 cup per pound of plums)
- 2 star anise
- 4 cinnamon sticks
- 4 cardamom pods, cracked
- 1 teaspoon vanilla extract
- 6 1/2 cups granulated sugar
- 1 (85 ml) envelope liquid pectin
Equipment Needed
- Large pot
- Potato masher
- Colander or sieve
- Cheesecloth (or J-cloths)
- Large bowl
- Stainless steel pot
- Ladle
- Hot, clean jars (half-pint size recommended)
- Metal snap lids
- Metal rings
- Water bath canner
Instructions
-
Begin by thoroughly washing about 4 pounds of large plums. Red plums work wonderfully, giving the jelly a beautiful color.
-
Place the washed plums in a large pot. Add 2 cups of water (use 1/2 cup of water per pound of plums). Incorporate the aromatic spices: 2 star anise, 4 cinnamon sticks, and 4 cardamom pods that have been lightly cracked open. Cracking the cardamom pods helps to release their fragrance more effectively.
-
Over high heat, bring the mixture to a boil, stirring frequently to prevent sticking.
-
Once boiling, reduce the heat to a simmer. Use a potato masher to thoroughly mash the plums. This helps to release their juices.
-
Cover the pot and simmer for approximately 20 minutes, stirring and mashing the plums occasionally to ensure even extraction.
-
Place a colander or sieve over a large bowl. Line the colander with a triple layer of cheesecloth. Alternatively, you can use two J-cloths crisscrossed to fully cover the holes in the colander. The goal is to filter out the solids while allowing the plum juice to drain through.
-
Carefully pour the plum mixture into the lined colander. Let it drain undisturbed for about 2 hours, or until it stops dripping. Resist the urge to squeeze or press the mixture, as this will result in a cloudy jelly. Patience is key here!
-
After the draining process, measure out exactly 4 cups of plum juice into a large stainless steel pot. Add 6 1/2 cups of sugar and 1 teaspoon of vanilla extract. It’s crucial to use the correct ratio of juice to sugar for proper setting.
-
Stirring constantly, over high heat, bring the mixture to a full rolling boil that cannot be stirred down. This means the boil remains even when you stir the mixture.
-
Add one (85 ml) envelope of liquid pectin to the boiling mixture. Immediately return to a boil and boil for one full minute, stirring constantly. Timing is critical to ensure the jelly sets properly.
-
Remove the pot from the heat and skim off any foam that has formed on the surface. A cold metal spoon works best for this, as the foam tends to cling to it more readily.
-
Use a ladle to carefully pour the hot jelly into hot, clean jars. Make sure the jars are heated beforehand to prevent them from cracking due to the temperature difference. Leave approximately 1/4 inch of headspace at the top of each jar.
-
Wipe the rims of the jars with a clean, damp cloth to remove any spills or drips. Place the metal snap lids on top of the jars and then screw on the metal rings. Tighten the rings until they are fingertip tight – not overly tightened, as this will prevent air from escaping during the canning process.
-
Place the filled jars in a water bath canner, ensuring they are completely covered with water. Bring the water to a boil and process the jars for 10 minutes. Adjust processing time for higher altitudes.
-
After processing, carefully remove the jars from the canner and place them on a towel-lined surface to cool completely. As the jars cool, you should hear a “pop” sound, indicating that the lids have sealed properly.
Expert Tips & Tricks
- Don’t double the recipe! Making too much at once affects the setting of the jelly.
- For a clearer jelly, avoid squeezing the plum mixture while it’s draining. Let gravity do its work.
- Test the jelly’s setting point by placing a small spoonful on a chilled plate. If it wrinkles when you push it with your finger, it’s ready. If not, cook it for a few more minutes and test again.
- If your jelly doesn’t set properly, you can reprocess it using additional pectin. Follow the instructions on the pectin package.
Serving & Storage Suggestions
This spiced plum jelly is delicious served on toast, biscuits, scones, or crackers. It’s also a wonderful accompaniment to cheese boards, roasted meats, or even as a glaze for poultry.
Store sealed jars of jelly in a cool, dark place for up to one year. Once opened, refrigerate the jelly and use it within a few weeks. If you didn’t get a seal on any of your jars during the water bath process, store those in the refrigerator and use them right away.
Nutritional Information
Estimated
| Nutrient | Amount per Serving | % Daily Value |
|---|---|---|
| Calories | 560 | N/A |
| Fat | 0g | 0% |
| Saturated Fat | 0g | 0% |
| Cholesterol | 0mg | 0% |
| Sodium | 3mg | 0% |
| Carbohydrates | 145g | 48% |
| Fiber | 0g | 0% |
| Sugars | 144g | N/A |
| Protein | 0g | 0% |
Variations & Substitutions
- For a more intense spice flavor, add a pinch of ground cloves or allspice to the plum mixture.
- Experiment with different types of plums. Damson plums will give a more tart and intense flavor.
- For a low-sugar version, use a sugar substitute specifically designed for jam and jelly making, but be sure to follow the manufacturer’s instructions carefully. The setting may be different.
- Add a splash of balsamic vinegar after cooking for a more sophisticated flavor.
FAQs (Frequently Asked Questions)
Q: Can I use frozen plums for this recipe?
A: Yes, frozen plums can be used, but make sure to thaw them completely and drain off any excess liquid before using. This will help to prevent the jelly from becoming too watery.
Q: Why is it important to sterilize the jars?
A: Sterilizing the jars helps to kill any bacteria or microorganisms that could cause the jelly to spoil. This ensures a longer shelf life and prevents foodborne illnesses.
Q: How do I know if my jars have sealed properly?
A: After processing and cooling, the lid should be concave and not flex when pressed in the center. If the lid pops up and down, it hasn’t sealed properly and should be refrigerated and used immediately.
Q: Can I use powdered pectin instead of liquid pectin?
A: Yes, but you’ll need to adjust the recipe accordingly. Follow the instructions on the powdered pectin package for the correct amount and usage.
Q: What if my jelly doesn’t set?
A: If your jelly doesn’t set, you can reprocess it with additional pectin. Follow the instructions on the pectin package for re-cooking instructions. You might have to start by adding lemon juice as well.
Final Thoughts
I truly hope you’ll give this spiced plum jelly recipe a try. It’s a labor of love, yes, but the end result – a jar of homemade goodness bursting with sweet and spicy flavors – is well worth the effort. Imagine spreading it on a warm croissant on a chilly morning, or gifting it to a friend during the holiday season. Share your creations and feedback; I’d love to see how you make it your own! Consider pairing this beautiful jelly with a sharp cheddar cheese or a glass of dry sherry for an unforgettable culinary experience. Happy preserving!