
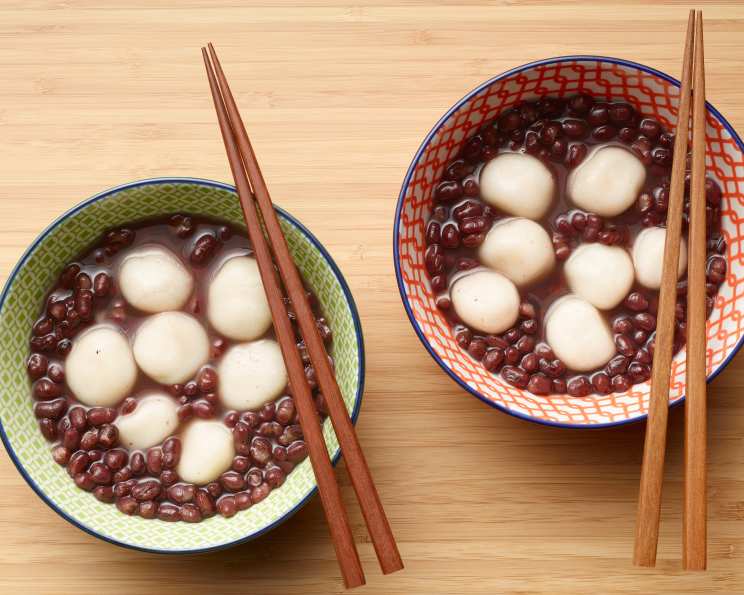
Zenzai: Sweet Azuki Bean Soup with Mochi Dumplings
The first time I tasted Zenzai, I was on a particularly brisk autumn day. I’d been wandering through a local Japanese garden, the air thick with the scent of fallen leaves and damp earth. Seeking warmth, I stumbled upon a small tea house tucked away amidst the meticulously raked gravel. The steam curling from the bowl of Zenzai I ordered was mesmerizing. The gentle sweetness of the azuki beans, the chewy texture of the mochi dumplings, and the comforting warmth spreading through me – it was an experience that transcended mere sustenance; it was a hug in a bowl, a taste of tradition, and a perfect moment captured in a single spoonful.
Recipe Overview
- Prep Time: 30 minutes
- Cook Time: 2 hours 15 minutes
- Total Time: 2 hours 45 minutes
- Servings: 4
- Dietary Type: Vegan
Ingredients
- 1 cup azuki beans
- 1 1/4 cups sugar
- 1/2 teaspoon salt
- 0.5 (16 ounce) box mochiko sweet rice flour
- Approximately 6 cups water, plus more as needed
Equipment Needed
- Large pot or Dutch oven
- Mixing bowl
- Slotted spoon or strainer
Instructions
- Prepare the Azuki Beans: Begin by carefully picking over the azuki beans, removing any small stones or debris. Rinse them thoroughly under cold water.
- Initial Boil: Place the rinsed azuki beans in a large pot or Dutch oven with 6 cups of water. Bring the mixture to a boil over high heat. Once boiling, reduce the heat to low, cover the pot, and simmer gently for 2 hours, or until the azuki beans are very soft and easily mashed.
- Maintain Liquid Level: During the 2-hour simmering process, check the water level periodically. If the water evaporates significantly, add more to the pot to ensure the beans remain submerged. The goal is to have approximately 5 cups of liquid remaining after the beans are cooked.
- Sweeten the Soup: Once the azuki beans are tender, carefully measure the remaining liquid. You should have about 5 cups. If you have less, add water to make it 5 cups total. Add the 1 1/4 cups of sugar and 1/2 teaspoon of salt to the pot.
- Simmer with Sugar: Stir the mixture gently to dissolve the sugar and salt. Simmer the azuki bean soup for an additional 15 minutes, stirring occasionally to prevent sticking and to allow the flavors to meld.
- Prepare the Mochi Dumplings (Dango): While the azuki bean soup is simmering, prepare the mochi dumplings. In a mixing bowl, gradually add water to the mochiko sweet rice flour, mixing until a stiff, pliable dough forms. The amount of water needed may vary slightly, so add it gradually until the dough reaches the right consistency.
- Knead the Dough: Knead the mochi dough well for several minutes until it becomes smooth and elastic. This step is important for achieving the desired chewy texture of the dumplings.
- Shape the Dumplings: Pinch off small portions of the mochi dough, about the size of marbles. Roll each portion into a small ball. Gently press a small indentation in the side of each dumpling with your thumb or a chopstick. This helps them cook evenly.
- Cook the Dumplings: Once the azuki bean soup has simmered for 15 minutes with the sugar and salt, bring it back to a boil. Gently drop the mochi dumplings into the boiling soup. Do not overcrowd the pot; work in batches if necessary.
- Cook Until Floating: Allow the dumplings to cook in the boiling soup until they rise to the surface. This usually takes a few minutes. Once they float, cook them for an additional 1-2 minutes to ensure they are cooked through.
- Serve: Using a slotted spoon or strainer, divide the azuki bean soup and mochi dumplings evenly between warmed individual bowls. Serve hot and enjoy!
Expert Tips & Tricks
- Bean Preparation: For the best flavor and texture, consider soaking the azuki beans in water overnight before cooking. This helps to soften them and reduce cooking time.
- Sweetness Level: Adjust the amount of sugar to your preference. Start with the recommended amount and add more to taste, if desired. Brown sugar can also be used for a richer flavor.
- Mochi Dough Consistency: The consistency of the mochi dough is crucial. If the dough is too dry, the dumplings will be hard. If it’s too wet, they will be sticky and difficult to handle. Adjust the amount of water accordingly.
- Dumpling Size: Keep the dumplings relatively small and uniform in size to ensure even cooking.
- Prevent Sticking: To prevent the mochi dumplings from sticking to the bottom of the pot, stir the soup gently and frequently while they are cooking.
Serving & Storage Suggestions
Zenzai is best served hot and enjoyed immediately. It’s a comforting dish perfect for cool weather. To store leftovers, allow the soup to cool completely before transferring it to an airtight container. Store in the refrigerator for up to 3 days.
To reheat, gently warm the soup in a saucepan over low heat, stirring occasionally. You may need to add a little water if the soup has thickened during storage. Reheating in the microwave is also possible, but be careful not to overheat the mochi dumplings, as they can become rubbery. Freezing is not recommended as it can alter the texture of the mochi.
Nutritional Information
| Nutrient | Amount per Serving | % Daily Value |
|---|---|---|
| Calories | 449 kcal | N/A |
| Calories from Fat | 7 g | 2% |
| Total Fat | 0.8 g | 1% |
| Saturated Fat | 0.2 g | 1% |
| Cholesterol | 0 mg | 0% |
| Sodium | 291.3 mg | 12% |
| Total Carbohydrate | 107.9 g | 35% |
| Dietary Fiber | 1.4 g | 5% |
| Sugars | 62.4 g | N/A |
| Protein | 3.4 g | 6% |
Note: Nutritional information is an estimate and may vary based on specific ingredients and preparation methods.
Variations & Substitutions
- Gluten-Free: This recipe is naturally gluten-free, as it uses mochiko sweet rice flour.
- Sweetener: Experiment with different sweeteners, such as maple syrup or honey, in place of sugar. Keep in mind that this may alter the flavor profile.
- Flavor Enhancements: Add a small piece of kombu (dried kelp) to the soup while simmering the azuki beans for a more complex umami flavor. Remove the kombu before serving.
- Citrus Zest: Add a small amount of orange or yuzu zest to the soup for a bright, aromatic touch.
- Toppings: Garnish with a sprinkle of toasted sesame seeds or a few drops of coconut milk for added flavor and visual appeal.
FAQs (Frequently Asked Questions)
Q: Can I use canned azuki beans instead of dried beans?
A: Yes, you can use canned azuki beans for convenience. Drain and rinse them well before adding them to the pot. Reduce the initial cooking time significantly since they are already cooked.
Q: How do I know when the azuki beans are cooked enough?
A: The azuki beans should be very soft and easily mashed with a spoon. If they are still firm after 2 hours of simmering, continue cooking until they reach the desired tenderness.
Q: Can I make the mochi dumplings ahead of time?
A: It’s best to cook the mochi dumplings just before serving, as they can become hard and rubbery if stored for too long. If you need to prepare them in advance, keep them covered with a damp cloth to prevent them from drying out.
Q: Why are my mochi dumplings sticking together in the soup?
A: To prevent the mochi dumplings from sticking together, make sure the soup is at a rolling boil when you add them. Also, avoid overcrowding the pot and stir gently while they are cooking.
Q: Can I add other ingredients to the azuki bean soup?
A: Yes, feel free to add other ingredients such as sweet potato, kabocha squash, or chestnuts for a heartier and more flavorful soup.
Final Thoughts
Zenzai is more than just a simple soup; it’s a taste of Japanese comfort food that warms the soul. This recipe, passed down through generations, offers a glimpse into a rich culinary heritage. Don’t be intimidated by the seemingly long cooking time—the process is simple and the result is well worth the effort. Gather your ingredients, embrace the aroma of simmering azuki beans, and create your own heartwarming bowl of Zenzai. I hope you enjoy making and sharing this delightful dish with your loved ones! Share your creations and variations – happy cooking!