
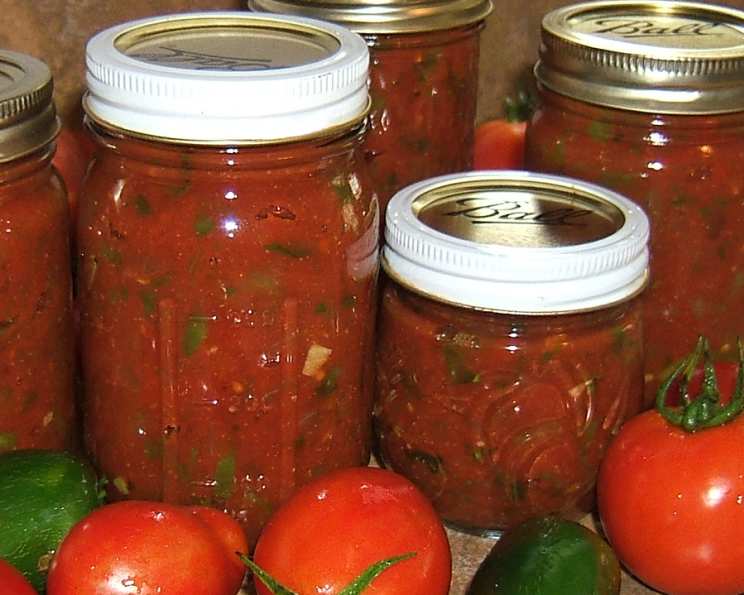
Zesty Salsa for Canning: A Taste of Sunshine All Year Round
The first time I tasted this salsa, it was at a church potluck. The table groaned under the weight of casseroles and desserts, but it was a simple jar of vibrant red salsa that caught my eye. One bite, and I was hooked. The fresh, zesty flavor, with just the right kick of heat, transported me back to sun-drenched summer days and backyard barbecues. It was unlike any store-bought salsa I’d ever had – bursting with the authentic taste of garden-fresh ingredients. It’s a flavor I chase every canning season!
Recipe Overview
- Prep Time: 30 minutes
- Cook Time: Varies, up to 1 hour
- Total Time: Varies, up to 1 hour 30 minutes (excluding canning time)
- Yield: Approximately 6 pints
- Dietary Type: Vegan, Gluten-Free, Dairy-Free
Ingredients
- 10 cups roughly chopped tomatoes
- 5 cups chopped and seeded bell peppers
- 5 cups chopped onions
- 2 1/2 cups chopped and seeded hot peppers (adjust to taste)
- 1 1/4 cups cider vinegar
- 3 garlic cloves, minced
- 2 tablespoons minced cilantro
- 3 teaspoons salt
- 1 (6 ounce) can tomato paste
Equipment Needed
- Large sauce pot
- Sharp knives
- Cutting boards
- Measuring cups and spoons
- Canning jars (pints or smaller)
- Canning lids and rings
- Jar lifter
- Funnel (optional, but helpful)
- Hot water bath canner
Instructions
- Prepare Your Vegetables: Start by washing all of your vegetables thoroughly. Roughly chop the tomatoes, removing any bruised or damaged areas. Chop and seed the bell peppers and onions.
- Handle with Care (Hot Peppers!): This is a crucial step! When handling the hot peppers, wear gloves to prevent skin irritation. Remove the seeds and membranes for a milder salsa, or leave them in for extra heat. Finely chop the peppers.
- Combine Ingredients: In a large, heavy-bottomed sauce pot, combine the chopped tomatoes, bell peppers, onions, hot peppers, cider vinegar, minced garlic, cilantro, and salt.
- Simmer to Perfection: Bring the mixture to a boil over medium-high heat, then reduce the heat to low and simmer uncovered. The simmering time will vary depending on how watery your tomatoes are. Stir frequently to prevent sticking and burning. Simmer until the salsa reaches your desired thickness – this can take anywhere from 30 minutes to an hour, or even longer. The longer you simmer, the thicker the salsa will be, and the more the flavors will meld.
- Stir in Tomato Paste: Once the salsa has reached your desired consistency, stir in the can of tomato paste. This adds body and richness to the salsa. Mix thoroughly to ensure the tomato paste is fully incorporated.
- Prepare Jars and Canner: While the salsa is simmering, prepare your canning jars. Wash the jars thoroughly with hot, soapy water and rinse well. Keep the jars hot until ready to use. You can do this by placing them in a simmering pot of water or by running them through a hot cycle in your dishwasher. Fill your hot water bath canner with enough water to cover the jars by at least an inch. Bring the water to a boil.
- Ladle and Fill: Using a ladle and a funnel (if desired), carefully fill the hot jars with the hot salsa, leaving 1/4 inch headspace at the top. Headspace is the space between the top of the salsa and the lid.
- Remove Air Bubbles: Use a non-metallic utensil (like a wooden chopstick or plastic spatula) to gently press down on the salsa to release any trapped air bubbles.
- Wipe the Rims: Wipe the rims of the jars clean with a damp cloth. This ensures a proper seal.
- Place Lids and Rings: Place the lids on the jars, and then screw on the rings fingertip tight. Do not overtighten the rings.
- Process in Hot Water Bath: Carefully lower the filled jars into the boiling water bath canner using a jar lifter. Make sure the jars are fully submerged and have at least 1 inch of water covering the tops.
- Process: Bring the water back to a rolling boil, and then process the jars for 15 minutes. Adjust processing time for altitude, if necessary, according to USDA canning guidelines.
- Cool and Check Seals: After processing, turn off the heat and carefully remove the jars from the canner using the jar lifter. Place the jars on a towel-lined surface to cool completely. Allow the jars to cool undisturbed for 12-24 hours. As the jars cool, you should hear a “pop” sound, which indicates that the lids have sealed properly.
- Check the Seals: After the jars have cooled completely, check the seals. The lids should be concave (curved downwards) and should not flex when pressed in the center. If a jar has not sealed properly, you can reprocess it with a new lid, or store the salsa in the refrigerator and use it within a week.
- Store: Remove the rings (they can rust during storage) and store the sealed jars in a cool, dark place. Properly canned salsa can be stored for up to 18 months.
Expert Tips & Tricks
- Adjust the Heat: The amount of hot peppers you use is completely up to you. Start with a smaller amount and taste as you go. Remember, you can always add more heat, but you can’t take it away! For a milder salsa, use jalapeños or poblano peppers. For a hotter salsa, try serrano or habanero peppers. Be careful!
- Roast the Vegetables: Roasting the tomatoes, peppers, and onions before simmering will add a smoky depth of flavor to your salsa.
- Add Other Flavors: Feel free to experiment with other flavorings. A squeeze of lime juice, a pinch of cumin, or a dash of chili powder can all add complexity to your salsa.
- Thickening Without Overcooking: If you find your salsa isn’t thickening as much as you’d like, try adding a tablespoon of cornstarch mixed with a little cold water to the pot during the last 15 minutes of simmering.
- Don’t Overfill the Jars: Leaving the proper headspace (1/4 inch) is critical for a good seal. Overfilling the jars can prevent a vacuum from forming, which can lead to spoilage.
Serving & Storage Suggestions
This zesty salsa is incredibly versatile! Serve it with tortilla chips for a classic appetizer, or spoon it over tacos, burritos, or nachos. It’s also delicious with grilled chicken or fish, or as a topping for scrambled eggs.
Once a jar is opened, store it in the refrigerator. Opened salsa will last for about a week in the refrigerator. Unopened jars of properly canned salsa can be stored in a cool, dark place for up to 18 months.
Nutritional Information
Please note that these are estimated values and can vary depending on the specific ingredients used.
| Nutrient | Amount per Serving | % Daily Value |
|---|---|---|
| Calories | 60 kcal | 3% |
| Total Fat | 0.5 g | 1% |
| Saturated Fat | 0 g | 0% |
| Cholesterol | 0 mg | 0% |
| Sodium | 250 mg | 11% |
| Total Carbohydrate | 13 g | 5% |
| Dietary Fiber | 3 g | 11% |
| Sugars | 8 g | 0% |
| Protein | 2 g | 4% |
Variations & Substitutions
- Fruit Salsa: Add chopped mango, pineapple, or peach for a sweet and savory twist.
- Black Bean Salsa: Stir in a can of rinsed and drained black beans for added protein and fiber.
- Corn Salsa: Add grilled or roasted corn kernels for a summery flavor.
- Smoked Paprika: Substitute some of the salt with smoked paprika for a deeper, smokier flavor profile.
- Vinegar Variation: Use white vinegar instead of cider vinegar for a sharper tang.
- Fire Roasted Tomatoes: Use canned fire roasted tomatoes for a smokier flavor.
FAQs (Frequently Asked Questions)
Q: Why is it important to remove air bubbles from the jars before canning?
A: Air bubbles can prevent a proper seal, which can lead to spoilage. Removing them ensures that the salsa is in full contact with the lid, allowing for a vacuum to form during processing.
Q: Can I use a different type of vinegar?
A: Yes, you can substitute white vinegar, but cider vinegar is generally preferred for its milder flavor. Always use a vinegar with at least 5% acidity for safe canning.
Q: How do I know if my jars have sealed properly?
A: After cooling, the lids should be concave (curved downwards) and should not flex when pressed in the center. You should also hear a “pop” sound as the jars cool, which indicates a proper seal.
Q: Can I double or triple this recipe?
A: Yes, you can easily double or triple the recipe, but be sure to use a large enough pot and adjust the simmering time accordingly. Ensure even heat distribution to prevent burning.
Q: What if my salsa is too watery after simmering?
A: Continue simmering the salsa until it reaches your desired thickness. Alternatively, you can add a tablespoon of cornstarch mixed with a little cold water during the last 15 minutes of simmering.
Final Thoughts
This Zesty Salsa for Canning is more than just a recipe; it’s a taste of summer sunshine preserved in a jar. It’s a labor of love, filled with fresh ingredients and vibrant flavors, that brings joy to any meal. I hope you’ll give this recipe a try and share the fruits of your labor with friends and family. Don’t hesitate to experiment with the ingredients and make it your own. Happy canning!