
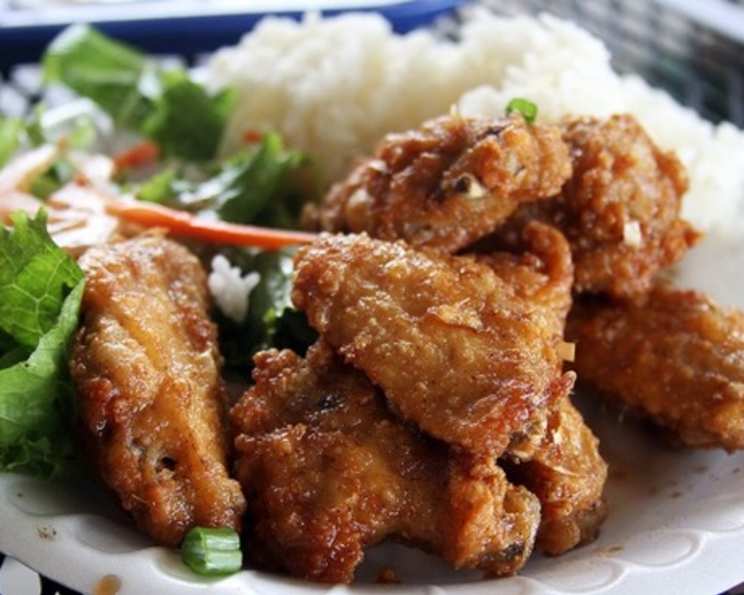
Zippy’s Fried Chicken: A Taste of Aloha at Home
Like many who grew up in Hawai’i, the red and yellow sign of Zippy’s Restaurants was a beacon of comfort. After school, on the way home from the beach, or late at night after a concert, Zippy’s was always there. But it wasn’t just the familiar atmosphere; it was that irresistible aroma of their fried chicken that drew me in every time. That first bite – the satisfying crunch, the slightly salty and subtly spiced flavor, and the juicy tenderness inside – is a memory etched in my taste buds, and one I’m eager to recreate at home.
Recipe Overview
- Prep Time: 20 minutes
- Cook Time: 15 minutes per batch
- Total Time: About 45 minutes
- Servings: 6-8
- Yield: Varies depending on chicken size
- Dietary Type: Not specified (contains gluten, may contain MSG)
Ingredients
- 1 (3-4 lb) fresh whole broiler-fryer chicken, cut into parts
- 2 cups wheat flour
- 1 tablespoon garlic powder
- 1 tablespoon paprika
- 2 teaspoons white pepper
- 1 tablespoon MSG (optional)
- 2 teaspoons fresh cracked black pepper
- 1 pinch coarse Hawaiian rock salt (or two!), or 1-2 pinches kosher salt
- Canola oil, for deep frying
- Warm water, to cover chicken
Equipment Needed
- Large mixing bowl
- Colander
- Wire whisk or blender
- Tray or cookie sheet
- Wok, deep frying pan, or dedicated deep fryer
- Paper towels
- Oven
Instructions
- Begin by rinsing the chicken pieces thoroughly under cold water. Pat them dry with paper towels.
- Place the chicken pieces in a large mixing bowl. Cover them completely with warm water.
- Add 1-2 generous pinches of Hawaiian rock salt (or kosher salt) to the bowl. This creates a simple salt brine that will help season the chicken from the inside out and keep it moist during frying.
- Let the chicken soak in the salt brine for exactly 10 minutes. This is crucial; don’t skip or extend this step.
- Drain the chicken thoroughly in a colander. Importantly, do not rinse the chicken after draining. The residual salt water will help the flour mixture adhere.
- In another large mixing bowl, combine all the dry ingredients: flour, garlic powder, paprika, white pepper, black pepper, and MSG (if using).
- Using a wire whisk or a blender, thoroughly mix the dry ingredients together. This step is essential to eliminate any flour lumps and ensure a uniform spice distribution.
- Add the drained chicken pieces to the bowl of dry ingredients.
- Dredge the chicken parts well in the flour mixture, ensuring each piece is completely coated. Press the flour gently onto the chicken to help it adhere.
- After dredging, shake off the excess flour from each piece. This prevents the oil from becoming overly saturated with flour and ensures a crispier crust.
- Place the floured chicken pieces on a tray or cookie sheet while you heat the oil. Allowing the chicken to sit briefly helps the coating adhere even better.
- Pour canola oil into your wok, deep frying pan, or deep fryer. You’ll need enough oil to completely submerge the chicken pieces.
- Heat the canola oil to a temperature between 350-375°F (175-190°C). Use a thermometer to ensure the oil is at the correct temperature. If you don’t have a thermometer, drop a small piece of flour into the oil; it should sizzle gently and turn golden brown within a few seconds.
- Carefully add the chicken pieces to the hot oil in 2 batches. Overcrowding the pan will lower the oil temperature and result in greasy chicken.
- Fry the chicken for approximately 15 minutes per batch, or until it is golden brown all over and cooked through. Use tongs to turn the chicken pieces occasionally to ensure even cooking.
- Remove the fried chicken from the oil and place it on paper towels to drain off excess oil.
- To keep the chicken warm and crispy while you finish frying all the batches, place the drained chicken in a 150°F (65°C) oven.
Expert Tips & Tricks
- Double Dredge for Extra Crispiness: For an even crispier crust, dredge the chicken in the flour mixture, dip it in a mixture of beaten egg and milk (or buttermilk), and then dredge it in the flour mixture again.
- Spice Level Adjustment: Adjust the amount of paprika and pepper to suit your taste. A little cayenne pepper can add a nice kick.
- Oil Temperature is Key: Maintaining the correct oil temperature is crucial for achieving crispy, non-greasy chicken. If the oil is too cool, the chicken will absorb too much oil. If it’s too hot, the outside will burn before the inside is cooked.
- Brining Alternatives: For a deeper flavor profile, try brining the chicken in a mixture of buttermilk, hot sauce, and your favorite herbs and spices for several hours or overnight.
- Rest the Chicken: After frying, let the chicken rest on a wire rack for a few minutes before serving. This allows the juices to redistribute, resulting in more tender and flavorful chicken.
Serving & Storage Suggestions
Serve your Zippy’s-inspired fried chicken hot, straight from the oven! It pairs perfectly with sides like rice, macaroni salad, coleslaw, or potato salad – classic Hawaiian plate lunch companions.
Storage: Leftover fried chicken can be stored in an airtight container in the refrigerator for up to 3-4 days. It’s best consumed as soon as possible to maintain its crispiness.
Reheating: To reheat, preheat your oven to 350°F (175°C). Place the chicken pieces on a wire rack set over a baking sheet and bake for 10-15 minutes, or until heated through and crispy. You can also reheat it in an air fryer for a few minutes. Microwaving is not recommended, as it will make the chicken soggy.
Nutritional Information
(Estimated values, will vary based on exact ingredients and portion sizes)
| Nutrient | Amount per Serving | % Daily Value |
|---|---|---|
| Calories | 450 kcal | 23% |
| Total Fat | 25g | 38% |
| Saturated Fat | 5g | 25% |
| Cholesterol | 150mg | 50% |
| Sodium | 200mg | 8% |
| Total Carbohydrate | 30g | 10% |
| Dietary Fiber | 2g | 8% |
| Sugars | 1g | 2% |
| Protein | 30g | 60% |
Variations & Substitutions
- Gluten-Free: Substitute the wheat flour with a gluten-free all-purpose flour blend. You may need to add a little extra cornstarch for crispness.
- MSG-Free: Simply omit the MSG. The recipe will still be delicious without it.
- Spice It Up: Add a pinch of cayenne pepper or a dash of hot sauce to the flour mixture for a spicy kick.
- Herbed Chicken: Add dried herbs like thyme, rosemary, or oregano to the flour mixture for a more complex flavor.
- Buttermilk Fried Chicken: Soak the chicken in buttermilk for at least 30 minutes (or up to overnight) before dredging it in the flour mixture. This will result in an even more tender and flavorful chicken.
FAQs (Frequently Asked Questions)
Q: Can I use chicken breasts instead of a whole chicken?
A: Yes, you can. Adjust the cooking time accordingly, as chicken breasts will cook faster than other parts. Ensure the internal temperature reaches 165°F (74°C).
Q: How do I know when the chicken is cooked through?
A: The best way to check for doneness is to use a meat thermometer. Insert the thermometer into the thickest part of the chicken (without touching bone). The internal temperature should reach 165°F (74°C).
Q: Can I use a different type of oil for frying?
A: Yes, you can use other oils with a high smoke point, such as peanut oil, vegetable oil, or avocado oil.
Q: Why is my fried chicken not crispy?
A: Several factors can contribute to soggy chicken. Make sure your oil is at the correct temperature, don’t overcrowd the pan, and shake off excess flour before frying.
Q: Can I make this ahead of time?
A: While fried chicken is best enjoyed fresh, you can prepare the chicken up to the point of frying and store it in the refrigerator for up to 24 hours. Bring it to room temperature before frying.
Final Thoughts
Now it’s your turn to bring a taste of Hawai’i to your kitchen! Don’t be intimidated by frying – with a little practice and attention to detail, you’ll be enjoying crispy, golden-brown fried chicken in no time. I encourage you to experiment with different spices and seasonings to create your own signature version. If you try this recipe, please share your feedback and photos. And for a truly authentic Hawaiian experience, serve it alongside some sticky rice and creamy macaroni salad. Aloha and happy cooking!