
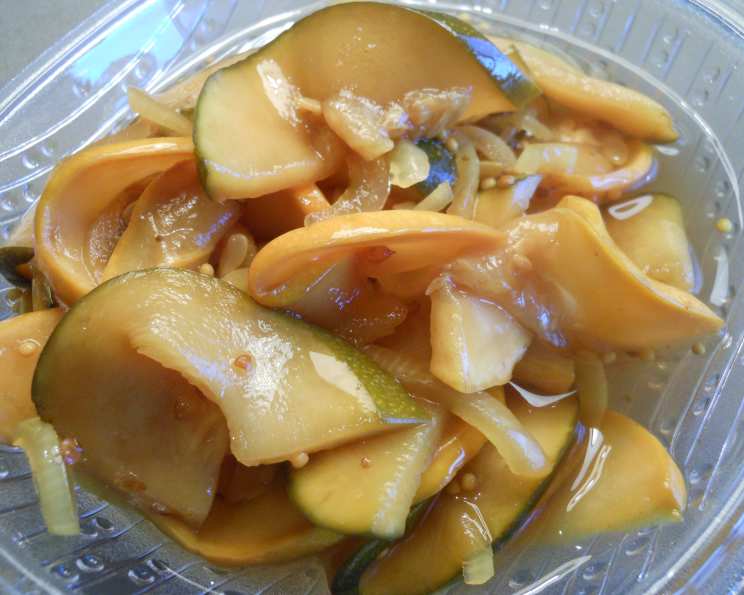
Zucchini Bread and Butter Pickles: A Sweet & Tangy Summer Delight
My grandmother, bless her heart, had a garden that threatened to engulf her entire house every summer. Zucchinis, in particular, seemed to multiply overnight, morphing into baseball bat-sized behemoths if you weren’t careful. While she made a mean zucchini bread, her pièce de résistance was always her bread and butter pickles. The sweet, tangy crunch of those pickles, a perfect counterpoint to a summer barbecue or a simple sandwich, is a memory etched in my taste buds. This recipe captures that very essence, a delicious way to use up your zucchini glut and conjure up those sunny childhood memories.
Recipe Overview
- Prep Time: 3 hours 30 minutes
- Cook Time: 3 minutes
- Total Time: 3 hours 33 minutes
- Yields: 8 250ml jars
- Dietary Type: Vegetarian, Gluten-Free
Ingredients
- 1 ¼ kg zucchini
- 3 red onions
- ¼ cup salt
- 1 tablespoon coriander seed, toasted and crushed
- 1 tablespoon yellow mustard seeds
- ½ teaspoon ground turmeric
- 1 teaspoon celery seed
- 3 cups apple cider vinegar
- 385 g light brown sugar
Equipment Needed
- Large bowl
- Knife and cutting board (or mandoline)
- Stainless steel saucepan
- Sterilized jars (8 x 250ml)
Instructions
- Start by preparing your vegetables. Slice the zucchini diagonally into 5mm-thick slices. If you have a mandoline with a waffle-cutter attachment, this is a great opportunity to use it for a beautiful, textured pickle.
- Cut the red onions in half and thinly slice them using a knife.
- In a large bowl, combine the sliced zucchini and onions. Add the salt and toss everything together thoroughly to ensure even coverage.
- Cover the bowl and refrigerate the salted zucchini and onions for 3 hours. This step is crucial for drawing out excess moisture and firming up the vegetables, resulting in a crisper pickle.
- After 3 hours, drain the vegetables. Rinse them very well under running water to remove the salt. Don’t skimp on the rinsing, as too much salt will make the pickles unpalatable.
- Drain the rinsed vegetables thoroughly and pat them dry with paper towels. This will help the pickling brine adhere better. Transfer the dried vegetables to a clean stainless steel or heatproof glass bowl. Avoid using reactive bowls like aluminum, which can affect the flavor and color of the pickles.
- In a stainless steel saucepan, combine the remaining ingredients: coriander seed, yellow mustard seeds, ground turmeric, celery seed, apple cider vinegar, and light brown sugar.
- Place the saucepan over medium heat. Cook, stirring constantly, until the sugar is completely dissolved. This prevents any gritty texture in the final product.
- Bring the mixture to a boil and then reduce the heat to a simmer. Simmer for 3 minutes to allow the flavors to meld together.
- Immediately pour the hot vinegar mixture over the vegetables in the bowl. Ensure that all the vegetables are submerged in the brine.
- Divide the mixture among sterilized jars. Leave about ½ inch of headspace at the top of each jar. Headspace is important for proper sealing.
- Seal the jars while the mixture is still hot. This creates a vacuum seal as the jars cool.
- Cool the jars to room temperature. As they cool, you should hear a “pop” sound, indicating that the jars have sealed properly.
- Store the sealed jars in the fridge for at least 2 days before eating. This allows the flavors to fully develop and the pickles to reach their peak. The pickles can be stored in the refrigerator for up to 2 months.
Expert Tips & Tricks
- Toasting the coriander seed before crushing it intensifies its aroma and flavor. Gently toast it in a dry pan until fragrant.
- If you don’t have light brown sugar, you can substitute it with regular granulated sugar, but the light brown sugar adds a subtle molasses note that enhances the flavor.
- Make sure your jars are properly sterilized to prevent spoilage. You can sterilize them by boiling them in water for 10 minutes or running them through a hot cycle in the dishwasher.
- For extra flavor, add a few thin slices of fresh ginger or a dried chili pepper to each jar before sealing.
- If you prefer a spicier pickle, add a pinch of red pepper flakes to the brine.
- Use high-quality apple cider vinegar for the best flavor.
Serving & Storage Suggestions
These Zucchini Bread and Butter Pickles are incredibly versatile. Serve them alongside grilled meats, in sandwiches, or as a tangy addition to charcuterie boards. They’re also delicious chopped and added to potato salad or tuna salad.
Once opened, a jar of pickles should be stored in the refrigerator. They will stay fresh for several weeks, although the texture may soften slightly over time. While technically safe to eat, the quality will decline if stored unrefrigerated for more than 2 hours. Freezing is not recommended, as it will drastically alter the texture of the zucchini.
Nutritional Information
Please note that the following is an estimate. Actual values may vary depending on specific ingredients used.
| Nutrient | Amount per Serving | % Daily Value |
|---|---|---|
| Calories | 254 kcal | 13% |
| Total Fat | 1 g | 1% |
| Saturated Fat | 0.2 g | 1% |
| Cholesterol | 0 mg | 0% |
| Sodium | 3570 mg | 149% |
| Total Carbohydrate | 58 g | 19% |
| Dietary Fiber | 3 g | 12% |
| Sugars | 53 g | 106% |
| Protein | 3 g | 6% |
Variations & Substitutions
- Spicy Pickles: Add a sliced jalapeno or a pinch of red pepper flakes to the brine for a kick.
- Dill Pickles: Replace the celery seed and turmeric with fresh dill and garlic cloves.
- Onion-Free Pickles: If you don’t like onions, simply omit them from the recipe. You may need to adjust the amount of zucchini accordingly.
- Sweet Pickles: Adjust the amount of sugar to your liking. For a sweeter pickle, add an extra ¼ cup of sugar.
- Different Vegetables: Feel free to add other vegetables to the mix, such as bell peppers, carrots, or green beans.
FAQs (Frequently Asked Questions)
Q: Why do I need to salt the zucchini for 3 hours?
A: Salting the zucchini draws out excess moisture, which helps to create a crisper pickle. It also helps to prevent the pickles from becoming soggy over time.
Q: Can I use a different type of vinegar?
A: While apple cider vinegar is recommended for its flavor, you can substitute it with white vinegar or rice vinegar. However, the flavor of the pickles will be slightly different.
Q: Do I need to sterilize the jars?
A: Yes, sterilizing the jars is essential to prevent spoilage and ensure a longer shelf life for your pickles.
Q: How long do the pickles need to sit before I can eat them?
A: It’s best to wait at least 2 days before eating the pickles to allow the flavors to fully develop.
Q: Can I process these pickles in a hot water bath for longer shelf life?
A: This recipe is designed for refrigerator storage and hasn’t been tested for long-term canning. For shelf-stable pickles, use a tested and approved canning recipe.
Final Thoughts
These Zucchini Bread and Butter Pickles are more than just a way to use up extra zucchini; they’re a taste of summer sunshine in a jar. The sweet and tangy flavor, the satisfying crunch – it’s a delightful addition to any meal. I encourage you to give this recipe a try, experiment with different variations, and share your creations with friends and family. Don’t be afraid to get creative and make it your own! These pickles pair beautifully with a grilled chicken sandwich or a simple cheese and crackers board. Happy pickling!