
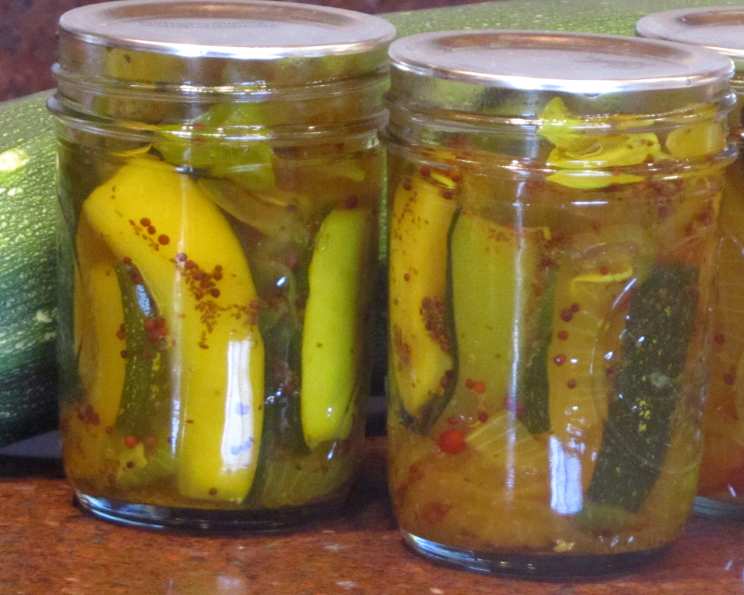
Zesty Zucchini Spears: A Spicy Summer Delight
The memory is so vivid: the sun-drenched garden, overflowing with zucchini plants seemingly overnight. My grandmother, apron dusted with flour, would survey the bounty with a mischievous glint in her eye. “Too many for ratatouille, child,” she’d declare, “time for some zesty magic!” And that’s how I learned to transform these humble vegetables into jars of flavorful, tangy spears, a taste of summer sunshine preserved for colder days.
Recipe Overview
- Prep Time: 3-4 hours (includes brining and infusing)
- Cook Time: 25 minutes
- Total Time: 4-5 hours
- Yields: 8 1/2 pints
- Serves: 40
- Dietary Type: Vegetarian, Gluten-Free
Ingredients
- 3 lbs zucchini, seeds removed, sliced into spears
- 10-12 fresh pepperoncini peppers, scored but left whole
- 2 serrano peppers, stems removed and sliced
- 1 large red onion, peeled, halved, and sliced
- Pickling salt
- 4-8 garlic cloves, sliced very thin
- 3 cups vinegar
- 2 cups sugar
- 2 teaspoons celery seeds
- 2 teaspoons mustard seeds
- 1 teaspoon turmeric
- 1 teaspoon red peppercorns
- Ball pickle crisp granules (just 1/8 teaspoon per 1 pint jars or a dash 1/16 teaspoon per 1/2 pint jars) (optional)
Equipment Needed
- Large stainless steel bowl
- Colander
- Large stainless steel pot
- 8 – 8 ounce jars
- Jar lifter
- Water bath canner
Instructions
- In a large stainless steel bowl, create layers of the zucchini spears, pepperoncini peppers, serrano peppers, and red onion. Sprinkle 1/2 cup pickling salt over the vegetables.
- Top the vegetable mixture with cold water, ensuring all the vegetables are submerged. Set aside for 2-3 hours to brine. This step is crucial for drawing out excess moisture and firming up the zucchini.
- Drain the vegetables into a colander and rinse thoroughly under running cold water to remove the salt. Drain well to ensure excess water is removed.
- In a large stainless steel pot, combine the vinegar, sugar, celery seeds, mustard seeds, turmeric, and red peppercorns. Bring the mixture to a boil, stirring constantly to dissolve the sugar. Maintain a gentle boil for 10 minutes, allowing the flavors to meld together.
- Add the drained vegetables to the boiling brine. Cover the pot and remove it from the heat. Let the vegetables infuse in the brine for 1 hour, allowing them to absorb the flavorful liquid.
- While the vegetables are infusing, prepare your jars. I used 8 – 8 ounce jars. Sterilize the jars according to manufacturer’s instructions or by boiling them in water for 10 minutes. Also, prepare your water bath canner.
- Bring the vegetable and brine mixture back to a boil to ensure the vegetables are heated through before canning.
- Pack the hot vegetables into the sterilized jars, leaving about 1/2-inch of headspace at the top.
- If using, add a dash of the Ball pickle crisp granules to each jar (just 1/8 teaspoon per 1 pint jars or a dash 1/16 teaspoon per 1/2 pint jars). This helps maintain the crispness of the zucchini.
- Remove any air bubbles from the jars by gently tapping them on the counter or using a non-metallic utensil. Ladle the hot liquid over the vegetables, maintaining the 1/2-inch headspace.
- Wipe the rims of the jars clean with a damp cloth to remove any residue. This ensures a proper seal. Top each jar with a lid and band. Screw the bands on to fingertip tight – not too loose, not too tight.
- Carefully place the filled jars into the boiling water bath canner, ensuring there is at least 1 inch of water covering the tops of the jars.
- Bring the water back to a boil, cover the canner, and boil for 15 minutes. This processing time ensures the jars are properly sealed and the contents are preserved.
- Turn off the heat and remove the canner lid. Let the jars rest in the hot water for 5 minutes before removing them. This helps prevent siphoning (loss of liquid from the jars).
- Using a jar lifter, carefully remove the jars from the canner without tilting them. Place them on a towel-lined surface in a draft-free area to cool completely.
- Allow the jars to cool for at least 12 hours. After 12 hours, remove the bands and check the seals. The lids should be concave and not flex when pressed. If any jars did not seal properly, refrigerate them and consume within a few weeks.
- Label the sealed jars with the date and contents. Store in a cool, dark place for optimal shelf life.
Expert Tips & Tricks
- Brining Time: Don’t rush the brining process. This is essential for achieving the desired texture and flavor. If you’re short on time, you can brine for a minimum of 2 hours, but 3 hours is ideal.
- Garlic Flavor: For a more intense garlic flavor, use more garlic cloves or slightly crush them before adding them to the brine.
- Spice Level: Adjust the amount of serrano peppers to control the heat level. Remove the seeds and membranes for a milder flavor.
- Jar Sealing: A properly sealed jar is crucial for food safety. Always check the seals before storing the jars. If a jar doesn’t seal, refrigerate it immediately and consume the contents within a few weeks.
Serving & Storage Suggestions
These zesty zucchini spears are delicious straight from the jar as a flavorful snack or side dish. They pair perfectly with grilled meats, sandwiches, salads, and cheese boards. Their tangy, spicy flavor complements a variety of dishes.
Store sealed jars in a cool, dark place for up to one year. Once opened, refrigerate the jars and consume the zucchini spears within a few weeks. Properly canned and stored, these zucchini spears should not spoil at room temperature, but refrigeration after opening is essential for maintaining quality and safety.
Nutritional Information
| Nutrient | Amount per Serving | % Daily Value |
|---|---|---|
| Calories | 54.7 kcal | N/A |
| Calories from Fat | 1g | 3% |
| Total Fat | 0.2 g | 0% |
| Saturated Fat | 0 g | 0% |
| Cholesterol | 0 mg | 0% |
| Sodium | 217.7 mg | 9% |
| Total Carbohydrate | 12.6 g | 4% |
| Dietary Fiber | 0.7 g | 2% |
| Sugars | 11.6 g | N/A |
| Protein | 0.7 g | 1% |
Variations & Substitutions
- Spicier Spears: For those who like extra heat, add a pinch of red pepper flakes to the brine or use hotter varieties of peppers.
- Sweeter Spears: If you prefer a sweeter taste, increase the amount of sugar in the brine by 1/4 to 1/2 cup.
- Herbaceous Spears: Add fresh herbs like dill, oregano, or thyme to the brine for a more complex flavor profile.
- Vinegar Variation: Experiment with different types of vinegar, such as apple cider vinegar or white wine vinegar, to alter the flavor profile.
FAQs (Frequently Asked Questions)
Q: Why do I need to brine the zucchini?
A: Brining helps draw out excess moisture from the zucchini, resulting in a firmer and crisper texture after canning. It also helps to season the zucchini from the inside out.
Q: Can I use different types of peppers?
A: Yes, you can use different types of peppers based on your preference for heat and flavor. Jalapeños, banana peppers, or even sweet bell peppers can be substituted.
Q: How do I know if my jars are properly sealed?
A: A properly sealed jar will have a concave lid that doesn’t flex when pressed. You should also hear a “pop” sound as the jars cool, indicating a vacuum seal has formed.
Q: Can I reduce the amount of sugar in the brine?
A: While you can reduce the sugar, it’s important to maintain a certain level for preservation and flavor. Reducing it too much may affect the shelf life and taste of the zucchini spears.
Q: What if I don’t have pickling salt?
A: Pickling salt is preferred because it doesn’t contain iodine or anti-caking agents, which can cloud the brine and affect the flavor. However, you can substitute kosher salt if necessary.
Final Thoughts
These zesty zucchini spears are a taste of summer sunshine in a jar. Whether you’re a seasoned canner or a first-timer, this recipe is sure to become a favorite. So gather your zucchini, put on your apron, and get ready to create a batch of these delightful spears. Don’t be afraid to experiment with different spices and flavors to create your own unique variation. And most importantly, enjoy the process and share your delicious creations with friends and family. They pair beautifully with a crisp, dry white wine on a warm evening. Let me know what you think!