
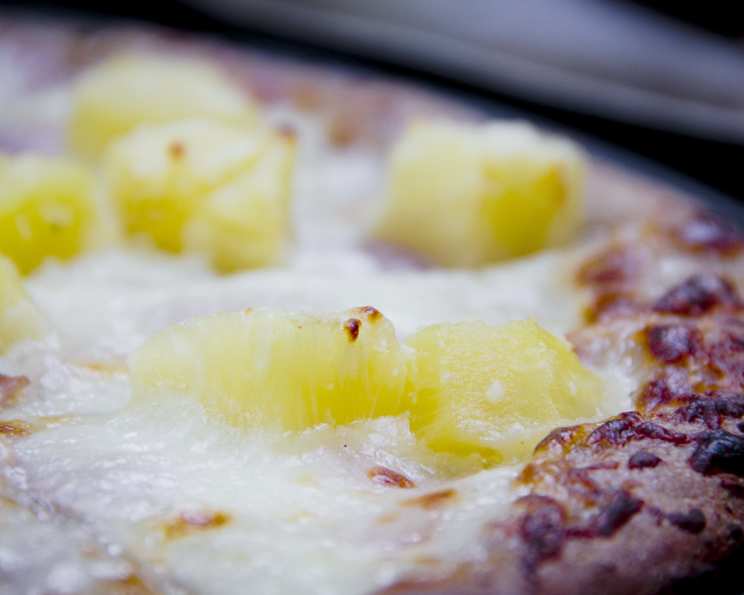
Mastering the Art of 100% Whole Wheat Pizza: A Baker’s Guide
The aroma of freshly baked pizza has always been a siren song for me, instantly transporting me back to my Nonna’s bustling kitchen. I can still picture her, flour dusting her apron, expertly stretching dough while humming a Neapolitan tune. The taste of that simple, honest pizza – made with love and wholesome ingredients – remains etched in my memory, inspiring my own journey in the culinary arts. While Nonna’s recipe was a closely guarded secret, this 100% whole wheat pizza dough comes pretty close, and I am so excited to share it with you.
Recipe Overview
- Prep Time: 20 minutes
- Cook Time: 7-8 minutes
- Total Time: Approximately 1 day (including resting/thawing)
- Servings: 5
- Yield: 5 pizzas (approximately 10-12 inches each)
- Dietary Type: Vegan (naturally), Vegetarian
Ingredients
- 5 1⁄2 cups whole wheat flour (24 oz or 680g, I recommend a hard spring wheat flour for best results)
- 2 tablespoons honey (or 1.5 oz or 43 g sugar as a substitute)
- 2 teaspoons salt (0.5 oz or 14 g, use less volume if using coarse salt)
- 1 teaspoon instant yeast (0.11 oz or 3 g)
- 2 1⁄8 cups water (17 oz or 482 g)
- 3 tablespoons olive oil (1.5 oz or 43 g)
Ingredient Notes:
- For the whole wheat flour, using a hard spring wheat variety will produce a stronger gluten network, resulting in a chewier, more elastic crust.
- The honey (or sugar) acts as food for the yeast and contributes to the crust’s browning and flavor.
- Good quality olive oil adds richness and flavor to the dough.
Equipment Needed
- Large mixing bowl (or stand mixer)
- Measuring cups and spoons
- Dough scraper or knife
- Kitchen scale (optional, but recommended for accuracy)
- Plastic sandwich bags or freezer bags
- Pizza stone (or baking sheet)
- Parchment paper
Instructions
-
Combine the Ingredients: In a large mixing bowl, or the bowl of your stand mixer fitted with a paddle attachment, combine the whole wheat flour, honey, salt, instant yeast, water, and olive oil. Mix with a spoon for about 1 minute, or using the paddle attachment on an electric mixer for 1 minute, until the ingredients are roughly combined.
-
Rest (Autolyse): Cover the bowl and let the dough rest for 5 minutes. This process, called autolyse, allows the flour to fully hydrate, resulting in a more extensible dough.
-
Knead the Dough: Knead the dough by hand or with a dough hook on an electric mixer for 5 to 6 minutes. The dough will still be slightly sticky, but it should start to come together and become smoother.
-
First Rise (Stretch and Fold): Lightly oil your countertop and your hands. Scrape the dough onto the oiled surface. Gently stretch the dough by pulling on the bottom until it forms a rectangle about 1/3 as thick as the original mass. Stretch and fold the dough as you would a letter (fold the top third down, then the bottom third up). Repeat with the ends, folding one end over the center and then the other, forming a folded package. Turn the dough over and pull it towards the bottom, forming a smooth ball. This process develops gluten strength.
-
Divide the Dough: Using a dough scraper or knife, divide the dough into 5 equal pieces, each about 8 oz (227 g). A kitchen scale is very helpful for ensuring even portions.
-
Shape into Balls: Form each piece of dough into a smooth ball.
-
Proof: Spray the inside of plastic sandwich bags or freezer bags with oil. Place each dough ball into a separate bag, ensuring they are coated with oil to prevent sticking.
-
Cold Fermentation (Retardation): Rest the dough overnight (or up to 4 days) in the refrigerator. This cold fermentation process develops complex flavors and improves the dough’s texture. Alternatively, you can freeze the dough for up to several months.
-
Thawing (if frozen): If you froze the dough, thaw it in the refrigerator for a day before cooking.
-
Second Rise (Proofing): On baking day, remove the desired number of bags from the refrigerator. Remove the dough balls from the bags and place them onto an oiled pan or work surface. Gently press them into discs, spray the tops with oil, and cover with oiled plastic wrap. Allow them to proof at room temperature for about 1-2 hours, or until slightly puffed.
-
Preheat Oven: Preheat your oven with a pizza stone to 500°F (260°C) or slightly higher if possible. The hotter the oven, the crispier the crust.
-
Prepare Toppings: While the oven is preheating, prepare your desired pizza toppings.
-
Shape the Dough: Using flour, shape the dough using gravity and your knuckles. Rotate and stretch it until you reach the desired size (10 to 12 inches). Aim for a slightly thicker rim and a thinner base, but avoid making the base paper-thin to prevent tearing.
-
Top the Pizza: Place the shaped dough on a piece of parchment paper. Add your favorite sauce, cheese, and toppings.
-
Bake the Pizza: Carefully transfer the pizza (on the parchment paper) onto the preheated pizza stone. Bake until the cheese is bubbly and the crust is golden brown. This should take 7 to 8 minutes at 500°F (260°C).
-
Cool and Serve: Remove the pizza from the oven using a pizza peel or spatula. Let it cool for a few minutes before slicing and serving.
A Note on Sauce: For a simple and delicious sauce, use canned whole peeled plum tomatoes that have been deseeded, salted, and lightly mixed with an immersion blender. Strain some of the excess water for the correct consistency. A pinch of sugar helps to balance the acidity and enhance the flavor. Do not cook the sauce.
Expert Tips & Tricks
- Dough Consistency: Whole wheat flour absorbs more water than all-purpose flour. Adjust the water amount slightly if the dough seems too dry or too wet.
- Cold Fermentation is Key: Don’t skip the cold fermentation step! It significantly improves the flavor and texture of the whole wheat crust.
- High Heat is Your Friend: A high oven temperature is crucial for achieving a crispy crust.
- Parchment Paper for Easy Transfer: Using parchment paper makes transferring the pizza to and from the hot pizza stone much easier and prevents sticking.
- Don’t Overload Toppings: Too many toppings can weigh down the crust and make it soggy.
- Pre-Bake Toppings (Optional): If using vegetables with high water content (like mushrooms or peppers), consider pre-baking them slightly to reduce moisture.
Serving & Storage Suggestions
Serve your freshly baked whole wheat pizza immediately for the best flavor and texture. Leftover pizza can be stored in an airtight container in the refrigerator for up to 3 days. To reheat, warm it in a preheated oven at 350°F (175°C) for a few minutes, or in a skillet on the stovetop for a crispier crust. You can also freeze slices individually wrapped in plastic wrap and then placed in a freezer bag for up to 2 months. Reheat frozen slices directly in the oven.
Nutritional Information
(Approximate values per slice, based on 5 servings per dough recipe, without toppings)
| Nutrient | Amount per Serving | % Daily Value |
|---|---|---|
| Calories | 350 kcal | 18% |
| Total Fat | 8g | 10% |
| Saturated Fat | 1g | 5% |
| Cholesterol | 0mg | 0% |
| Sodium | 350mg | 15% |
| Total Carbohydrate | 60g | 22% |
| Dietary Fiber | 8g | 32% |
| Sugars | 3g | 6% |
| Protein | 10g | 20% |
Note: Nutritional information is an estimate and may vary based on specific ingredients and portion sizes.
Variations & Substitutions
- Gluten-Free Version: While this recipe is for 100% whole wheat, you can adapt it using a gluten-free flour blend designed for bread making. You may need to adjust the water content and add a binder like xanthan gum.
- Herb Infused Dough: Add 1-2 tablespoons of dried herbs (such as oregano, basil, or rosemary) to the dough for extra flavor.
- Spicy Dough: Incorporate a pinch of red pepper flakes for a touch of heat.
- Cheese Substitutions: Use a vegan cheese alternative for a dairy-free pizza.
FAQs (Frequently Asked Questions)
Q: Why is my whole wheat pizza crust tough?
A: Over-kneading the dough or using too much flour can lead to a tough crust. Make sure to knead for the recommended time and avoid adding excess flour during shaping. Also, cold fermentation is your friend!
Q: Can I make this dough without a stand mixer?
A: Absolutely! Kneading by hand works just as well. Just be prepared to put in a little extra effort.
Q: How do I prevent the pizza from sticking to the stone?
A: Use parchment paper for easy transfer, or generously dust your pizza peel with flour or cornmeal before placing the dough on it.
Q: Can I add toppings before the second rise?
A: No, you should only add toppings right before baking to prevent the crust from becoming soggy.
Q: How long can I store the dough in the freezer?
A: The dough can be stored in the freezer for up to 2 months without significant loss of quality.
Final Thoughts
This 100% whole wheat pizza dough recipe is a fantastic way to enjoy a healthier and more flavorful homemade pizza. The process might seem a bit involved, but the end result is well worth the effort. Don’t be afraid to experiment with different toppings and variations to create your own signature pizza. Now, gather your ingredients, preheat your oven, and prepare to create a pizza masterpiece that will impress your family and friends. And please, share your creations and feedback – I’m always eager to learn from your culinary adventures! Pair this pizza with a crisp green salad and a glass of your favorite Italian wine for a truly memorable meal. Buon appetito!