
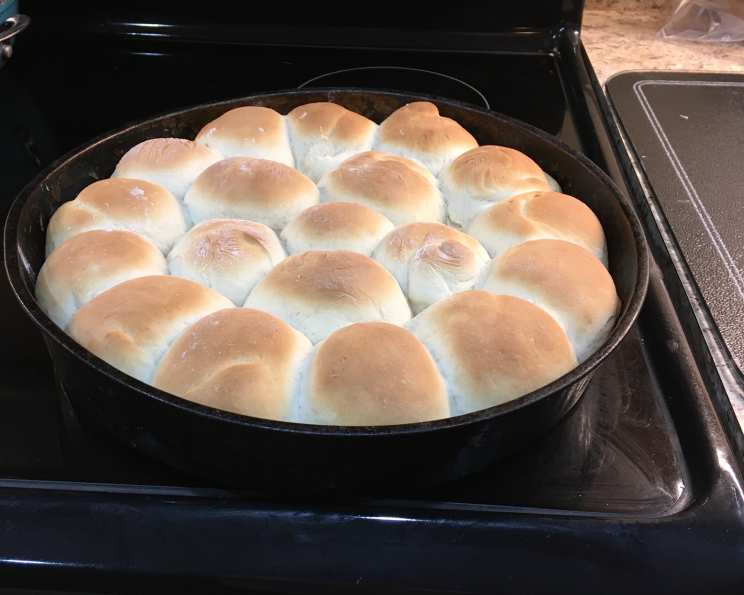
30-Minute Dinner Rolls: A Culinary Quickstep
I remember one Thanksgiving years ago. My aunt, bless her heart, had drastically underestimated the number of guests. Suddenly, there weren’t enough rolls to go around, and panic threatened to set in. That’s when I discovered the magic of quick dinner rolls. Whipped up in a flash, they saved the day and became a cherished family tradition. The aroma of freshly baked bread filling the air, the slightly frantic but joyful atmosphere—it’s a memory I wouldn’t trade for the world. These 30-minute rolls are my go-to for those moments when you need a little bit of homemade comfort, fast.
Recipe Overview
- Prep Time: 10 minutes
- Cook Time: 15-20 minutes
- Total Time: 25-30 minutes
- Servings: 5-6
- Yield: 6-8 rolls
- Dietary Type: Vegetarian
Ingredients
- 1 cup very warm water
- 2 tablespoons very warm water
- 1/3 cup oil (vegetable or canola works well)
- 1/4 cup sugar
- 2 tablespoons yeast (active dry or instant)
- 1 teaspoon salt
- 1 egg, beaten
- 3-4 cups flour (all-purpose, plus extra for kneading)
Equipment Needed
- Large Mixing Bowl
- Measuring Cups and Spoons
- Greased Baking Pan (9×13 inch recommended, or round cake pan)
Instructions
- In a large mixing bowl, combine the 1 cup of very warm water, oil, sugar, and yeast. Let this mixture rest for 10 minutes, allowing the yeast to activate. You’ll know it’s working when you see a foamy layer forming on top. This step is crucial for achieving light and fluffy rolls.
- After 10 minutes, add the salt and beaten egg to the yeast mixture. Blend everything together thoroughly with a spoon or whisk. The egg adds richness and helps bind the dough.
- Begin adding the flour, one cup at a time, to the wet ingredients. Mix well after each addition. Continue adding flour until a soft dough forms. The amount of flour needed may vary depending on humidity and the type of flour you use, so add it gradually.
- Turn the dough out onto a lightly floured surface. Knead the dough for 5-10 minutes, or until it becomes smooth and elastic. Kneading develops the gluten, which gives the rolls their structure. If the dough is too sticky, add a little more flour, one tablespoon at a time, until it’s manageable.
- Shape the dough into small balls, about the size of walnuts. Place the dough balls into a greased baking pan, arranging them so they are close together. This encourages them to rise together and creates soft sides.
- Let the rolls rise in the pan for at least 5-10 minutes. While this is a quick recipe, allowing a short rise time is important for a light texture.
- Preheat your oven to 425 degrees Fahrenheit (220 degrees Celsius). Once the oven is heated, bake the rolls for 15-20 minutes, or until they are golden brown on top. Keep an eye on them, as oven temperatures can vary.
- Remove the rolls from the oven and let them cool slightly before serving. Brush with melted butter for extra flavor (optional).
Important Note: If you have more time, you can let the rolls rise in the pan until they have doubled in size. This will result in even fluffier rolls.
Expert Tips & Tricks
- Temperature Matters: The water needs to be warm enough to activate the yeast, but not too hot, which can kill it. Aim for around 105-115°F (40-46°C).
- Kneading Technique: Don’t be afraid to really work the dough. Use the heel of your hand to push the dough away from you, then fold it over and rotate it. This develops the gluten and creates a smooth, elastic texture.
- Proofing Place: If your kitchen is cold, create a warmer environment for proofing by placing the pan of rolls in a slightly warmed oven (turn the oven on for a minute or two, then turn it off) or near a warm stovetop.
- Egg Wash: For a shinier, more golden crust, brush the tops of the rolls with a beaten egg before baking.
- Flavor Boost: Add a touch of garlic powder or dried herbs to the dough for extra flavor.
Serving & Storage Suggestions
Serve these rolls warm, ideally straight from the oven. They are delicious with butter, jam, or as an accompaniment to soups, stews, and salads. Leftover rolls can be stored in an airtight container at room temperature for 1-2 days. To keep them fresh longer, store them in the refrigerator for up to a week. You can also freeze the rolls for up to 2-3 months. To reheat, wrap the rolls in foil and warm them in a preheated oven at 350°F (175°C) for 10-15 minutes, or until heated through. Alternatively, microwave them briefly, but be careful not to overcook them, as they can become tough.
Nutritional Information
| Nutrient | Amount per Serving | % Daily Value |
|---|---|---|
| Calories | 470 kcal | 24% |
| Total Fat | 16.6g | 25% |
| Saturated Fat | 2.4g | 12% |
| Cholesterol | 37mg | 12% |
| Sodium | 485mg | 20% |
| Total Carbohydrate | 69g | 23% |
| Dietary Fiber | 3.3g | 13% |
| Sugars | 10g | 20% |
| Protein | 11g | 22% |
Note: Nutritional information is an estimate and may vary based on specific ingredients and portion sizes.
Variations & Substitutions
- Dairy-Free: Substitute the egg with 2 tablespoons of applesauce or mashed banana.
- Whole Wheat: Replace up to half of the all-purpose flour with whole wheat flour for a nuttier flavor and added fiber.
- Sweet Rolls: Increase the amount of sugar to 1/2 cup and add a teaspoon of cinnamon to the dough for sweet rolls. Frost with cream cheese frosting after baking.
- Herb Rolls: Add 1-2 tablespoons of chopped fresh herbs, such as rosemary, thyme, or oregano, to the dough for a savory flavor.
- Garlic Rolls: Add 1-2 teaspoons of garlic powder to the dough, or brush the baked rolls with garlic butter.
FAQs (Frequently Asked Questions)
Q: Can I use instant yeast instead of active dry yeast?
A: Yes, you can use instant yeast. There’s no need to activate it in water first; just add it directly to the dry ingredients.
Q: My dough is too sticky. What should I do?
A: Add a little more flour, one tablespoon at a time, until the dough is manageable and no longer sticks to your hands.
Q: Can I make the dough ahead of time?
A: Yes, you can make the dough ahead of time and store it in the refrigerator for up to 24 hours. Punch it down before shaping and baking.
Q: Why didn’t my rolls rise?
A: Make sure your yeast is fresh and your water is warm enough, but not too hot. Also, ensure you’re kneading the dough sufficiently to develop the gluten.
Q: Can I freeze these rolls after baking?
A: Yes, you can freeze the baked rolls. Wrap them tightly in plastic wrap and then in foil, or place them in a freezer-safe bag. They will keep for up to 2-3 months.
Final Thoughts
These 30-minute dinner rolls are more than just a quick fix; they’re a warm, comforting reminder that homemade goodness doesn’t have to take hours. They are perfect for busy weeknights, unexpected guests, or simply when you crave the simple pleasure of freshly baked bread. So, gather your ingredients, preheat your oven, and get ready to enjoy the delightful aroma and taste of these easy, delicious rolls. Don’t be afraid to experiment with variations and make them your own! Share your creations and experiences – I’d love to hear how these rolls become a part of your cherished meals.