
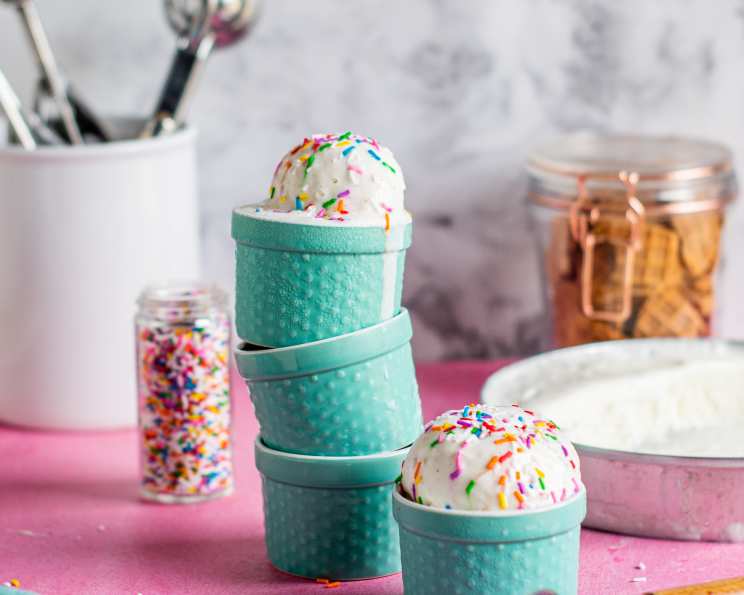
5-Minute Ice Cream: A Culinary Magic Trick
I remember one sweltering summer afternoon when I was about eight years old. My grandmother, a woman who could conjure deliciousness out of thin air, decided we needed ice cream. No ice cream maker, no fancy ingredients, just a couple of Ziploc bags, some ice, and a whole lot of shaking. The pure joy on my face as I tasted that surprisingly creamy, homemade ice cream is a memory I cherish to this day. It wasn’t just the coolness on my tongue; it was the magic of creating something so satisfying with my own hands, a culinary wonder that sparked my lifelong love affair with cooking.
Recipe Overview
- Prep Time: 2 minutes
- Cook Time: 5 minutes
- Total Time: 7 minutes
- Servings: 1-2 (depending on appetite!)
- Dietary Type: Vegetarian (easily adaptable to dairy-free, see Variations)
Ingredients
- 1 gallon Ziploc bag
- 1 quart Ziploc bag
- 1 cup milk (whole milk recommended for richness, but 2% or non-dairy alternatives work)
- 1 tablespoon sugar (granulated or caster sugar)
- ½ teaspoon vanilla extract (pure vanilla extract is best, but imitation vanilla will also work)
- ⅓ cup salt (table salt or kosher salt)
- Ice (enough to fill the gallon bag about ¾ full)
Equipment Needed
- 1 Gallon-sized Ziploc bag
- 1 Quart-sized Ziploc bag
- Measuring cups and spoons
Instructions
- First, prepare your ice cream base. In the smaller, quart-sized Ziploc bag, carefully pour in the milk, sugar, and vanilla extract. Seal the bag tightly, ensuring all the air is pressed out. This is crucial to prevent leaks!
- Next, create your ice bath. Take the larger, gallon-sized Ziploc bag and fill it about ¾ full with ice. Then, add the salt to the ice. The salt lowers the freezing point of the ice, allowing the ice cream mixture to freeze faster and at a colder temperature.
- Now, assemble your ice cream-making machine. Carefully place the sealed quart-sized bag containing the milk mixture inside the gallon-sized bag filled with ice and salt. Again, ensure both bags are sealed tightly. Double-checking the seals is always a good idea!
- The fun part! Shake the bag vigorously for about 5 minutes. You’ll want to shake it continuously and with some force. This agitation is what helps to freeze the milk mixture into ice cream. It’s a great arm workout! If it’s too cold to hold directly, use gloves or a towel.
- Finally, rinse the quart-sized bag with cold water before opening it. This prevents any of the salty water from the outer bag from contaminating your delicious ice cream. Open the bag carefully and enjoy immediately!
Expert Tips & Tricks
- Use cold ingredients: Starting with cold milk will speed up the freezing process. Consider chilling the milk in the freezer for about 15 minutes before starting, but don’t let it freeze solid!
- Salt is key: The amount of salt is important. Too little, and the ice cream won’t freeze properly. Too much, and it might taste salty (though rinsing the bag helps prevent this).
- Shake it up! Continuous shaking is crucial. Take turns with a friend or family member to avoid arm fatigue. Put on some music and make it a dance party!
- Check for doneness: After 5 minutes, feel the bag. The mixture should be mostly solid, but still slightly soft. If it’s too liquid, continue shaking for another minute or two.
- Soft serve vs. Hard ice cream: This recipe makes a soft-serve style ice cream. If you prefer a firmer texture, you can freeze it for an additional 30-60 minutes after shaking.
Serving & Storage Suggestions
Serve immediately in a bowl or cone. Because this ice cream is made without stabilizers, it will melt quickly at room temperature. It’s best enjoyed fresh.
If you must store it, transfer any leftover ice cream to an airtight container and freeze for up to 2 hours. Be aware that the texture will change upon refreezing, becoming icier. It is best consumed immediately after making it.
Nutritional Information
Please note that these values are estimates and can vary based on the specific ingredients used.
| Nutrient | Amount per Serving | % Daily Value |
|---|---|---|
| Calories | 180 kcal | 9% |
| Total Fat | 8g | 12% |
| Saturated Fat | 5g | 25% |
| Cholesterol | 25mg | 8% |
| Sodium | 90mg | 4% |
| Total Carbohydrate | 15g | 5% |
| Dietary Fiber | 0g | 0% |
| Sugars | 14g | 28% |
| Protein | 4g | 8% |
Variations & Substitutions
- Dairy-Free: Use almond milk, soy milk, oat milk, or coconut milk instead of regular milk. Coconut milk will result in a richer, creamier flavor.
- Chocolate Ice Cream: Add 2 tablespoons of cocoa powder to the milk mixture.
- Strawberry Ice Cream: Add ¼ cup of mashed fresh strawberries to the milk mixture.
- Peanut Butter Ice Cream: Add 2 tablespoons of peanut butter to the milk mixture.
- Mint Chocolate Chip: Add a few drops of peppermint extract and a handful of chocolate chips to the milk mixture.
- Vegan Option: Ensure that you are using plant based milk and vegan sugar.
- Adjust the Level of Sweetness: Feel free to adjust the level of sugar added to the milk to fit your tastes.
FAQs (Frequently Asked Questions)
Q: Why do I need salt in the ice?
A: Salt lowers the freezing point of water, which allows the ice to get colder than 32°F (0°C). This colder temperature is necessary to freeze the ice cream mixture properly.
Q: Can I use less sugar?
A: Yes, you can reduce the amount of sugar to your liking. However, keep in mind that sugar not only adds sweetness but also helps to prevent the formation of large ice crystals, resulting in a smoother texture.
Q: What if my ice cream doesn’t freeze after 5 minutes?
A: Make sure you used enough ice and salt, and that both bags are sealed tightly. Continue shaking for another few minutes, and check the consistency regularly.
Q: Can I use a different type of milk?
A: Yes, you can use different types of milk, but the texture and flavor may vary. Whole milk will result in the creamiest ice cream, while lower-fat milk or non-dairy milk may produce a slightly icier texture.
Q: How do I prevent the salt from getting into the ice cream?
A: Rinse the small bag thoroughly with cold water before opening it. This will remove any salt residue that may have accumulated on the outside of the bag. Also make sure to seal both bags tightly.
Final Thoughts
This 5-minute ice cream recipe is more than just a quick dessert; it’s a fun, interactive culinary experience that anyone can enjoy. Whether you’re making it with kids on a hot summer day or craving a simple sweet treat, the process is as delightful as the result. So grab your Ziploc bags, gather your ingredients, and get ready to shake your way to deliciousness. I encourage you to experiment with different flavors and share your creations with friends and family. And don’t forget to let me know what variations you come up with! Happy shaking!