
Amish Sourdough Bread: A Taste of Tradition
My grandmother’s kitchen was a haven, filled with the comforting aroma of freshly baked bread. While I don’t specifically remember her making this exact sourdough recipe, the scent of yeast, warm milk, and a hint of sweetness always transports me back to those cherished moments spent by her side. This Amish Sourdough Bread, with its tangy flavor and slightly chewy texture, is a reminder of the simple, wholesome goodness that defined her cooking and our family’s history. I hope this recipe brings the same warmth and joy to your home.
Recipe Overview
- Prep Time: 30 minutes (plus 10 days for starter)
- Cook Time: 25 minutes
- Total Time: 11 days, 55 minutes
- Yields: 2 loaves or 1 loaf and 12-14 rolls
- Serves: 30
- Dietary Type: Not specified (contains dairy and eggs)
Ingredients
For the Starter (10-Day Ferment):
- 2 1⁄4 teaspoons dry yeast
- 1⁄4 cup warm water
- 3 cups flour
- 3 cups sugar (or 3 cups honey)
- 3 cups milk
For the Bread:
- 2 1⁄4 teaspoons dry yeast
- 1 cup warm water
- 1 cup milk
- 2 tablespoons honey
- 2 teaspoons salt
- 1⁄4 cup vegetable oil
- 2 eggs
- 1 cup whole wheat flour
- 6-7 cups flour (all-purpose or bread flour)
- 1 egg white (for brushing on top)
- Sesame or poppy seeds (optional, for topping)
Equipment Needed
- Plastic or glass container for starter
- Mixing bowl
- Dough hook (for mixer)
- Floured board
- Clean towel
- Greased cookie sheet (for rolls)
- Greased loaf pan (for bread)
Instructions
-
Prepare the Starter (Days 1-10): Begin by dissolving the dry yeast (2 1⁄4 teaspoons) in warm water (1⁄4 cup). In a plastic or glass container, mix the dissolved yeast with flour (1 cup), sugar or honey (1 cup), and milk (1 cup). This marks Day 1 of the 10-day starter preparation.
-
Ferment and Stir: Cover the starter and leave it on the counter at room temperature. Stir it daily.
-
Feed the Starter (Day 5): On the 5th day, “feed” the starter by adding another 1 cup of flour, 1 cup of sugar or honey, and 1 cup of milk. Stir well.
-
Continue Stirring: Continue to stir the starter daily.
-
Final Feeding (Day 10): On the 10th day, add the final feeding: 1 cup of flour, 1 cup of sugar or honey, and 1 cup of milk. The starter is now ready to be used, divided, and shared, or frozen. Ideally, waiting one day after feeding the starter before baking allows it to ferment more completely.
-
Refrigerating the Starter: If you aren’t baking the next day, you can refrigerate the starter. Remember to bring it to room temperature on baking day or the night before if frozen. If you receive a cup of starter as a gift, feed it immediately and wait a day before baking, allowing it time to ferment at room temperature.
-
Prepare the Bread Dough: Place 1 cup of the prepared starter in the bowl of a mixer. Using a dough hook on slow speed, add all the bread ingredients, ensuring they are at room temperature.
-
Add Remaining Ingredients: Add the remaining ingredients in the following order: yeast (2 1⁄4 teaspoons), warm water (1 cup), milk (1 cup), honey (2 tablespoons), vegetable oil (1⁄4 cup), whole wheat flour (1 cup), eggs (2), salt (2 teaspoons), and approximately 6-7 cups of white flour (all-purpose or bread flour). You can adjust the ratio of whole wheat flour to white flour according to your preference.
-
Knead the Dough: Knead the dough in the mixer for 10 minutes. The dough should be slightly sticky, smooth, shiny, and mostly gathered around the dough hook when finished.
-
Shape and Rise: Remove the dough from the mixer bowl and place it on a lightly floured board. Knead it by hand for two minutes, shaping it into a large ball. Oil the inside of the mixer bowl. Place the dough back into the bowl, swirl it around in the oil, and turn it over so that all sides are oiled. Press down gently, cover the bowl with a clean towel, and allow the dough to rise in a warm place until doubled in size (about 1-1.5 hours).
-
Divide and Shape: Once the dough has doubled, punch it down to release the air. Divide the dough into two equal portions. At this point, you can make two loaves of bread, or one loaf and a batch of rolls.
-
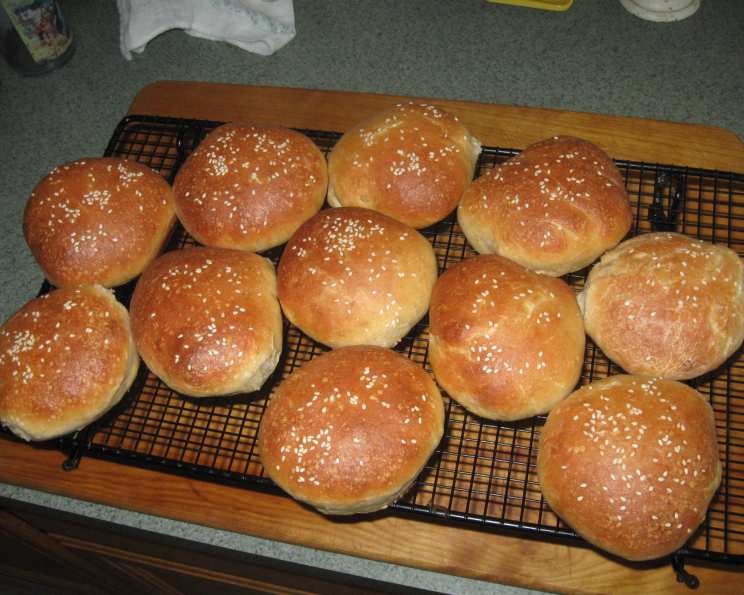
Prepare Rolls (Optional): For rolls, divide one portion of the dough into 12-14 even balls (about 2 1⁄2 oz each if using a scale). Place the balls on a greased cookie sheet, pressing each one down into a flat disc. Brush the tops with a beaten egg white mixed with 1 tablespoon of water. Sprinkle with sesame or poppy seeds, if desired. Cover the rolls and allow them to rise for 1 hour, or until doubled in size.
-
Bake Rolls: Preheat oven to 375°F (190°C). Bake the rolls for 15-20 minutes, or until they are golden brown.
-
Prepare Loaf: For a loaf of bread, flatten one portion of the dough into a rectangle to remove air bubbles. Roll it up tightly into a log. Roll the two sides under and place the log seam-side down in a greased loaf pan. Brush the top with egg white and sprinkle with seeds, if desired.
-
Bake Loaf: Bake the loaf at 375°F (190°C) for 25 minutes. Remove it from the pan and thump the bottom of the loaf. It should sound hollow when done.
-
Freezing Dough (Optional): You can bake half of the dough and shape the other half into a loaf, wrap it tightly in plastic wrap, and freeze it. When you are ready to bake it, remove it from the wrap and place it in a greased loaf pan. Cover the pan and allow the dough to defrost and rise in a warm spot. Brush with egg white and sprinkle with seeds before baking as usual.
Expert Tips & Tricks
- Maintaining Starter Health: A healthy starter is key to great sourdough. Observe your starter closely. It should be bubbly and active after feeding. If it smells strongly of alcohol, it might need more frequent feedings.
- Adjusting Flour: The amount of flour needed can vary depending on humidity and the type of flour used. Add flour gradually until the dough reaches the desired consistency – slightly sticky but manageable.
- Warm Place for Rising: A slightly warm environment helps the dough rise faster. You can place the bowl in a turned-off oven with the light on or near a warm stovetop.
- Egg Wash Substitute: If you don’t have an egg white, you can use milk or melted butter for brushing the tops of the bread or rolls before baking. This will give them a nice golden-brown color.
- Scoring the Loaf: For a more professional look, score the top of the bread loaf with a sharp knife before baking. This helps control expansion and prevents the bread from cracking unpredictably.
Serving & Storage Suggestions
Serve the Amish Sourdough Bread warm with butter, jam, or your favorite spreads. It’s also delicious toasted or used for sandwiches. Store leftover bread in an airtight container at room temperature for up to 3 days, in the refrigerator for up to a week, or in the freezer for longer storage (up to 2 months). To reheat, wrap the bread in foil and warm it in a 350°F (175°C) oven for about 10-15 minutes, or until heated through. Rolls can be reheated similarly or microwaved briefly.
Nutritional Information
Please note that these values are estimates and can vary based on specific ingredients and portion sizes.
| Nutrient | Amount per Serving (estimated) | % Daily Value (estimated) |
|---|---|---|
| Calories | 275 kcal | N/A |
| Total Fat | 4 g | 5% |
| Saturated Fat | 1 g | 5% |
| Cholesterol | 17 mg | 6% |
| Sodium | 180 mg | 8% |
| Total Carbohydrate | 54 g | 18% |
| Dietary Fiber | 2 g | 6% |
| Sugars | 21 g | N/A |
| Protein | 6 g | 12% |
Variations & Substitutions
- Honey instead of Sugar: Feel free to use all honey in the starter and bread dough for a slightly different flavor profile.
- Different Flours: Experiment with different types of flour, such as rye or spelt, for a unique twist. You can substitute up to half of the all-purpose flour with these alternatives.
- Herb Infusion: Add fresh or dried herbs like rosemary, thyme, or oregano to the dough for an aromatic bread.
- Cheese Bread: Incorporate shredded cheese, such as cheddar or mozzarella, into the dough for a cheesy delight.
- Sweet Variations: Turn this recipe into a sweet bread by adding dried fruits, nuts, and spices like cinnamon and nutmeg.
FAQs (Frequently Asked Questions)
Q: Can I use all-purpose flour instead of bread flour?
A: Yes, you can use all-purpose flour, but bread flour generally yields a chewier texture due to its higher gluten content.
Q: My starter isn’t bubbly. Is it still okay to use?
A: If your starter isn’t bubbly, it may not be active enough. Try feeding it again and waiting another day to see if it becomes more active.
Q: Can I freeze the baked bread?
A: Yes, you can freeze the baked bread. Wrap it tightly in plastic wrap and then in foil to prevent freezer burn. It can be stored in the freezer for up to 2 months.
Q: How do I know when the bread is done baking?
A: The bread is done when it is golden brown and sounds hollow when you tap the bottom of the loaf. An internal temperature of 200-210°F (93-99°C) is also a good indicator.
Q: What can I use the leftover starter for?
A: Leftover starter can be used in pancakes, waffles, muffins, or other bread recipes. It adds a tangy flavor and unique texture to baked goods.
Final Thoughts
This Amish Sourdough Bread recipe is more than just a set of instructions; it’s an invitation to experience a time-honored tradition. The process of nurturing the starter and patiently waiting for the dough to rise is a rewarding journey that culminates in a delicious, homemade loaf. I encourage you to try this recipe, share it with your loved ones, and enjoy the simple pleasures of baking. Don’t hesitate to experiment with variations and share your feedback – happy baking!