
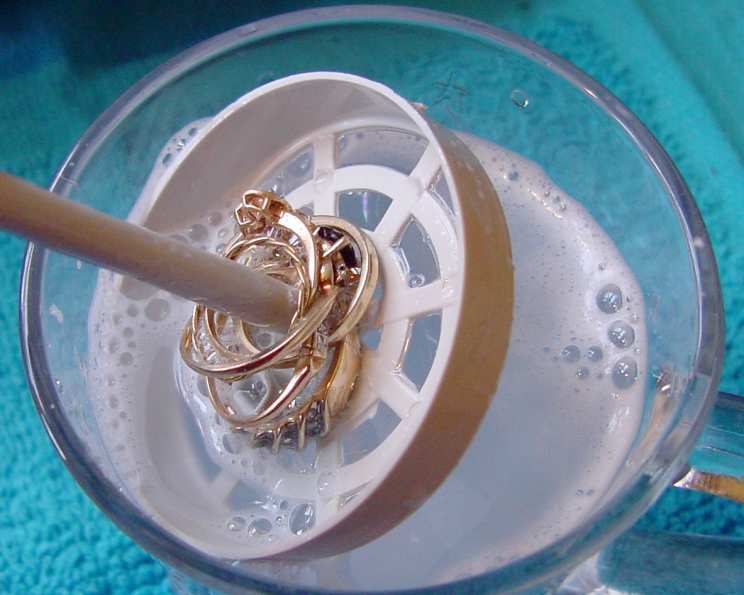
The Sparkling Secret: Homemade Jewelry Cleaner
My grandmother, a woman of impeccable style and thrift, always had her pearls gleaming. I remember being fascinated as a child, watching her meticulously care for her treasures. She swore by a concoction that was more kitchen chemistry than high-end polish, and the results were astonishing. Her jewelry held a radiance that belied their age, a brilliance that seemed to capture the light itself. And now, I’m sharing that very same secret with you – a simple, effective, and surprisingly affordable jewelry cleaner that will leave your prized possessions looking brand new.
Recipe Overview
- Prep Time: 5 minutes
- Cook Time: 2 minutes
- Total Time: 7 minutes
- Yields: 1 bowl of cleaning solution
- Serves: 1
- Dietary Type: Vegan
Ingredients
- 1 tablespoon salt
- 1 tablespoon baking soda
- 1 tablespoon dish detergent
- 1 cup water
- 1 piece aluminum foil
Equipment Needed
- Microwave
- Small Bowl (cereal bowl size is ideal)
- Soft Cloth
- (Optional) Rubber Gloves or Tweezers
Instructions
- Begin by heating the water in the microwave for 1 to 2 minutes, until it’s nice and hot, but not boiling.
- While the water is heating, cut a piece of aluminum foil that is large enough to roughly cover the bottom of your small bowl. It doesn’t have to be perfect, just enough to create a contact surface for the jewelry.
- Carefully pour the hot water into the bowl, being mindful not to burn yourself.
- Now, add the salt, baking soda, and dish detergent to the bowl. You’ll notice a bit of fizzing as the ingredients interact – that’s exactly what we want!
- Gently place your jewelry on top of the aluminum foil. Make sure the jewelry is in contact with the foil. Allow the jewelry to sit in the solution for 5 to 10 minutes. The length of time depends on how tarnished the jewelry is. Check it periodically to see how the cleaning is progressing.
- After the soaking period, rinse the jewelry in cool water. This will remove any residue from the cleaning solution.
- Finally, dry the jewelry completely with a soft cloth. Be thorough to prevent water spots from forming.
- Discard the used cleaning solution. Always make a fresh batch each time you clean your jewelry to ensure optimal results.
Expert Tips & Tricks
- Use Hot Water (But Not Boiling): The heat helps accelerate the cleaning process by promoting the chemical reaction between the ingredients and the tarnish on the jewelry. However, boiling water can damage delicate gemstones, so stick to hot water.
- Aluminum Foil is Key: The aluminum foil acts as a reducing agent, attracting the sulfur from the tarnish on the silver (or other metals). This process reverses the chemical reaction that caused the tarnish in the first place. Ensure good contact between the jewelry and the foil.
- Gentle Detergent is Best: Avoid using harsh detergents that contain bleach or abrasive chemicals. These can damage delicate jewelry. A mild dish soap works perfectly.
- Don’t Overcrowd the Bowl: If you have a lot of jewelry to clean, work in batches to ensure each piece gets adequate contact with the solution and the aluminum foil.
- Consider Rubber Gloves: The solution can be drying to your hands, especially with prolonged exposure. Wearing rubber gloves will protect your skin. Alternatively, use tweezers to place and remove the jewelry.
- Gentle Scrubbing (If Needed): For stubborn tarnish, you can gently scrub the jewelry with a soft-bristled brush (like an old toothbrush) after soaking. Be careful not to scratch the surface, especially with delicate gemstones.
Serving & Storage Suggestions
Since this is a cleaning solution, there’s no serving involved. However, once your jewelry is cleaned, wear it with pride!
The used cleaning solution should be discarded immediately after use. Do not attempt to store or reuse it, as its effectiveness diminishes over time. Always make a fresh batch for each cleaning session.
Nutritional Information
This recipe does not contain any calories or nutrients as it is a cleaning solution and not intended for consumption.
| Nutrient | Amount per Serving | % Daily Value |
|---|---|---|
| Calories | 0 kcal | 0% |
| Total Fat | 0g | 0% |
| Saturated Fat | 0g | 0% |
| Cholesterol | 0mg | 0% |
| Sodium | Trace | – |
| Total Carbohydrate | 0g | 0% |
| Dietary Fiber | 0g | 0% |
| Sugars | 0g | 0% |
| Protein | 0g | 0% |
Variations & Substitutions
- For Heavily Tarnished Items: If you have a piece of jewelry that is particularly tarnished, you can increase the soaking time. You can also try slightly increasing the amount of baking soda or salt in the solution.
- Different Metals: According to wire-sculpture.com, this method works well for gold-filled, brass, German (nickel) silver, and sterling silver. It can even be used to clean jewelry with freshwater pearls, shell cameos, and mother of pearl. Always test a small, inconspicuous area first to ensure compatibility.
- Dish Soap Alternative: While dish soap is generally preferred, you can experiment with other mild, pH-neutral cleansers. However, always exercise caution and research the compatibility of the cleanser with your specific jewelry type.
- Citric Acid Boost: For an extra cleaning boost, a pinch of citric acid can be added to the solution. However, be extremely careful when using citric acid, as it can be corrosive to certain metals and gemstones. Start with a very small amount and monitor the jewelry closely.
FAQs (Frequently Asked Questions)
Q: Why does this cleaning solution work so well?
A: The combination of hot water, baking soda, salt, and aluminum foil creates a chemical reaction called ion exchange. This process essentially reverses the tarnishing process by transferring the sulfur from the tarnish to the aluminum foil.
Q: Can I use this solution on all types of jewelry?
A: While this solution is generally safe for many types of jewelry, including silver, gold, and some gemstones, it’s always best to test a small, hidden area first to ensure compatibility. Avoid using it on delicate or porous stones like opals or emeralds without careful research.
Q: How often should I clean my jewelry using this method?
A: The frequency of cleaning depends on how often you wear your jewelry and how quickly it tarnishes. A general guideline is to clean your jewelry every 1-2 months, or more frequently if needed.
Q: Can I reuse the cleaning solution?
A: No, it’s not recommended to reuse the cleaning solution. The solution loses its effectiveness after a single use, and the dissolved tarnish can redeposit onto the jewelry.
Q: What if my jewelry is still tarnished after soaking?
A: If your jewelry is heavily tarnished, you can try soaking it for a longer period, gently scrubbing it with a soft brush, or making a new batch of cleaning solution with slightly increased amounts of baking soda and salt.
Final Thoughts
Give this surprisingly simple jewelry cleaner a try – you’ll be amazed at the results. There’s nothing quite like the feeling of putting on a piece of jewelry that shines as brightly as the day you bought it. It’s not just about cleaning; it’s about restoring the beauty and preserving the memories associated with each cherished piece. So, gather your tarnished treasures, whip up this simple solution, and rediscover the sparkle! Don’t hesitate to share your experiences and any variations you discover – happy cleaning!