
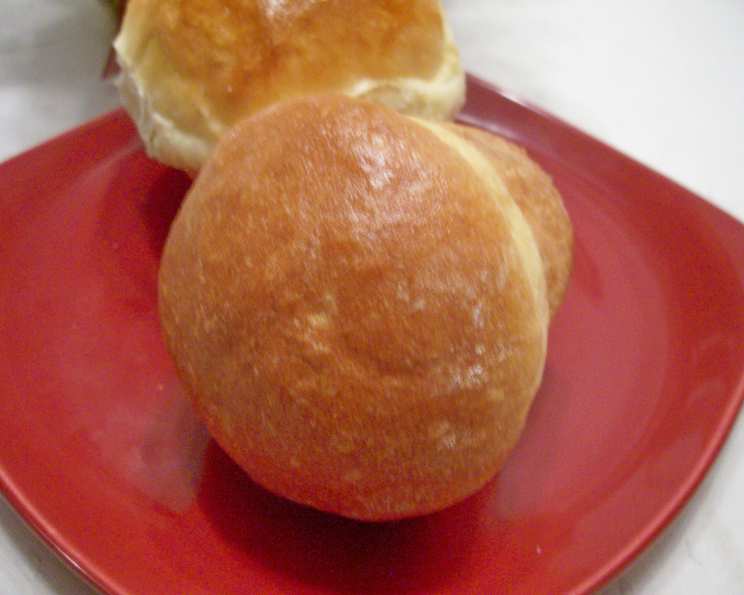
Angel’s Rich and Buttery Pan Rolls (Bread Machine)
The aroma still takes me back to Grandma Angel’s kitchen. Every holiday, her bread machine would hum quietly in the corner, churning out dough for the most incredible, pillowy rolls. We’d gather around the warm oven, mesmerized as they puffed up and turned golden brown, their buttery scent filling the entire house. Each bite was pure comfort, a perfect blend of soft interior and slightly crusty exterior—a taste of family and tradition I’ve cherished ever since.
Recipe Overview
- Prep Time: 20 minutes
- Cook Time: 10-20 minutes
- Total Time: 1 hour 30 minutes to 2 hours (includes rising)
- Servings: 12-24 rolls
- Yields: 12-24 rolls
- Dietary Type: Not specified (can be modified for dietary needs)
Ingredients
- 1 cup water
- 1 large egg
- 1 teaspoon lemon juice
- 1/4 cup butter, room temperature
- 1 teaspoon salt
- 4 tablespoons sugar
- 3 tablespoons powdered coffee creamer (or 3 tablespoons powdered milk)
- 2 tablespoons instant potato flakes
- 3 1/4 cups bread flour
- 1 tablespoon bread machine yeast
Equipment Needed
- Bread Machine
- Lightly greased muffin pan (or baking sheet for free-form rolls)
- Lightly floured surface
- Mixing bowl (optional, for egg wash)
- Pastry brush (optional, for egg wash or melted butter)
Instructions
-
Follow your bread machine manufacturer’s instructions for adding ingredients. Generally, add the ingredients to the bread machine pan in the following order: water, egg, lemon juice, butter, salt, sugar, powdered coffee creamer, instant potato flakes, bread flour, and finally, bread machine yeast.
-
Select the dough cycle on your bread machine and press start. This cycle will mix and knead the dough, and then allow it to rise.
-
Once the dough cycle is complete, carefully remove the dough from the bread machine pan onto a lightly floured surface.
-
Using a knife or dough cutter, divide the dough into 12 to 24 equal pieces, depending on the desired size of your rolls.
-
Shape each piece of dough into a smooth, round roll. You can achieve this by gently tucking the edges of the dough underneath, creating a rounded top.
-
Place the shaped rolls into a lightly greased muffin pan. Alternatively, you can place them on a lightly greased baking sheet, spacing them evenly apart. Ensure adequate greasing, even with non-stick pans!
-
Cover the muffin pan (or baking sheet) with a clean kitchen towel or plastic wrap and let the rolls rise in a warm place until they have doubled in size. This usually takes about 50 to 60 minutes.
-
While the rolls are rising, preheat your oven to 375 degrees Fahrenheit (190 degrees Celsius).
-
Once the rolls have doubled in size, they are ready to bake. Before baking, you have the option of brushing them with an egg wash (1 egg whisked with 3 tablespoons of water) for a glossy, golden finish. You can also simply brush them with melted butter after baking for extra richness.
-
If using an egg wash, you can also sprinkle the tops of the rolls with sesame seeds or poppy seeds for added texture and flavor.
-
Bake the rolls in the preheated oven for 10 to 20 minutes, depending on their size. Smaller rolls will be done closer to 10 minutes, while larger rolls will take closer to 20 minutes. Watch them carefully to prevent over-browning. The rolls are done when they are golden brown on top and sound hollow when tapped.
-
Remove the baked rolls from the oven and let them cool slightly in the muffin pan or on the baking sheet before serving. If desired, brush them with melted butter immediately after removing them from the oven.
-
Serve warm and enjoy!
Expert Tips & Tricks
- Room temperature butter is crucial for proper incorporation into the dough. Soft butter ensures a tender crumb.
- Don’t skip the lemon juice; it adds a subtle tang that enhances the flavor.
- If you don’t have powdered coffee creamer, powdered milk works just as well. Both contribute to a softer texture.
- Adjust the amount of salt to your liking, especially if you are on a salt-restricted diet. As little as 1/4 teaspoon of salt will still yield delicious results.
- For a richer flavor, try using brown butter (beurre noisette) in place of regular melted butter for brushing after baking.
Serving & Storage Suggestions
Serve these rolls warm as a side dish to accompany soups, salads, or main courses. They are also delicious on their own with a pat of butter or a drizzle of honey. Leftover rolls can be stored in an airtight container at room temperature for up to 2 days. For longer storage, refrigerate them for up to a week or freeze them for up to 2 months. To reheat, wrap the rolls in foil and bake in a preheated oven at 350 degrees Fahrenheit (175 degrees Celsius) for 5-10 minutes, or microwave them for 15-30 seconds.
Nutritional Information
Estimated nutritional information per roll (based on 18 rolls per batch):
| Nutrient | Amount per Serving | % Daily Value* |
|---|---|---|
| Calories | 193 kcal | 10% |
| Total Fat | 5.2g | 7% |
| Saturated Fat | 3.1g | 15% |
| Cholesterol | 25.7mg | 8% |
| Sodium | 238.7mg | 9% |
| Total Carbohydrate | 31.8g | 10% |
| Dietary Fiber | 1.2g | 4% |
| Sugars | 5.2g | N/A |
| Protein | 4.6g | 9% |
- Percent Daily Values are based on a 2,000 calorie diet.
Variations & Substitutions
- Vegan Rolls: Replace the egg with an equivalent amount of applesauce or a flax egg (1 tablespoon ground flaxseed mixed with 3 tablespoons of water). Substitute the butter with a vegan butter alternative. Use a plant-based milk alternative in place of the powdered coffee creamer or powdered milk.
- Whole Wheat Rolls: Substitute up to half of the bread flour with whole wheat flour for a nuttier flavor and added fiber.
- Herb Rolls: Add 1-2 tablespoons of your favorite dried herbs (such as rosemary, thyme, or oregano) to the dough for a savory twist.
- Sweet Rolls: Increase the amount of sugar to 1/2 cup and add 1 teaspoon of cinnamon to the dough for a sweeter, dessert-like roll. You can also add a simple glaze after baking.
- Garlic Rolls: Add 1-2 teaspoons of garlic powder to the dough for a savory, garlicky flavor. Brush with garlic butter after baking.
FAQs (Frequently Asked Questions):
Q: Can I make the dough ahead of time and refrigerate it?
A: Yes, you can refrigerate the dough after the bread machine cycle is complete. Punch it down to release air, wrap it tightly, and refrigerate for up to 24 hours. Allow the dough to come to room temperature before shaping and baking.
Q: My rolls are browning too quickly. What can I do?
A: If the rolls are browning too quickly, reduce the oven temperature by 25 degrees Fahrenheit (15 degrees Celsius) or tent the rolls with foil during the last few minutes of baking.
Q: Can I use active dry yeast instead of bread machine yeast?
A: Yes, but you’ll need to proof the active dry yeast first. Dissolve it in warm water with a teaspoon of sugar and let it sit for 5-10 minutes until foamy before adding it to the bread machine.
Q: What can I use if I don’t have instant potato flakes?
A: While the potato flakes contribute to the soft texture, you can omit them if necessary. You may need to add a tablespoon or two of extra flour to compensate for the lack of starch.
Q: Why are my rolls flat and dense?
A: This could be due to several factors, including using expired yeast, not letting the dough rise enough, or using too much flour. Ensure your yeast is fresh, allow the dough to double in size during the rising stage, and measure the flour accurately.
Final Thoughts
These Angel’s Rich and Buttery Pan Rolls are more than just bread; they’re a warm hug in every bite. Don’t be intimidated by the bread machine – this recipe is surprisingly easy and incredibly rewarding. Gather your ingredients, follow the steps, and prepare to be transported to a place of pure comfort and deliciousness. I hope these rolls bring as much joy to your table as they have to mine! Feel free to experiment with variations and share your creations – I can’t wait to hear what you come up with! These rolls are also fantastic paired with a hearty stew or a simple roasted chicken. Enjoy!