
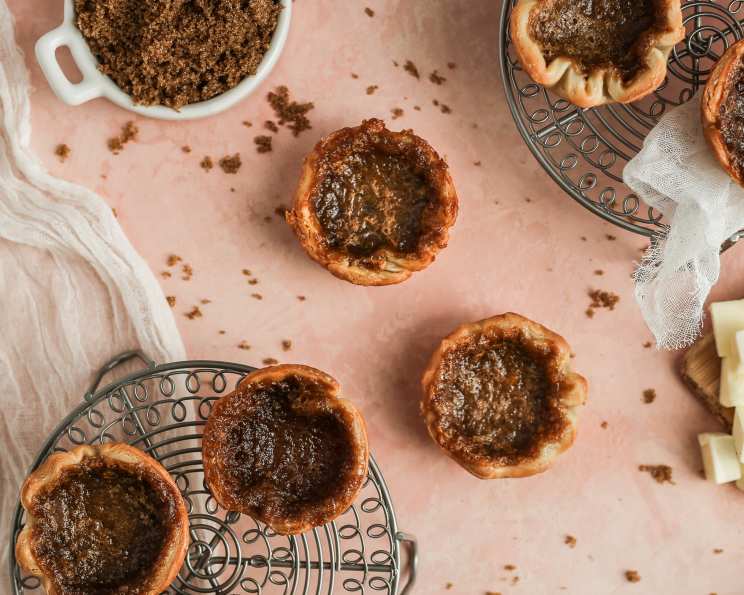
Award-Winning Butter Tarts: A Taste of Canadian Heritage
The scent of butter tarts baking always takes me back to my childhood summers spent at my grandmother’s cottage in Muskoka. The tiny kitchen, perpetually warm from the wood-burning stove, would fill with the intoxicating aroma of caramelized sugar and buttery pastry. My cousins and I would hover impatiently, vying for the first bite of those golden, gooey treasures, knowing that each tart held a little piece of Canadian sunshine. It wasn’t just a dessert; it was a symbol of family, tradition, and the sweet, simple pleasures of life.
Recipe Overview
- Prep Time: 30 minutes
- Cook Time: 15-20 minutes
- Total Time: 45-50 minutes
- Servings: 16
- Yield: 16 tarts
- Dietary Type: Vegetarian
Ingredients
For the Crust:
- Pie pastry (enough to fill 16 muffin cups, your own or from a mix)
For the Filling:
- 1/2 cup raisins
- 1/4 cup soft butter
- 1/4 cup packed brown sugar
- Pinch of salt
- 1/2 cup corn syrup
- 1 egg, lightly beaten
- 1/2 teaspoon vanilla
Optional:
- Toasted walnuts, chopped
Equipment Needed
- Muffin tins (16 count)
- Rolling pin
- Small bowl
- Large bowl
- Wooden spoon
- Measuring cups and spoons
- Cooling rack
Instructions
-
Begin by preparing your muffin pans. On a lightly floured surface, roll out the pie dough and cut out approximately 4-inch circles. The size might vary slightly depending on your muffin tin. Gently fit the dough circles into each muffin cup, ensuring the dough is snug against the bottom and sides. Once all the cups are lined, place the muffin tins in the refrigerator while you prepare the filling. This helps prevent the pastry from shrinking during baking.
-
In a small bowl, place the raisins and cover them with hot tap water. Allow the raisins to soak for 30 minutes on the counter. This plumps them up, making them juicy and preventing them from becoming hard during baking.
-
While the raisins are soaking, prepare the filling. In a large bowl, use a wooden spoon to mix together the softened butter, packed brown sugar, and salt. Cream these ingredients together until the mixture is smooth and the sugar is mostly dissolved. This step is important for creating a well-emulsified filling.
-
Next, add the corn syrup to the butter and sugar mixture, and stir well to combine. The corn syrup adds sweetness and contributes to the signature gooey texture of butter tarts.
-
Incorporate the lightly beaten egg and vanilla extract into the mixture. Mix until well combined. The egg adds richness and helps to bind the filling ingredients together, while the vanilla enhances the overall flavor profile.
-
After the raisins have soaked for 30 minutes, drain them thoroughly.
-
Remove the tart shells from the refrigerator. Divide the drained raisins equally among all the tart shells. If you are using toasted walnuts, sprinkle them in along with the raisins. This provides a delightful textural contrast and nutty flavor.
-
Divide the butter mixture evenly among all the tart shells, being careful not to overfill them.
-
Bake in a preheated oven at 400°F (200°C) for 15-20 minutes. Keep a close eye on the tarts during baking. The filling should be lightly browned and still bubbling when they are done.
-
Once baked, let the butter tarts cool in the muffin tins for 10 minutes after removing them from the oven. This allows the filling to set slightly, making them easier to remove. After 10 minutes, carefully remove the tarts from the tins and place them on a wire rack to cool completely.
Expert Tips & Tricks
- Softening the butter is crucial. Don’t melt it! It should be soft enough to easily cream with the sugar.
- If you prefer a firmer filling, bake the tarts for the full 20 minutes, or even an extra minute or two. However, be careful not to overbake them, as they can become dry.
- For an extra touch of flavor, try browning the butter before adding it to the filling. This adds a nutty, caramel-like note that enhances the overall taste.
- Make the dough ahead of time. The dough can be made a day in advance and stored in the refrigerator, well-wrapped in plastic wrap.
- If the tart shells start to brown too quickly, tent them loosely with foil during the last few minutes of baking.
Serving & Storage Suggestions
These butter tarts are best enjoyed at room temperature, allowing the filling to be perfectly gooey. Serve them as a dessert after a meal, with a cup of coffee or tea, or as a sweet treat any time of day. They’re also perfect for bake sales, potlucks, or holiday gatherings.
To store, place cooled butter tarts in an airtight container. They will keep at room temperature for 2-3 days, in the refrigerator for up to a week, or in the freezer for up to 2 months. To reheat frozen tarts, thaw them at room temperature and then warm them in a preheated oven at 350°F (175°C) for a few minutes, or microwave them briefly.
Nutritional Information
| Nutrient | Amount per Serving | % Daily Value |
|---|---|---|
| Calories | 84 kcal | – |
| Calories from Fat | 28 kcal | – |
| Total Fat | 3.2g | 4% |
| Saturated Fat | 1.9g | 9% |
| Cholesterol | 19.2mg | 6% |
| Sodium | 41.1mg | 1% |
| Total Carbohydrate | 14.4g | 4% |
| Dietary Fiber | 0.2g | 0% |
| Sugars | 8.6g | – |
| Protein | 0.6g | 1% |
Nutritional information is an estimate and may vary based on specific ingredients and preparation methods.
Variations & Substitutions
- Pecan Butter Tarts: Substitute chopped pecans for the raisins or use a combination of both.
- Maple Butter Tarts: Replace the corn syrup with an equal amount of maple syrup for a distinctly Canadian flavor.
- Gluten-Free Butter Tarts: Use a gluten-free pie crust recipe.
- Chocolate Chip Butter Tarts: Add a handful of mini chocolate chips to the filling.
- Different Dried Fruits: Experiment with dried cranberries, cherries, or apricots in place of the raisins.
FAQs (Frequently Asked Questions)
Q: Why are my butter tarts runny?
A: A runny filling is often due to underbaking. If you prefer a firmer filling, bake the tarts for a longer time. Also, ensure your oven temperature is accurate.
Q: Can I use a store-bought pie crust?
A: Yes, you can definitely use a store-bought pie crust to save time. Just make sure to choose a good quality one.
Q: How do I prevent the crust from shrinking?
A: Blind baking the crust for a few minutes before adding the filling can help prevent shrinking. Also, chilling the dough before baking helps.
Q: Can I make these ahead of time?
A: Yes, you can bake the tarts a day or two in advance and store them in an airtight container at room temperature or in the refrigerator.
Q: What’s the best way to reheat these tarts?
A: You can reheat them in a preheated oven at 350°F (175°C) for a few minutes, or microwave them briefly.
Final Thoughts
Now it’s your turn to create your own batch of these award-winning butter tarts and experience a true taste of Canadian heritage. Don’t be afraid to experiment with different variations and make them your own. Share your creations with friends and family, and enjoy the smiles they bring. Whether you prefer them runny or firm, with raisins or pecans, these butter tarts are sure to become a cherished tradition in your own kitchen. So, gather your ingredients, preheat your oven, and get ready to bake a little piece of Canadian magic!