
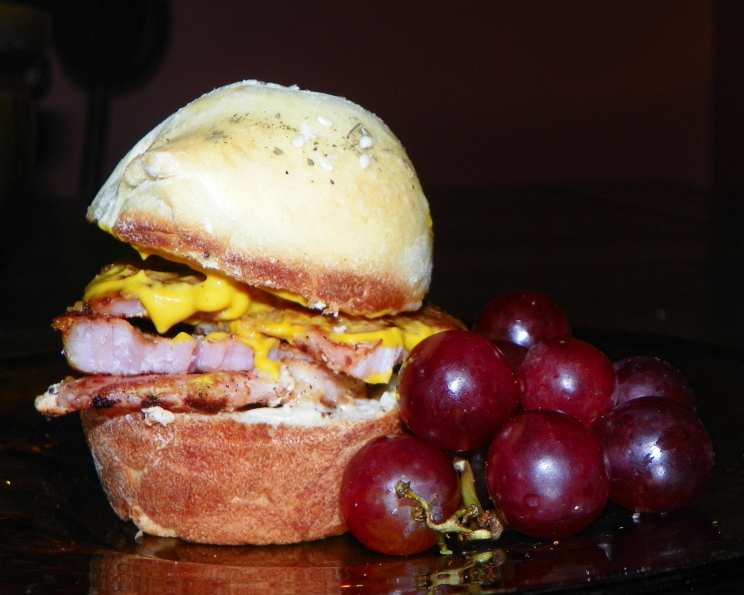
Best Homemade Dinner Rolls
The aroma of freshly baked bread has always been a potent memory trigger for me. Growing up, Sunday dinners at my grandmother’s house were incomplete without a basket overflowing with her golden, pillowy dinner rolls. They were the kind of rolls that melted in your mouth, the slight sweetness balanced perfectly with a touch of salt. I can still picture her, flour dusting her apron, carefully shaping each roll with love. This recipe aims to capture that same comforting magic, those unforgettable flavors that bring people together around a table.
Recipe Overview
- Prep Time: 1 hour 30 minutes
- Cook Time: 10-15 minutes
- Total Time: 2 hours 10 minutes
- Yields: 12-24 rolls
- Serves: 12-26
- Dietary Type: Vegetarian
Ingredients
- 4 ½ – 5 cups bread flour
- ¼ cup sugar
- 1 (¼ ounce) package active dry yeast
- 1 ¼ teaspoons salt
- 1 cup milk
- ½ cup water
- 2 tablespoons butter
- 2 eggs
- 1 egg white
THREE DIFFERENT TOPPINGS
Parmesan-Garlic Topping
- 2 tablespoons grated parmesan cheese
- ½ teaspoon instant minced garlic
Almond Herb Topping
- 2 tablespoons finely chopped almonds
- ½ teaspoon salt
- ½ teaspoon dried basil
- ½ teaspoon thyme
- ½ teaspoon dried oregano
Everything Topping
- 1 teaspoon poppy seed
- 1 teaspoon salt
- 1 teaspoon dried garlic
- 1 teaspoon sesame seeds
- 1 teaspoon dried onion
Equipment Needed
- Large bowl
- Small saucepan
- Candy thermometer
- Electric mixer
- Plastic wrap
- Greased bowl
- Lightweight towel
- 13-inch x 9-inch baking pans or muffin tin
- Wire racks
Instructions
-
In a large bowl, combine 2 cups of the bread flour, ¼ cup of sugar, the yeast, and 1 ¼ teaspoons of salt. Make sure the salt doesn’t directly touch the yeast, as it can inhibit its activity.
-
In a small saucepan, using a candy thermometer, heat the milk, water, and butter to between 120-130 degrees Fahrenheit. This temperature range is crucial; too hot, and you risk killing the yeast; too cold, and it won’t activate properly.
-
Add the warmed milk mixture to the dry ingredients. With an electric mixer, beat on medium speed for 3 minutes.
-
Add the 2 eggs and beat on high speed for an additional 2 minutes, incorporating them fully into the batter.
-
Gradually stir in the remaining flour until a soft dough forms. The dough will be sticky; don’t be tempted to add too much flour, as this can result in dry, dense rolls.
-
On a lightly floured surface, knead the dough until it is smooth and elastic. This usually takes about 5-7 minutes. Kneading develops the gluten, which is essential for creating a light and airy texture. A stand mixer with a dough hook can also be used for this step.
-
Place the kneaded dough in a greased bowl, turning once to grease the top. This prevents the dough from drying out as it rises.
-
Cover the bowl with plastic wrap and let rise in a warm place until doubled in size, approximately 1 hour. A warm environment encourages the yeast to do its work. To create a consistently warm spot, you can preheat your oven to 200 degrees Fahrenheit for 1 minute, then turn it off and place the dough inside to rise. Don’t forget to turn the oven OFF!
-
Once doubled, punch down the dough in the bowl to release the trapped air.
-
Turn the dough onto a lightly floured surface and divide it into 24 equal portions. Shape each portion into a ball.
-
Divide the dough balls between two greased 13-inch x 9-inch baking pans. Alternatively, place two shaped balls next to each other into each greased muffin cup of a muffin tin to make 12 larger rolls.
-
Cover the pans with a clean, lightweight towel and let rise until doubled in size again, about 30 minutes. This second rise is crucial for achieving the ultimate light and fluffy texture.
-
Preheat your oven to 375 degrees Fahrenheit.
-
Brush the risen rolls with a lightly beaten egg white. This will give them a beautiful golden-brown sheen.
-
Sprinkle the rolls with the topping(s) of your choice. Get creative! A combination of all three toppings is a delicious way to add variety.
-
Bake at 375 degrees Fahrenheit for 10-15 minutes, or until golden brown. Keep a close eye on them to prevent burning, especially if using the Parmesan-Garlic topping, which can brown quickly.
-
Remove the rolls from the pans and transfer them to wire racks to cool slightly before serving.
Expert Tips & Tricks
- For extra soft rolls: Add a tablespoon of potato flakes to the dry ingredients. Potato flakes help retain moisture, resulting in an incredibly tender crumb.
- Make-ahead option: The dough can be made a day in advance and stored in the refrigerator after the first rise. Punch it down before refrigerating, and then let it come to room temperature for about 30 minutes before shaping and baking.
- Even baking: Rotate the baking pans halfway through the baking time to ensure even browning.
- To avoid dry rolls: Cover the rolls loosely with foil during the last few minutes of baking if they are browning too quickly.
- Flavor Boost: Try adding a teaspoon of vanilla extract to the dough for a subtle sweetness.
- Shiny Crust: Brush melted butter over the rolls immediately after baking for an extra-shiny crust.
Serving & Storage Suggestions
Serve these homemade dinner rolls warm, ideally within a few hours of baking. They are the perfect accompaniment to soups, stews, roasts, or simply enjoyed with a pat of butter.
Storage:
- Room Temperature: Store cooled rolls in an airtight container at room temperature for up to 2 days.
- Refrigerator: For longer storage, keep them in an airtight container in the refrigerator for up to 5 days.
- Freezer: For freezing, wrap the cooled rolls individually in plastic wrap, then place them in a freezer-safe bag or container. They can be frozen for up to 2 months.
Reheating:
- Oven: To reheat, wrap the rolls in foil and warm them in a preheated oven at 350 degrees Fahrenheit for 5-10 minutes.
- Microwave: For a quick reheat, microwave individual rolls for 15-20 seconds. Be careful not to overheat them, as they can become tough.
Nutritional Information
Please note that these values are estimates and may vary based on specific ingredients and portion sizes.
| Nutrient | Amount per Serving | % Daily Value |
|---|---|---|
| Calories | 236 kcal | N/A |
| Total Fat | 3.9 g | 5% |
| Saturated Fat | 1.4 g | 7% |
| Cholesterol | 36.3 mg | 12% |
| Sodium | 584.1 mg | 24% |
| Total Carbohydrate | 41.9 g | 13% |
| Dietary Fiber | 1.7 g | 6% |
| Sugars | 4.5 g | N/A |
| Protein | 7.8 g | 15% |
Variations & Substitutions
- Whole Wheat Rolls: Substitute up to half of the bread flour with whole wheat flour for a nuttier flavor and added fiber.
- Dairy-Free: Use a non-dairy milk alternative like almond or soy milk and a vegan butter substitute.
- Sweet Rolls: Increase the sugar to ½ cup and add a cinnamon swirl filling for a sweet treat.
- Gluten-Free: While achieving the exact same texture with gluten-free flour can be challenging, experiment with a high-quality gluten-free bread flour blend. You may need to add a binder like xanthan gum.
- Herb Infused: Add fresh herbs like rosemary or thyme to the dough for a fragrant variation.
FAQs (Frequently Asked Questions)
Q: Why is my dough not rising?
A: Several factors can affect the dough rising, including the yeast being expired, the liquid being too hot or too cold, or the room temperature being too cold. Make sure your yeast is fresh, your liquid is between 120-130°F, and the environment is warm.
Q: Can I use instant yeast instead of active dry yeast?
A: Yes, you can! Simply add the instant yeast directly to the dry ingredients. There’s no need to proof it in water first.
Q: How do I prevent the rolls from drying out?
A: Avoid overbaking the rolls, and brush them with melted butter immediately after they come out of the oven. Storing them in an airtight container is also crucial.
Q: Can I freeze the unbaked dough?
A: Yes, you can! After shaping the rolls, place them on a baking sheet and freeze until solid. Then, transfer them to a freezer-safe bag. When ready to bake, let them thaw overnight in the refrigerator and then let them rise before baking.
Q: What if I don’t have bread flour?
A: Bread flour has a higher protein content than all-purpose flour, which contributes to a chewier texture. You can still use all-purpose flour, but your rolls might be slightly less chewy.
Final Thoughts
These homemade dinner rolls are more than just bread; they are a symbol of comfort, connection, and shared moments. I encourage you to try this recipe and experience the joy of baking these rolls for yourself. Don’t be afraid to experiment with the toppings and make them your own. Share your creations with loved ones, and let the warmth of these rolls fill your home with happiness. Whether it’s a holiday gathering or a simple weeknight dinner, these rolls are sure to be a crowd-pleaser. Happy baking!