
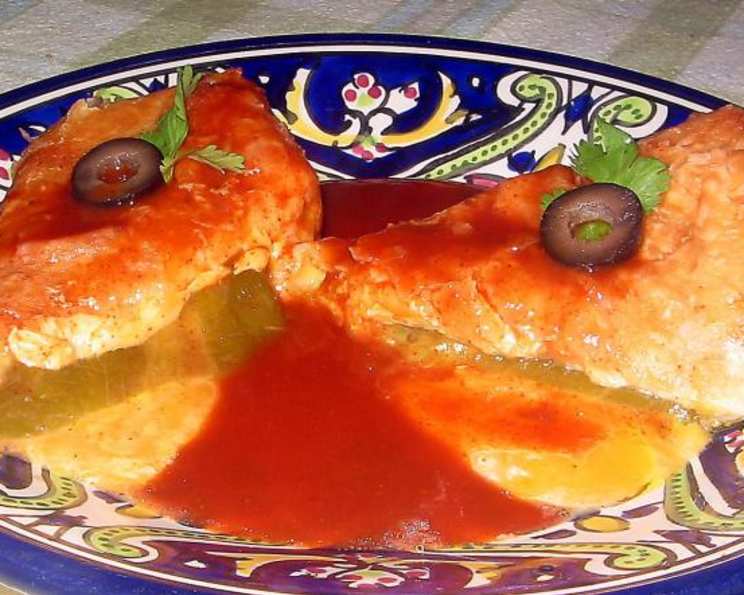
Ole! Chile Relleno Wraps: A Fiesta in Every Bite
The sizzle of oil, the aroma of melting cheese, and that satisfying crunch – these are the sense memories instantly evoked when I think of Chile Relleno Wraps. My first experience with these delightful creations wasn’t in a fancy restaurant, but at a bustling street food fair in San Diego. The air buzzed with music, laughter, and the tantalizing smells of countless culinary delights. But it was the Chile Relleno Wrap, its golden tortilla glistening under the California sun, that truly stole my heart (and my appetite!). One bite, and I was hooked. The combination of the savory pepper, the creamy cheese, and the crispy tortilla was simply irresistible. I knew I had to recreate this magic in my own kitchen.
Recipe Overview
- Prep Time: 15 minutes
- Cook Time: 25 minutes
- Total Time: 40 minutes
- Servings: 1
- Yield: 1 wrap
- Dietary Type: Vegetarian
Ingredients
- 1 flour tortilla (Mission brand 8-inch)
- 1 green pepper (or 1 canned whole roasted Ortega chile) or 1 red pepper, fire-roasted and peeled (or 1 canned whole roasted Ortega chile)
- 1 cup monterey jack pepper cheese or 1 cup mild cheddar cheese
- Vegetable oil (for frying, peanut oil is especially good)
- Margarine or cooking spray, for baking
- Enchilada sauce or taco sauce, for serving
Equipment Needed
- Skillet
- Microwave
- Plate
- Plastic wrap
- Paper towels
- Baking sheet (optional, for baking)
Instructions
-
Begin by grating the cheese. You’ll need approximately 1 cup for each Chile Relleno Wrap. Set aside.
-
Pour between 1/4 and 1/2 inch of vegetable oil into a skillet. Place the skillet over low heat and begin heating the oil slowly. If using peanut oil, be mindful of allergies when serving.
-
Place a stack of tortillas on a plate, cover with plastic wrap, and microwave for up to 30 seconds. This will make them more pliable and easier to roll.
-
If using whole roasted chiles, microwave them before using so they are warm, but not hot to the touch. This helps ensure even heating when the wrap is cooked.
-
Remove one tortilla at a time to assemble. Evenly pile approximately 1/3 of the grated cheese lengthwise along the center of the tortilla.
-
Stuff the pepper (or chile) with 1/3 of the cheese, then place it over the cheese already on the tortilla. If using a large pepper, you may need to cut it in half lengthwise for easier rolling.
-
Cover the pepper with the remaining cheese and roll carefully and tightly, burrito-style. Tuck in the sides as you roll to keep the filling secure.
-
Raise the heat to medium and begin frying when the oil temperature is reached. Each wrap should be browned slowly so the filling is thoroughly heated, melting the cheese without scorching the tortilla. Depending on the size of your skillet, you can fry up to 4 wraps at a time.
-
Turn each wrap to brown evenly, achieving a nice golden-brown color on all sides. This typically takes a few minutes per side.
-
Drain the cooked wraps on paper towels when done and allow them to cool slightly before serving.
-
TO BAKE (Optional): If you prefer baking, brush each wrap with oil or melted margarine or butter, or spray with non-stick cooking spray. Bake at 400 degrees Fahrenheit for 25 minutes, or until golden brown.
-
SERVE with warmed enchilada sauce or taco sauce. And don’t forget to snap your fingers and shout, “OLE!”
Expert Tips & Tricks
- Cheese Distribution: Ensure even cheese distribution inside and outside the pepper for optimal flavor in every bite.
- Tortilla Integrity: Warm tortillas are less prone to cracking during rolling. If your tortillas are still stiff, microwave them for a few more seconds.
- Frying Temperature: Monitoring oil temperature is crucial. Too hot, and the tortilla will burn before the cheese melts. Too low, and the wrap will absorb too much oil.
- Make-Ahead Prep: You can assemble the wraps ahead of time and store them in the refrigerator for a few hours before frying or baking. This is great for entertaining.
- Peeling Roasted Peppers: After fire-roasting peppers, place them in a sealed bag or container for 10 minutes. This allows the steam to loosen the skin, making it easier to peel.
Serving & Storage Suggestions
Serve your Ole! Chile Relleno Wraps immediately while they are hot and crispy. A side of warmed enchilada sauce or taco sauce is a classic pairing. Consider adding a dollop of sour cream or guacamole for extra flavor.
Leftover wraps can be stored in an airtight container in the refrigerator for up to 3 days. To reheat, bake in a preheated oven at 350 degrees Fahrenheit until warmed through and crispy, or microwave in 30-second intervals until heated. Microwaving will result in a softer tortilla. Freezing is not recommended as it can affect the texture of the tortilla.
Nutritional Information
| Nutrient | Amount per Serving | % Daily Value |
|---|---|---|
| Calories | 539 kcal | N/A |
| Total Fat | 37g | 56% |
| Saturated Fat | 22g | 110% |
| Cholesterol | 101mg | 33% |
| Sodium | 800mg | 33% |
| Total Carbohydrate | 22g | 7% |
| Dietary Fiber | 3g | 11% |
| Sugars | 4g | N/A |
| Protein | 31g | 62% |
Note: Nutritional information is an estimate and can vary based on specific ingredients and portion sizes.
Variations & Substitutions
- Spicy Kick: Add a pinch of cayenne pepper to the cheese filling for a spicier wrap.
- Vegetarian Option: Use a vegetarian cheese alternative to suit dietary needs.
- Gluten-Free: Use gluten-free tortillas for a gluten-free version.
- Different Cheeses: Experiment with different cheese blends, such as a Mexican blend or Oaxaca cheese.
- Protein Boost: Add cooked shredded chicken, ground beef, or black beans to the filling for a more substantial meal.
- Vegan Variation: While the cheese is central to the flavor profile, consider using a good quality vegan cheese alternative.
FAQs (Frequently Asked Questions)
Q: Can I use pre-shredded cheese?
A: Yes, pre-shredded cheese is perfectly acceptable. However, freshly grated cheese tends to melt more smoothly and evenly.
Q: Can I use a different type of pepper?
A: Absolutely! Poblano peppers, Anaheim peppers, or even jalapeños can be used depending on your spice preference.
Q: How do I prevent the cheese from leaking out while frying?
A: Ensure the wrap is tightly rolled and sealed. Also, avoid overcrowding the skillet, as this can lower the oil temperature and cause the cheese to melt out faster.
Q: What if I don’t have enchilada or taco sauce?
A: You can use salsa, hot sauce, or even a simple tomato sauce as a substitute.
Q: Can I air fry these instead of frying or baking?
A: Yes, you can air fry them! Preheat your air fryer to 375 degrees Fahrenheit and cook for about 10-12 minutes, flipping halfway through, until golden brown and crispy.
Final Thoughts
Ole! Chile Relleno Wraps are more than just a meal; they’re an experience. The vibrant flavors and textures come together in a symphony of deliciousness that’s sure to impress. Whether you’re a seasoned chef or a kitchen novice, this recipe is easy to follow and yields consistently satisfying results. So, gather your ingredients, put on some festive music, and get ready to create a fiesta in your kitchen. Don’t be afraid to experiment with different variations and make this recipe your own. And most importantly, don’t forget to share your culinary creations with friends and family! I’d love to hear about your experience and any creative twists you’ve added. ¡Buen provecho!