
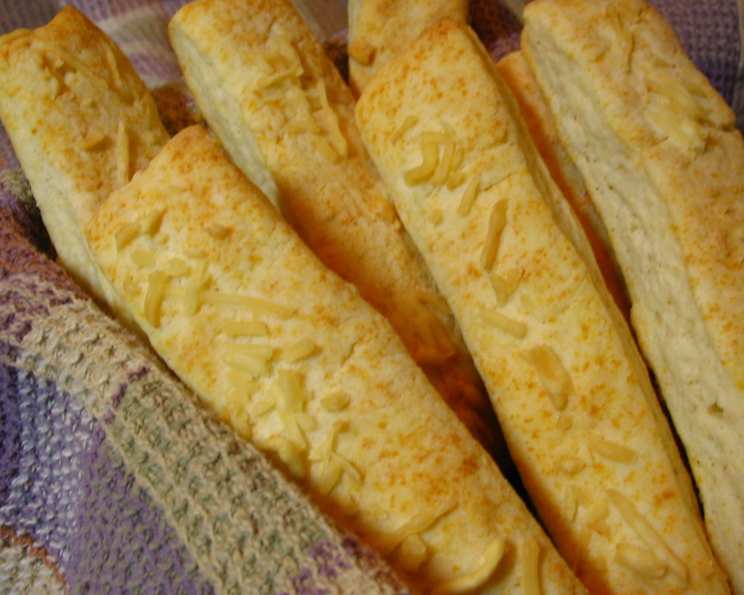
Biscuit Sticks – 3 Ingredients!
I remember one particularly hectic Thanksgiving when I was just starting out in the kitchen. The turkey was refusing to brown, the gravy was lumpy, and my aunt kept asking when dinner would be ready. In a moment of utter panic, I remembered my grandmother’s secret weapon: a simple, three-ingredient biscuit stick recipe. They were quick, easy, and always a crowd-pleaser, a comforting, buttery antidote to any kitchen calamity. The simplicity of those sticks, and the joy they brought amidst the chaos, has made them a cherished tradition ever since.
Recipe Overview
- Prep Time: 5 minutes
- Cook Time: 12-15 minutes
- Total Time: 17-20 minutes
- Servings: 12
- Yield: 24 biscuit sticks
- Dietary Type: Vegetarian (easily adaptable to vegan with substitutions, see Variations)
Ingredients
- 1/3 cup butter or 1/3 cup margarine
- 2 cups Bisquick baking mix
- 1/2 cup cold water
Equipment Needed
- 13×9-inch baking pan
- Medium bowl
- Surface for kneading
- Oven
Instructions
-
Preheat your oven to 425 degrees Fahrenheit (220 degrees Celsius). This high heat is crucial for achieving that golden-brown color and flaky texture we’re after.
-
Place the butter (or margarine) in the 13×9-inch pan. Put the pan into the preheated oven to melt the butter. This is a clever trick that evenly coats the bottom of the pan and infuses the sticks with buttery goodness from the start. Keep a close eye on it; you don’t want the butter to burn.
-
While the butter is melting, prepare the dough. In a medium bowl, combine the Bisquick baking mix and the cold water. Stir until a soft dough forms. Be careful not to overmix; a few streaks of flour are perfectly fine. Overmixing will develop the gluten too much and result in tough biscuit sticks.
-
Generously dust a clean work surface with Bisquick mix. This is important to prevent the dough from sticking.
-
Place the dough on the dusted surface. Gently roll it in the Bisquick mix to coat. This helps create a slightly crisp exterior.
-
Shape the dough into a ball and knead it 5 times. Just a few turns are all it takes to bring the dough together.
-
Roll the dough into a 10×6-inch rectangle. Aim for an even thickness throughout.
-
Cut the rectangle in half lengthwise. This will give you two long strips.
-
Cut each half crosswise into 12 sticks, each approximately 3/4 inch wide.
-
Carefully remove the pan with the melted butter from the oven. Roll each stick in the melted butter in the pan, ensuring they are well coated. This is where the magic happens!
-
Bake for 12 to 15 minutes, or until the biscuit sticks are golden brown and cooked through. The baking time may vary depending on your oven, so keep a close eye on them. A toothpick inserted into the center of a stick should come out clean.
-
Serve hot. These biscuit sticks are best enjoyed fresh out of the oven.
Expert Tips & Tricks
- For an extra buttery flavor, consider using clarified butter (ghee) in place of regular butter. Clarified butter has a higher smoke point and won’t burn as easily in the oven.
- Don’t have Bisquick? You can make your own homemade version with flour, baking powder, salt, and shortening. There are many recipes available online.
- If the dough is too sticky, add a little more Bisquick mix, one tablespoon at a time, until it becomes easier to handle.
- For a richer flavor, brush the baked biscuit sticks with melted butter and sprinkle with a pinch of sea salt immediately after removing them from the oven.
- To avoid overly browned bottoms, you can place a baking sheet underneath the pan during baking.
Serving & Storage Suggestions
These biscuit sticks are fantastic served warm with soup, chili, or alongside a main course like roasted chicken or pasta. They’re also delicious on their own as a snack.
- Room Temperature: Store leftover biscuit sticks in an airtight container at room temperature for up to 2 days.
- Refrigerator: For longer storage, keep them in an airtight container in the refrigerator for up to 5 days.
- Freezer: To freeze, let the biscuit sticks cool completely, then wrap them individually in plastic wrap and place them in a freezer bag. They can be stored in the freezer for up to 2 months.
To reheat, simply bake in a preheated oven at 350 degrees Fahrenheit (175 degrees Celsius) for 5-10 minutes, or until warmed through. You can also microwave them for a few seconds, but they may become a little softer.
Nutritional Information
Note: Nutritional information is an estimate and can vary based on specific ingredients and portion sizes.
| Nutrient | Amount per Serving | % Daily Value |
|---|---|---|
| Calories | 131 kcal | 7% |
| Total Fat | 8g | 10% |
| Saturated Fat | 4g | 20% |
| Cholesterol | 14mg | 5% |
| Sodium | 292mg | 13% |
| Total Carbohydrate | 13g | 5% |
| Dietary Fiber | 0g | 0% |
| Sugars | 2g | 4% |
| Protein | 2g | 4% |
Variations & Substitutions
- Garlic Parmesan: Sprinkle the biscuit sticks with grated Parmesan cheese and garlic powder before baking for a savory twist.
- Herb & Cheese: Add chopped fresh herbs like rosemary, thyme, or chives to the dough along with a sprinkle of shredded cheddar cheese.
- Cinnamon Sugar: For a sweet treat, brush the baked biscuit sticks with melted butter and sprinkle with cinnamon sugar.
- Vegan Option: Use a vegan butter substitute or margarine and ensure your Bisquick is vegan-friendly (some contain milk powder).
- Gluten-Free: Use a gluten-free baking mix designed for biscuits instead of Bisquick. You may need to adjust the amount of water depending on the specific mix.
FAQs (Frequently Asked Questions)
Q: Can I use self-rising flour instead of Bisquick?
A: While self-rising flour contains baking powder and salt like Bisquick, it may not yield the exact same results due to differences in formulation. You might need to adjust the amount of water.
Q: My dough is too sticky. What should I do?
A: Gradually add more Bisquick mix, one tablespoon at a time, until the dough is easier to handle. Be careful not to add too much, as this can make the biscuit sticks dry.
Q: Can I make the dough ahead of time?
A: Yes, you can prepare the dough ahead of time, wrap it tightly in plastic wrap, and store it in the refrigerator for up to 24 hours. Let it sit at room temperature for about 15 minutes before rolling it out.
Q: What can I serve these biscuit sticks with?
A: These biscuit sticks are incredibly versatile and pair well with soups, stews, chili, salads, and roasted meats. They’re also delicious as a simple snack with butter or jam.
Q: How do I prevent the bottom of the biscuit sticks from burning?
A: Placing a baking sheet underneath the pan during baking will help to insulate the bottom and prevent burning. Also, make sure your oven temperature is accurate.
Final Thoughts
This three-ingredient biscuit stick recipe is a testament to the fact that delicious food doesn’t have to be complicated. It’s a perfect recipe for busy weeknights, impromptu gatherings, or whenever you’re craving a simple, comforting treat. Don’t hesitate to experiment with different flavor combinations to make it your own. I encourage you to try this recipe and share your results and variations! Perhaps pair it with a hearty tomato soup for a complete and satisfying meal. Happy baking!